As I experimented with bread-making last year (in 2010), I tried to make Rustic Sourdough Bread from the King Arthur Flour website - twice. I knew back then that I didn't really know what I was doing, and I've definitely made bread-baking progress since then. This blog post summarizes those attempts, as well as this one.
What went wrong with my first two tries? A few things went wrong with my first batch. My kitchen was too warm; I didn't add enough flour to my bread; and I let the dough rise way too long. There was nothing in particular wrong with the second batch, except that it was the palest bread I've ever made. I think I sprayed too much water on it before I baked it.
Attempt #1 - August 6, 2010
(Note: this was recipe #180 of my 365 recipe challenge.)
I wanted to make bread because I wanted to make what’s become my replacement for BLTs – bacon, cucumber, and tomato sandwiches. Trust me, these are very refreshing – cucumber’s a nice substitute for lettuce, particularly when you seem to have a new cucumber to eat every other day. I thought that a fresh sourdough bread would be a good base for this sandwich.
I liked the recipe for Sourdough Hamburger Buns that I’d gotten from the King Arthur Flour website, so I decided to make their Rustic Sourdough Bread as well.
Believe it or not, I learned from my previous experience making sourdough bread. I decided that I would make this bread the day before I wanted to eat it. I actually made this the same night that I made the Ice Cream Sandwich cookies. I started the dough and went shopping, which took longer than I expected. After about 2.5 hours, I tried to divide the dough, and it became a puddly mess. I let those puddly messes rise an hour, and then baked them for 25 or 30 minutes, until it seemed like they should be done.
I don’t have pictures here to show you. This was easily the ugliest bread I’ve made. It didn’t really brown, although it did seem to have a hard crust. It was very, very flat, much more like a flatbread. You know those panini sandwiches you get from Panera? It was flat like that. In fact, I decided to quarter a loaf and split each piece down the center, so that rather than slices, we had our BCTs on a quarter loaf of bread.
The flavor of this was good. Not too strong, but definitely tasted like sourdough. I will try this again, not just so that I can fix where it went wrong (over-rising), but because it tastes good.
Attempt #2 - September 11, 2010
With the temperatures finally more seasonable, I decided I could finally try sourdough bread baking again. I really felt like I should give the Rustic Sourdough Bread another try.
This began very differently from my first attempt. The dough that I produced from the first time was extremely wet, and I'm still not really sure why, unless my starter had more water content in it then. [Edit: I assume, after baking bread for years, that I measured my ingredients with scoops, instead of weighing them, leading to too much liquid in the dough.] My dough this time was much more dough-like - not sticky, pliable, maintained a shape.
I also made sure that I'd have time to make my bread this time. I had an evening at home. Baking the bread would likely keep me up a little late, since I was starting it at 7:15, but I didn't mind that too much. I wanted to have it to go with my perfectly ripe tomatoes on a sandwich the next day.
I followed the instructions closely. I may have sprayed too much water on my bread too much this time. My bread didn't brown up like I thought it should, and I thought it would rise a little more than it would. The end product did not look as appealing as the bread looks in the instructions from the King Arthur Flour website.
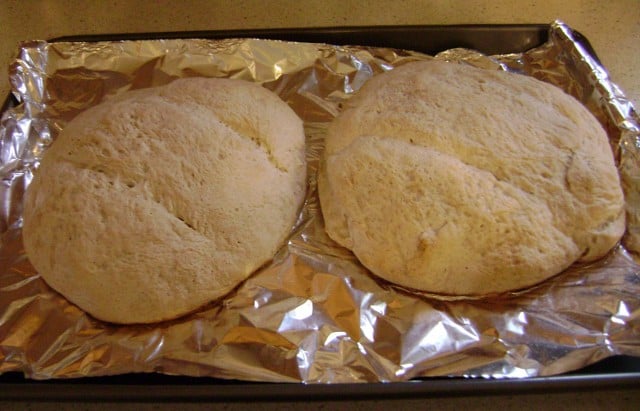
This wasn't nearly as flat at my original bread was. We sliced it to have with sandwiches. This was still relatively dense, and it had a fine, sandwich bread texture. I personally would have preferred it to be less fine, and have a texture more like how it looks in the picture on the website. I suppose I'm still trying to figure out what texture I would like my bread to have, and how to best make that texture happen. However, the taste was fine, and I did enjoy this bread.
Attempt #3 - February 10, 2011
I should note that this time, I decided to weigh all the ingredients. I have a digital scale that measures in ounces. I halved the recipe so I'd only make one loaf, so I used 4 ounces of sourdough starter; 6 ounces (¾ cup) water; 1 teaspoon yeast; ¼ ounce sugar (which I also weighed); 1 ¼ teaspoon salt; and 10 ounces of flour, a little under the amount called for. I added a little more flour to the bread as I kneaded and shaped it.
For this third attempt, I know how to shape bread. I have a better sense of how bread dough should feel, and how sticky or tacky it should be. I was home for the evening, so I wouldn't mess up on the timing of the bread. I decided not to try to proof my bread in the oven, which might make it rise too much. If the bread wasn't ready to bake at night, I would just refrigerate it and bake it in morning.
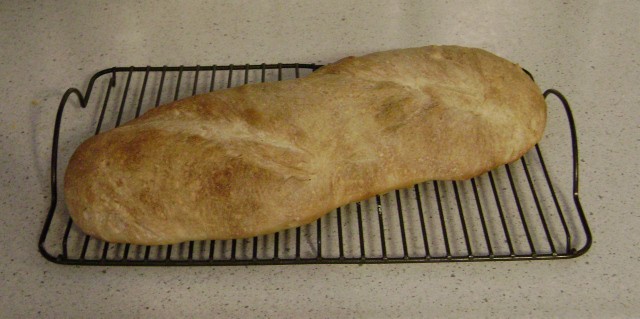
The dough was easy to make. I mixed the dough together with a spoon. The ingredients weren't really well-combined until I started to knead it by hand. I didn't knead it very long - just a couple of minutes until the dough was smooth. I did windowpane it, and the dough was fairly see-through at that point. I preheated the oven briefly, but rather than put the dough in the warmed oven to rise, I just set it on top of the warmed stove.
After an hour and a half, I turned the dough out onto parchment paper on a baking sheet and gently shaped it into a loaf. I actually did it more like how I would make a baguette than an oval like the instructions said to. I patted it out (gently), made a crease down it lengthwise, and folded the dough over that crease like a letter. I sealed the seam into the dough and turned the dough over so that it was seam side-down. I again preheated the oven briefly to warm up the stovetop and set the baking sheet with the dough on the stove to rise again.
After about an hour, I went to bake the bread. I preheated the oven and peeled the plastic wrap off of the dough. I sprayed the loaf with water and made 2 gashes in the dough. I baked the bread on the baking sheet at 425F for about 25 minutes. At that time, it looked done.
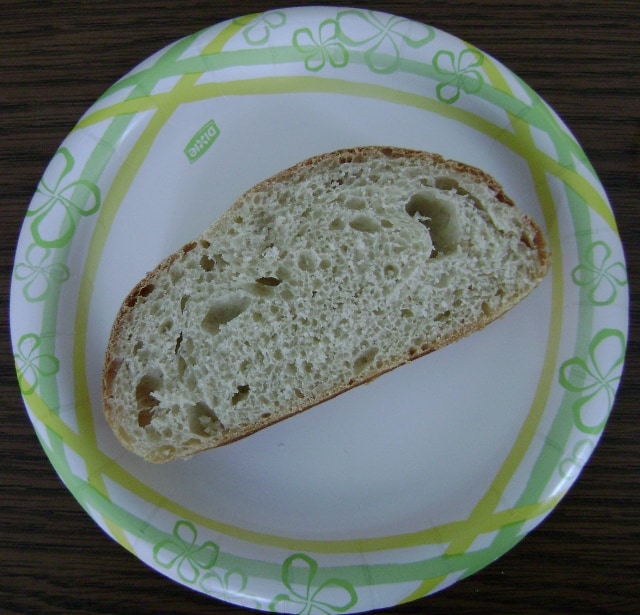
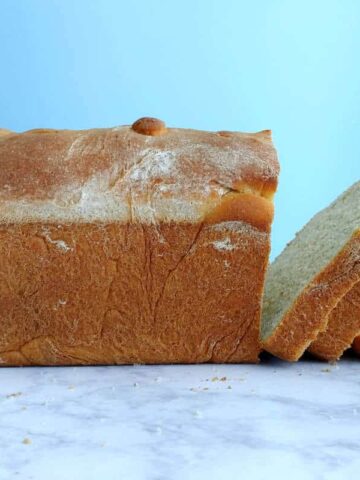
I was really happy with how this bread turned out. I think I sprayed a little too much water on it, which is why it didn't develop the dark brown color that I wanted; the bottom of the loaf was a beautiful reddish brown, though. The outside wasn't as crusty as I would have liked, but it still was chewy and delicious. The inside had a great chewy crumb, and the crust tore apart from the inside relatively easily. The bread had a nice flavor from the sourdough, but wasn't overly sour since it had the shorter fermentation times of a yeasted bread. I ate it with soup and on its own, and it was still really good a day later. It didn't dry out or get stale, and I didn't have it wrapped the entire time.
Definitely make this bread if you like using sourdough starter, but don't really want something that's too strongly flavored. Based on my results this time, I also recommend trying this bread if you're still trying to get the hang of baking with your sourdough. Sure, it took me 3 tries to really like this bread (although the second batch I made turned out okay). This recipe is fast enough that even if you don't get as satisfactory a result as you'd like, you haven't spent too much time on it. In addition, I think you get better results with this recipe if you weigh the ingredients rather than measure them. If you do measure them, go easy on the flour at first, since it's easy to add flour but impossible to remove it once it's in the dough.


Leave a Reply