Peter Reinhart's Italian Bread
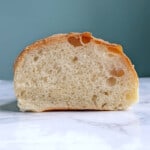
This homemade Italian bread has a soft, tender crumb and a lightly chewy crust. The overnight dough adds depth of flavor, but you can make it same‑day and still get a delicious loaf.
Servings: 24
Calories: 102kcal
Equipment
- 17-inch baking sheet
- stand mixer (optional)
- digital kitchen scale (optional)
- steam pan (optional)
- serrated bread knife (optional)
Ingredients
Overnight Dough (Day 1)
- 2 ½ cups bread flour (11.25 ounces)
- ½ teaspoon yeast (.06 ounces)
- ⅞ cup water (7.5 ounces; ¾ cup + 2 tablespoons)
Full Dough (Day 2)
- 2 ½ cups bread flour (11.25 ounces)
- 1 ⅔ teaspoons table salt (.41 ounces)
- 1 tablespoon sugar (.5 ounces)
- 1 teaspoon yeast (.11 ounces)
- 1 tablespoon olive oil (.5 ounces)
- ¾ cup water (7 ounces)
Instructions
Overnight Dough (Day 1): 15 Minutes
- In a large bowl or stand mixer, mix together the flour and yeast. Stir in the water and make a dough that's neither too stiff nor too sticky. Add a little more flour or water as needed.
- Knead on a lightly floured surface - or in your stand mixer on medium-low - for about 6 minutes, until the dough is soft and pliable. The dough should be tacky, like a Post-It note clings to your finger but doesn't leave dough behind.
- Place dough in a lightly oiled bowl, coat dough with oil, and cover with plastic wrap. Let rise for 2-4 hours, until doubled in size. Degas the dough, return it to the bowl, cover, and refrigerate overnight.
Mix the Full Dough (Day 2): 15 Minutes
- Remove the cold dough from the refrigerator 1 hour before making the dough. Cut it into about 10 pieces (to make mixing easier), cover, and let sit at room temperature for 1 hour.
- In a stand mixer or large bowl, combine the overnight dough, flour, salt, sugar, yeast, olive oil, and ¾ cup water, and mix until a ball forms. The dough should be slightly sticky and soft; add a tiny bit more flour or water if necessary. It's better for the dough to be slightly too sticky now, since it's hard to mix water in later.
- Knead dough with your stand mixer on medium-low speed, or on a floured surface, for about 6-10 minutes. (Kneading by hand will take longer.) Your dough should be soft and tacky - like a Post-It note that clings to you, but not sticky. It will also pass the windowpane test; see notes below.
- Place in an oiled bowl, coat with oil, and cover with plastic wrap. Let rise for about 2 hours, or until doubled in size. If your kitchen is cold, see notes for tips on making a warm space to proof the dough.
Shape the Loaves: 20 Minutes
- Gently divide the dough in half, deflating as little as possible. (That said, I've degassed my dough a lot before, and it turned out.) Flatten out each ball of dough into a tall rectangle.
- Fold the top third of the dough over the middle third, like you would fold a paper or letter over. Next, fold the bottom third up over that seam, and seal the edge to the top edge of the dough. Repeat with the second piece. You will have 2 rough, squat loaves.
- Let the dough rest for 5 minutes to let the gluten recover, if needed. Stretch and roll each loaf out to about 12 inches in length. Place on a baking sheet lined with parchment or dusted with cornmeal or flour.
- Spray the tops lightly with oil, cover with plastic wrap, and let rise for about 1 hour, or until the loaves are 1 ½ times their original size.
- Preheat oven to 475-500F, and place an empty pan on the bottom rack of the oven so it can preheat for steam. Heat some water for later.
Bake the Bread
- When the oven is preheated, score the bread with a sharp knife. Place the baking sheet on the middle oven rack. Using a glove, carefully pour the water into the hot pan on the bottom oven rack. Avoid splashing, which can crack the oven glass door. Close the oven door.
- Lower the oven temperature to 450F. Bake the bread for about 20 minutes, rotating halfway through the baking time if needed. The loaves will be done when they're golden brown and sound hollow when tapped on bottom. They'll also be 200F if you take its temperature with a thermometer
- Transfer loaves to a wire cooling rack as soon as possible. Cool at least 1 hour, but preferably 2, before cutting.
- Store in an airtight container at room temperature for 2-3 days, or in the freezer for up to 1 month.
Notes
I weigh my ingredients using a digital kitchen scale. It's the most accurate way to measure and gives the most consistent results.
Same-day option: You can make this bread all on one day, although the flavor won't be as deep. Start the "overnight" dough in the morning, let it rise 2 hours, and proceed with making the final dough.
Flour and yeast: All-purpose flour also works if you can't find bread flour. Both instant and active dry yeast work; do not try fresh yeast.
Windowpane test: Take a small piece of dough and stretch it out between your fingers. It should stretch thinly enough that you can see light behind the dough, without tearing.
To create a warm proofing space: I preheat my oven for 1-2 minutes, then turn off the heat. I close the bowl of dough in the oven. This is warm enough to prove the dough, but not too hot. All ovens heat differently; be sure yours isn't too hot.
Adapted from Peter Reinhart's The Bread Baker's Apprentice
Revised slightly January 27, 2026.
Nutrition
Calories: 102kcal | Carbohydrates: 19g | Protein: 3g | Fat: 1g | Saturated Fat: 0.1g | Polyunsaturated Fat: 0.3g | Monounsaturated Fat: 0.5g | Sodium: 163mg | Potassium: 28mg | Fiber: 1g | Sugar: 1g | Vitamin A: 1IU | Calcium: 5mg | Iron: 0.2mg
