
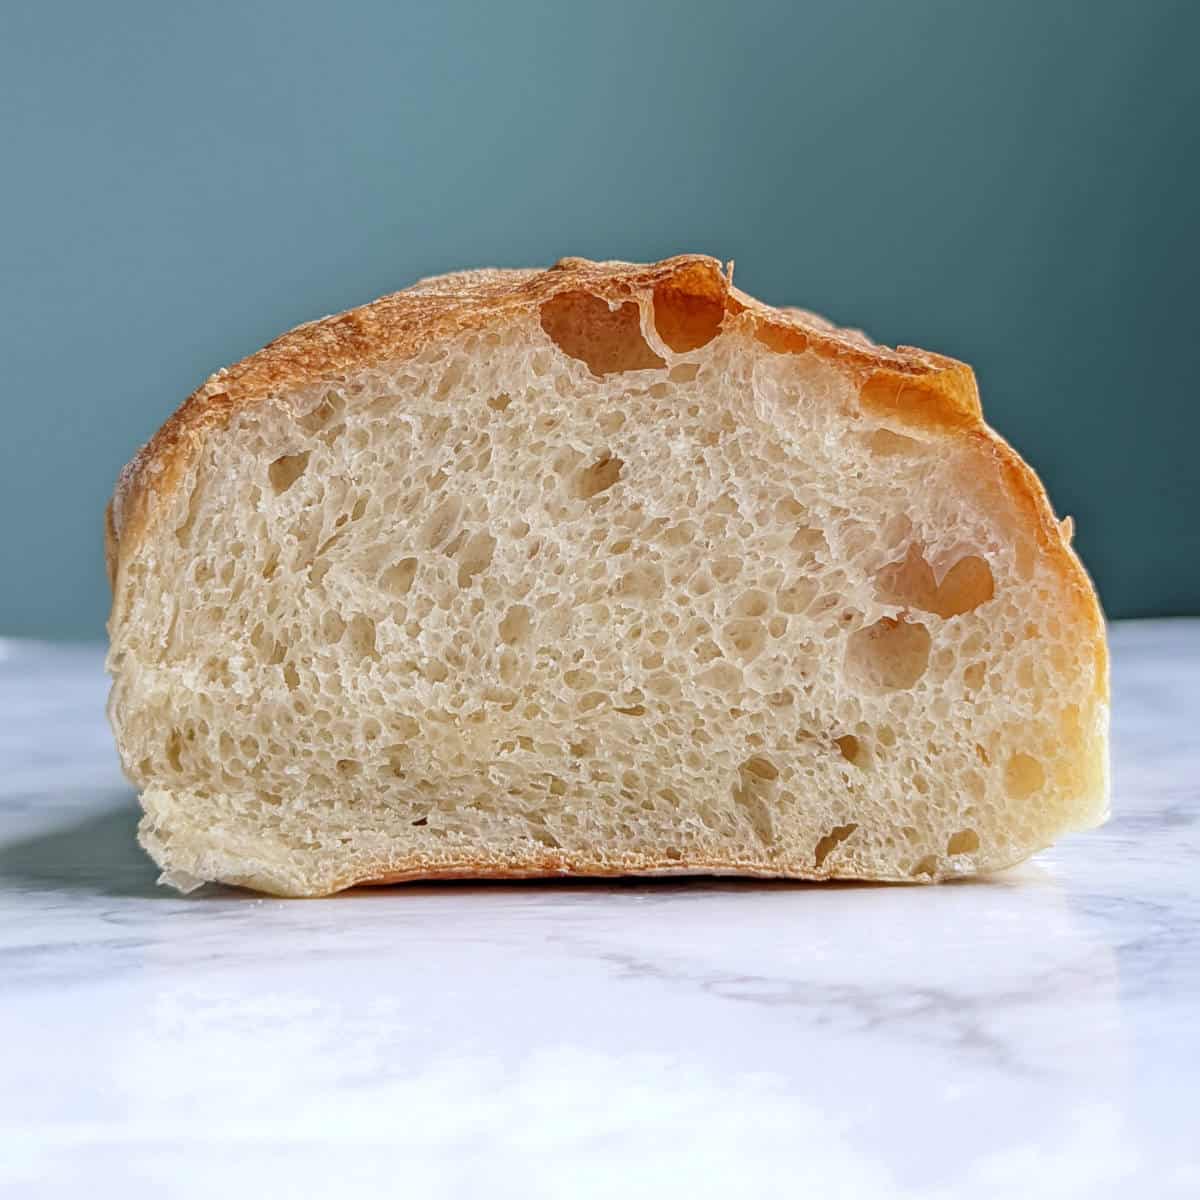
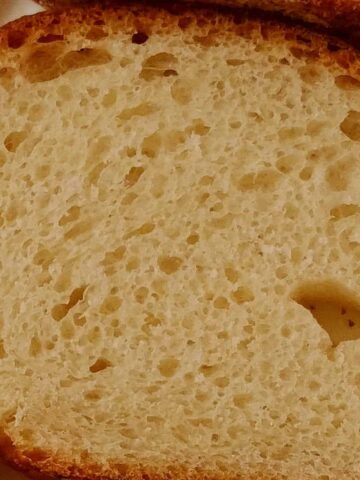
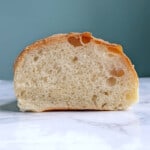
When I want bread to accompany dinner, this Italian bread recipe is what I pull out, almost without fail. The inside is soft and chewy, the crust delightful. It's easy to make, and equally importantly, delicious.
Good homemade Italian bread will turn you into a bread lover. I generally don't eat complimentary bread at restaurants, but at home, I'll eat more of the loaf than a reasonable person should.
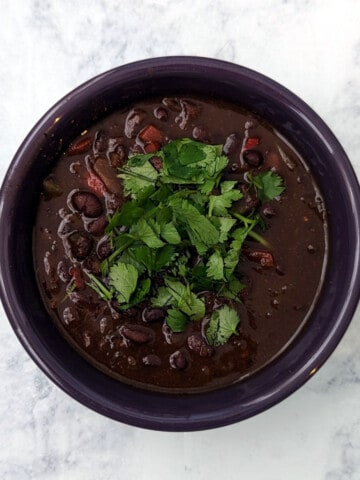
I make this bread often - it's what I usually make each year to turn into garlic bread alongside our Christmas lasagna. Its flavor is vastly superior to anything you could buy at a grocery store. It's great with all kinds of soup, including Slow Cooker Bean and Bacon Soup and Southwestern Bean and Barley Soup.
Jump to:
I first wrote about this specific bread recipe in 2012 and reprised it in 2014 for my year of bread. There are lots of recipes for Italian Bread, but mine comes from Peter Reinhart's The Bread Baker's Apprentice (affiliate link), which basically taught me how to make bread.
What Makes This Bread Great
I return to this Italian bread recipe time and time again. Here's why.
- It tastes so much better than store-bought bread, thanks to a long overnight rise.
- Each loaf has a tender, chewy interior with a soft (not hard) crust.
- It uses simple, everyday ingredients.
- Even with a long rise time, the hands-on steps are straightforward.
SUMMARIZE AND SAVE THIS CONTENT ON:
Ingredients You'll Need
The beauty of homemade bread is that it takes just a few simple ingredients.
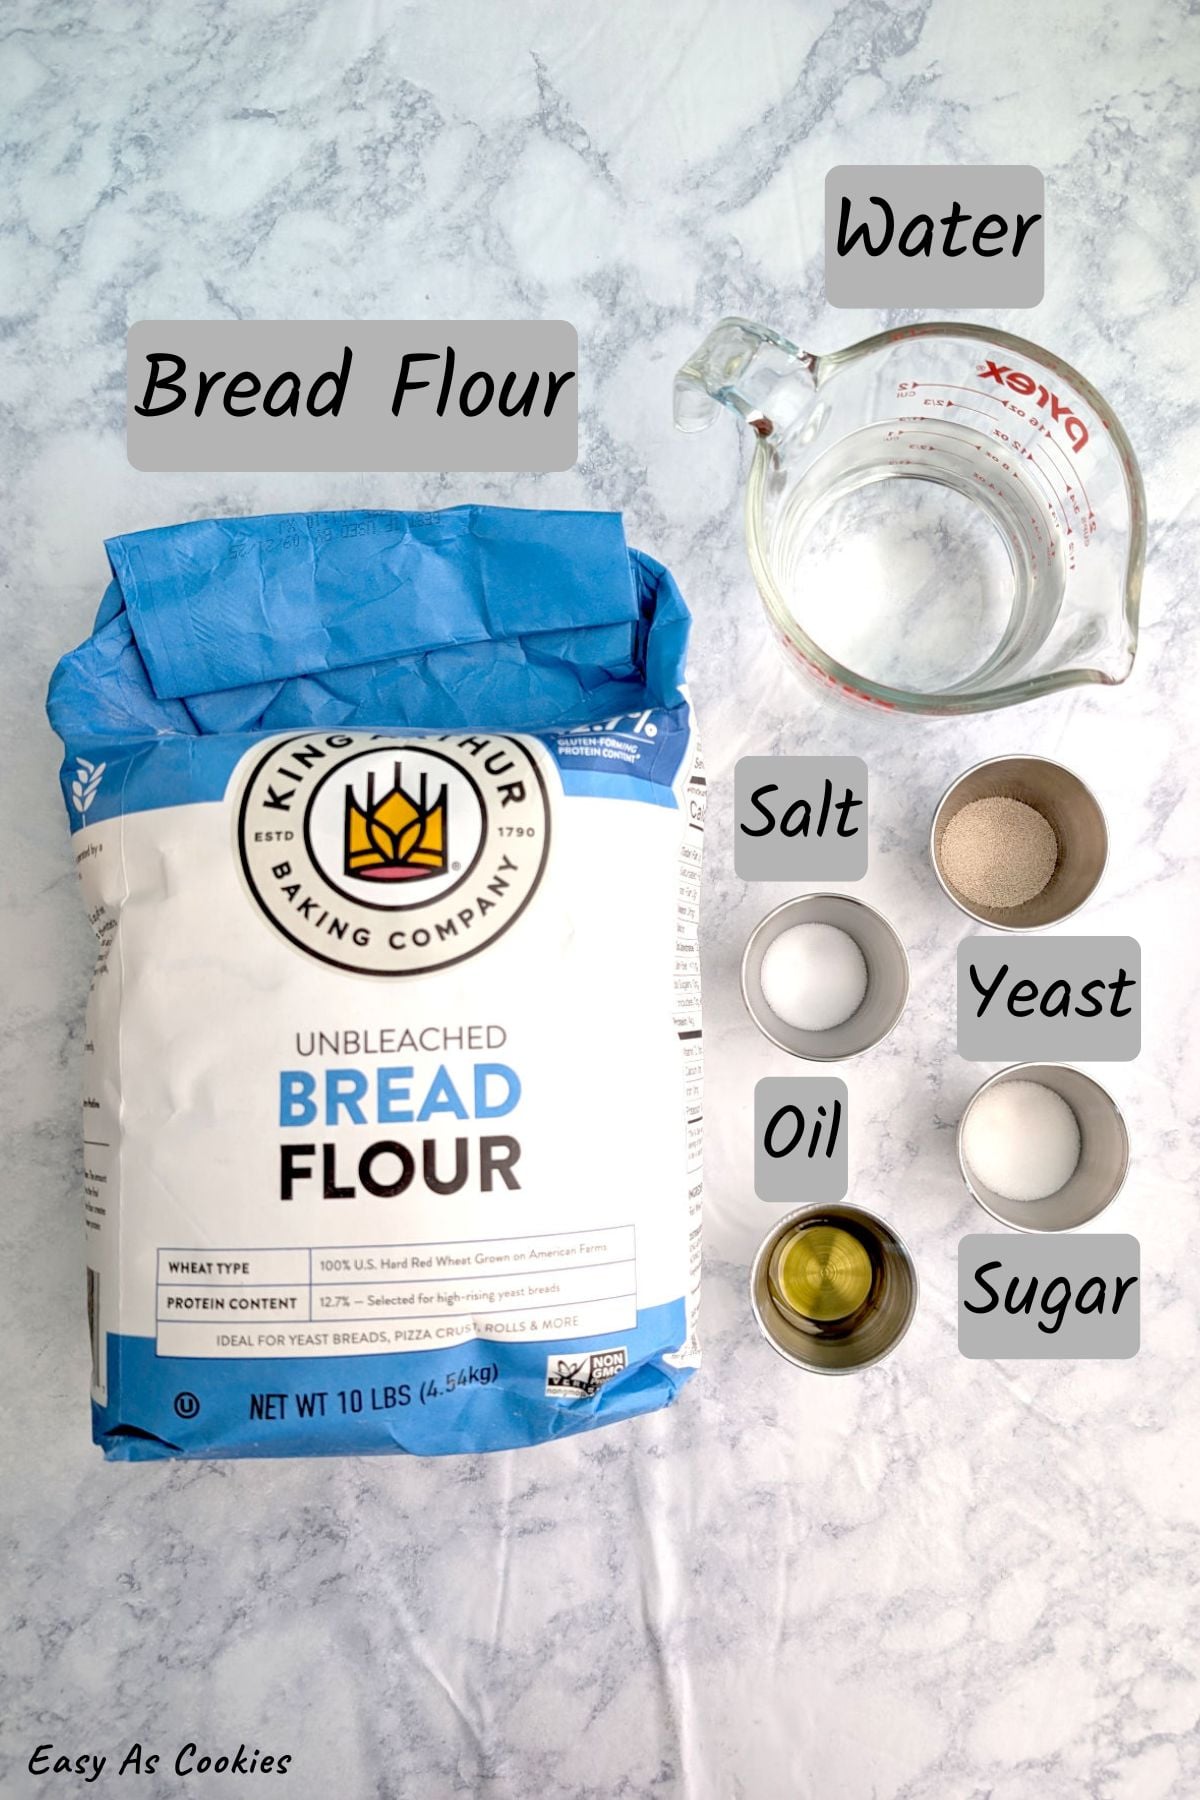
Flour: Bread flour has more protein and develops more gluten when kneaded, giving the loaf more chew and structure. I sometimes use all-purpose flour instead; it still makes a better loaf than grocery store bread.
Yeast: Use dried yeast, not fresh. Both active dry and instant yeast work fine. Yeast creates air bubbles as it eats the carbohydrates in the dough.
Table salt: Salt adds flavor and slows down how quickly the dough rises. You'll notice there's no salt in the Day 1 dough - there's no need to slow that rise. Kosher salt likely works; add about double by volume.
Sugar: This feeds the yeast at the start and tenderizes the dough slightly.
Olive oil: This makes the bread more tender than French bread or baguettes.
Water: I use tap water. That said, you may want to use bottled water if you live in an area with a high mineral content.
Recommended Equipment
Baking sheet: This is the only tool that's truly required. I use a 17-inch half sheet pan (affiliate link) that isn't non-stick, since non-stick pans shouldn't be used at high temperatures.
Digital scale (optional): A cup of flour vary widely in weight depending on how it's scooped, which directly affects the texture and hydration of your dough. Weighing your ingredients is far more accurate and gives consistent results. Although I list it as optional, I use my digital kitchen scale (affiliate link) multiple times a day.
Mixer (optional): You can stir and knead the dough by hand, although a Kitchenaid stand mixer (affiliate link) makes it easier. Don't use a handheld mixer - it isn't powerful enough.
Steam pan (optional): I add steam by preheating another aluminum pan in the oven and pouring water into it. Steam is optional but recommended. This pan should also not be non-stick.
Serrated knife (optional): A serrated bread knife (affiliate link) cuts through the crust without squishing the loaf. I use mine often, not just for bread.
Day 1: Make the Overnight Dough
You can make this bread using a stand mixer, or by hand. I've done both. The stand mixer saves time, but I knead by hand when I'm visiting my parents.
When you mix the dough on Day 1, you'll want to aim for soft, tacky dough. To check it, touch the dough with a clean, dry finger. Tacky dough clings to your finger like a Post-It note, releases easily, and leaves almost no residue behind.

- Combine the overnight dough's flour, yeast, and water to make a dough that's neither stiff nor sticky. Knead on a lightly floured surface, or in your stand mixer on medium-low, for about 6 minutes until the dough is soft, stretchy, tacky, and pliable.

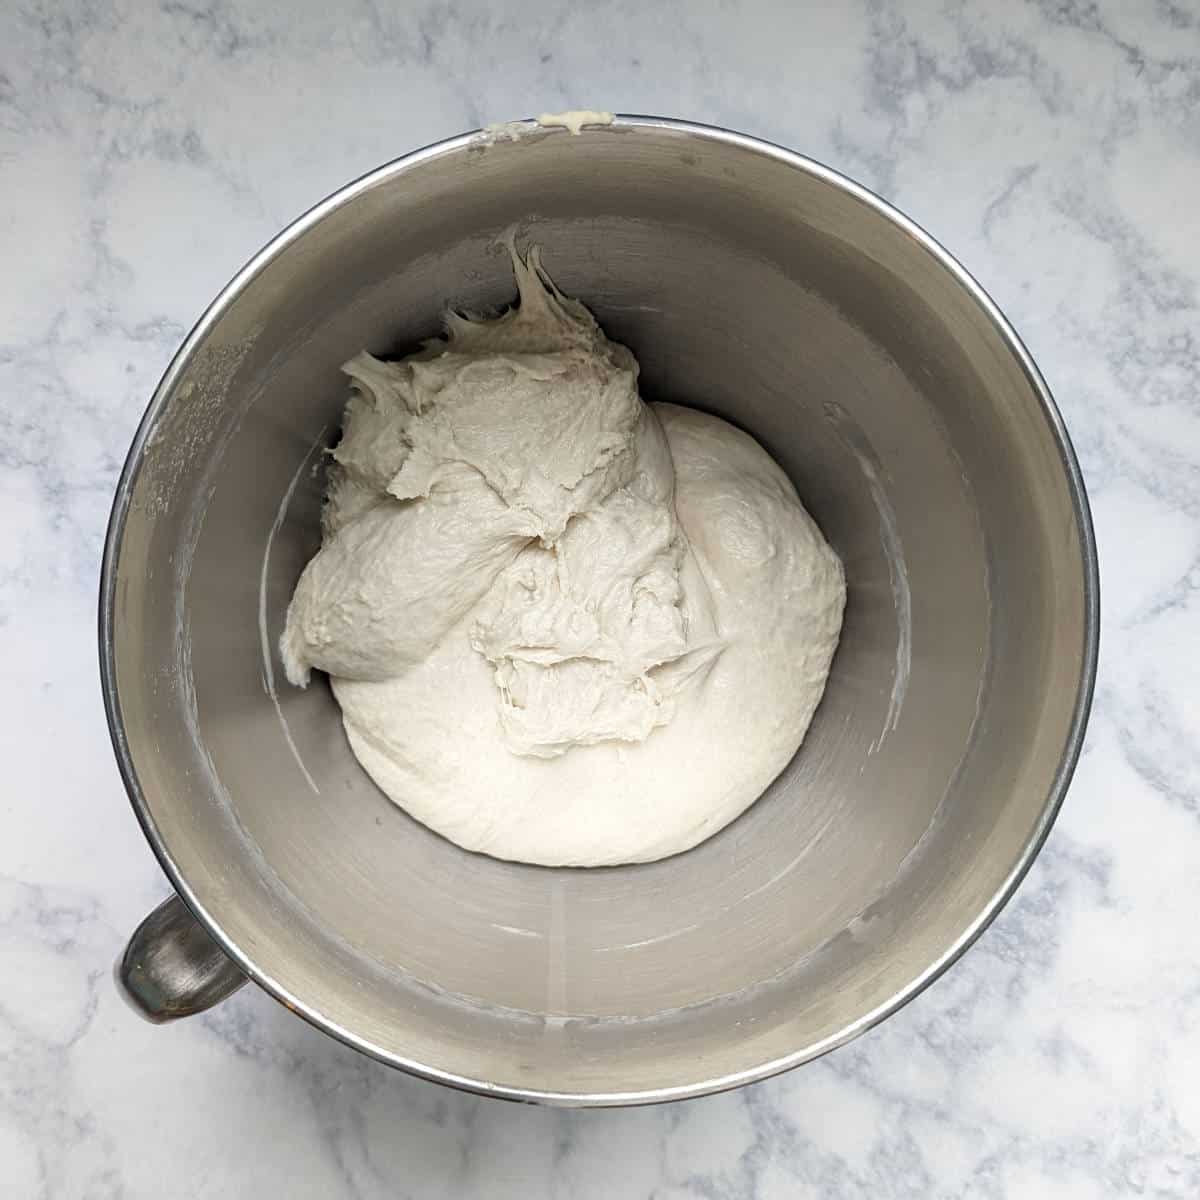
- Cover and let the dough rise until it's doubled, about 2-4 hours. Degas the dough, replace the cover, and refrigerate overnight. The dough will double in size again overnight, and it will look like the dough above the next morning.
Making the overnight dough is primarily to develop flavor, so don't worry if you don't knead the dough much.
Day 2: Make the Final Dough
Remove the overnight dough from the refrigerator one hour before you want to make the final dough. Cut it into several small pieces (around 10) to help it warm up; this is especially helpful if kneading by hand because it makes mixing easier.
Before you knead the final dough, you want the dough to be sticky. Sticky dough will leave noticeable residue behind on your finger when you touch it (like on my fingers in the windowpane photo below.) It's easier to add flour to sticky dough than it is to add water to stiff dough, and the sticky dough will become less sticky as you knead it.
- Add the remaining ingredients to the overnight dough, and mix until a sticky dough forms. If it seems too wet or batter-like, add more flour a tablespoon at a time. Knead until the dough is soft, tacky, and pliable, but not sticky. This takes about 10 minutes in a stand mixer on medium-low speed.
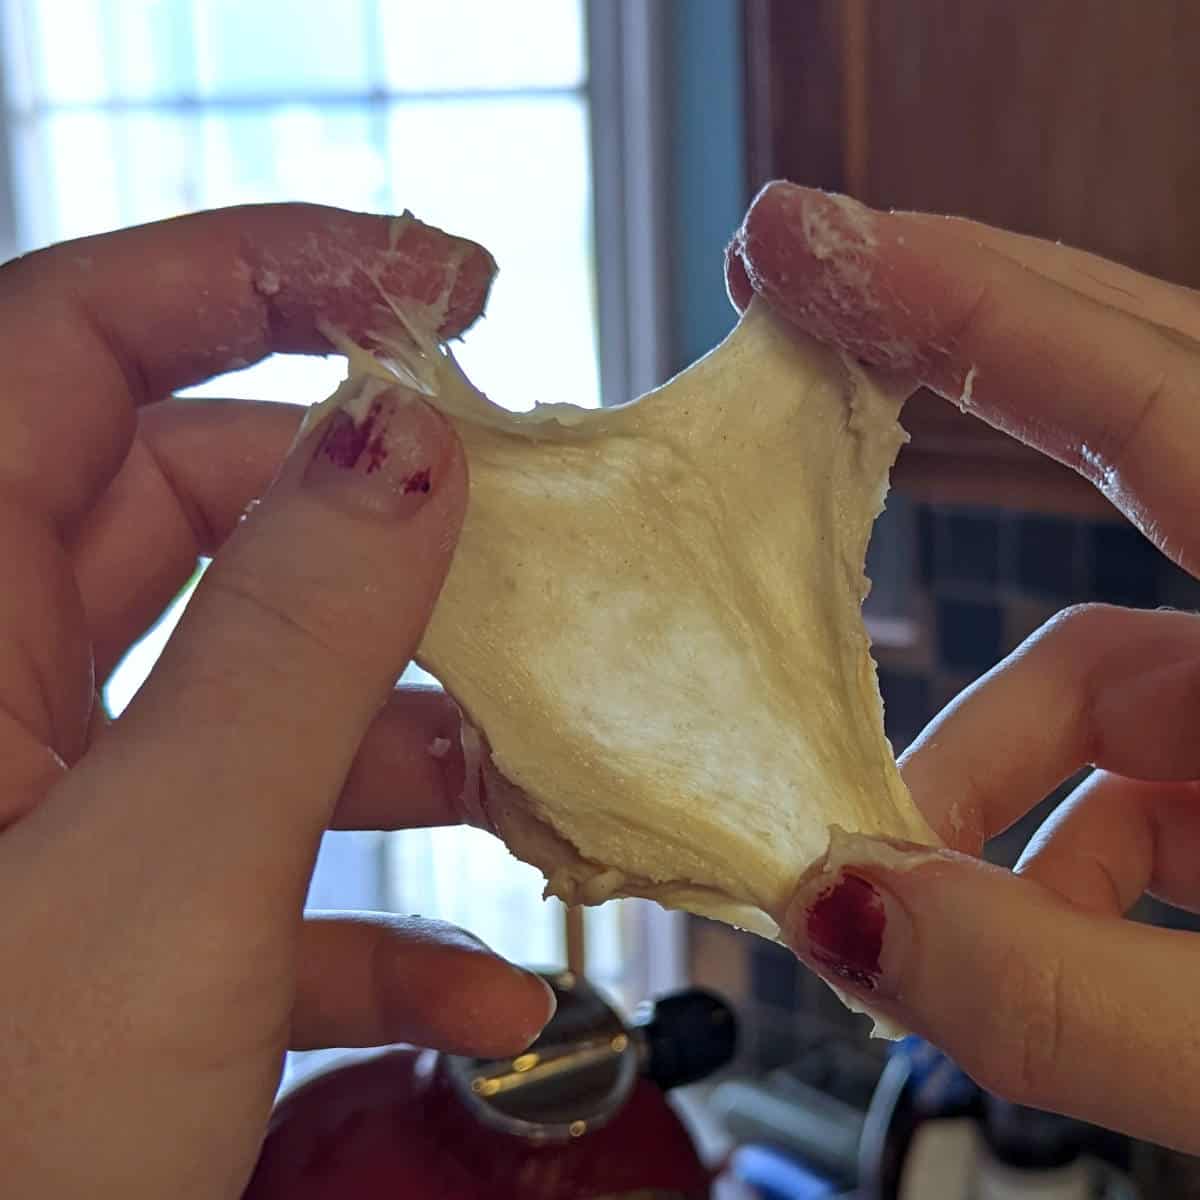
- Do a windowpane test to see if the gluten is fully developed.
Pinch off a small amount of dough and stretch and flatten it out between your fingers. It should stretch thinly without tearing, and you should be able to see light behind/through it - like a windowpane. (The dough in this photo needed a little more kneading.)
Place your dough in an oiled bowl - I reuse the stand mixer bowl - and spray the top of the dough with oil. Cover with plastic wrap, and let rise until doubled in size, about 2 hours.
🔥 Hot tip for cold kitchens: To create a warm place for dough to rise, I preheat my oven for exactly 2 minutes, then turn it off. The oven isn't too hot yet and stays warm, so it's a great place to proof the dough. All ovens heat differently, so check the temperature on yours before proofing your dough.
Day 2: Shape the Dough
After the dough's risen, it's time to shape the loaves.
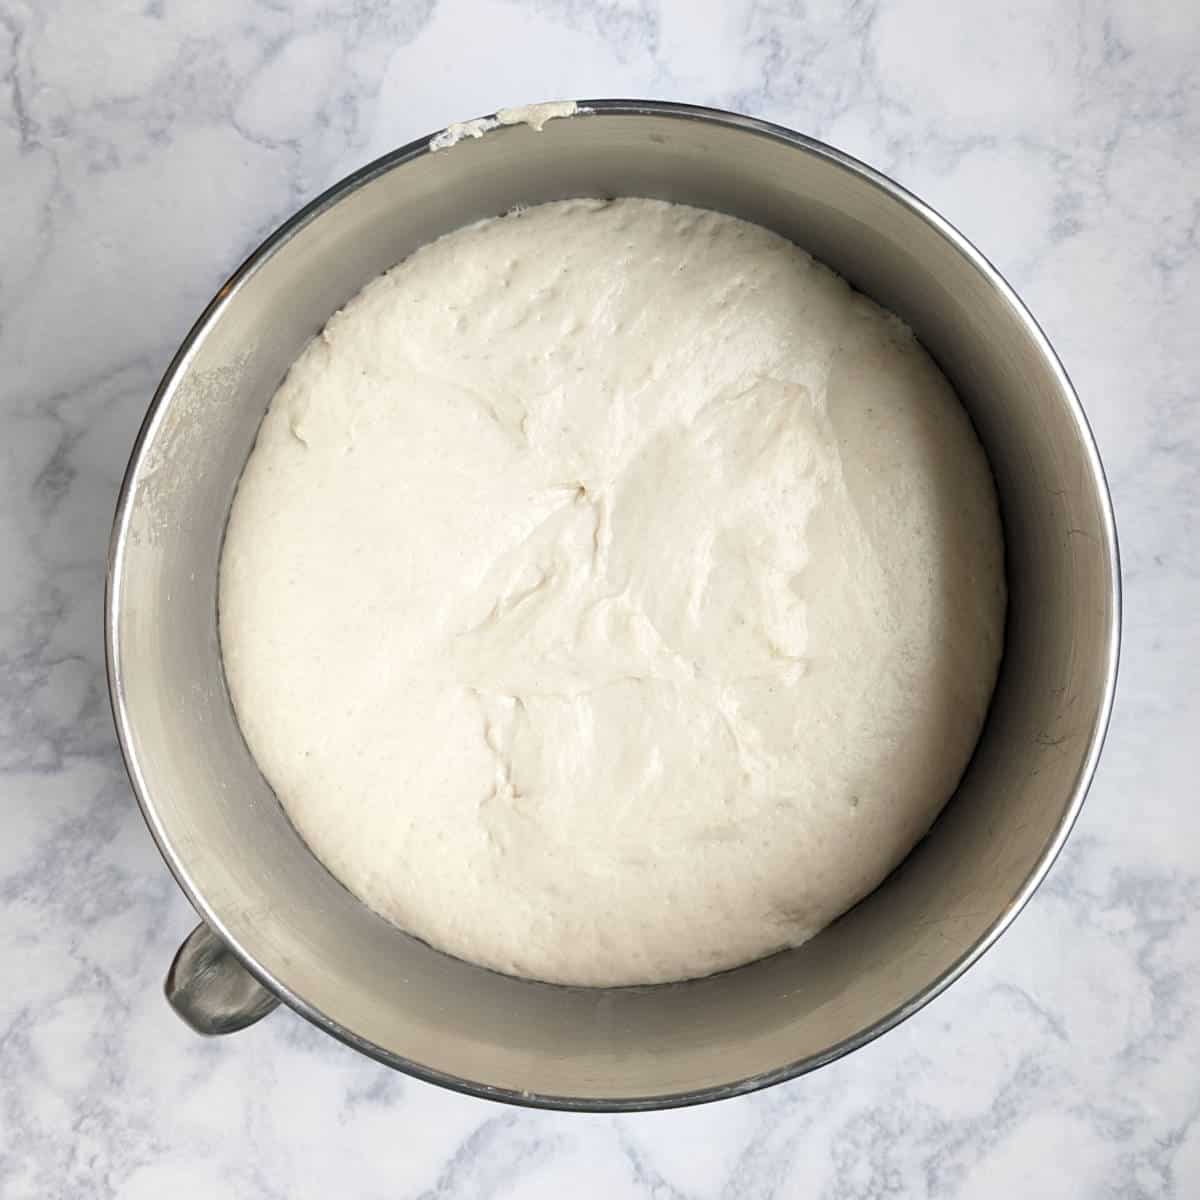
- After around two hours, the dough has doubled in size. Use a silicone spatula to scrape it cleanly from the sides of the bowl.
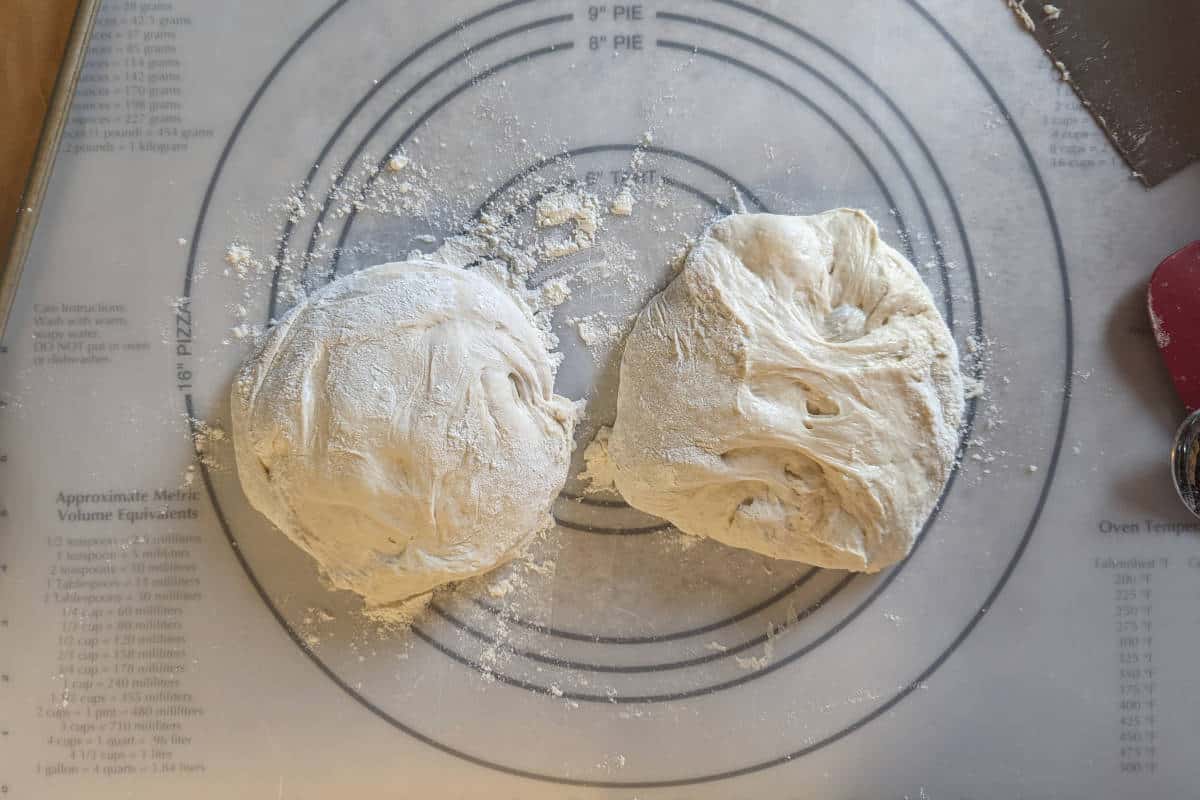
- Divide your doubled dough into two halves, being careful not to deflate the dough too much.
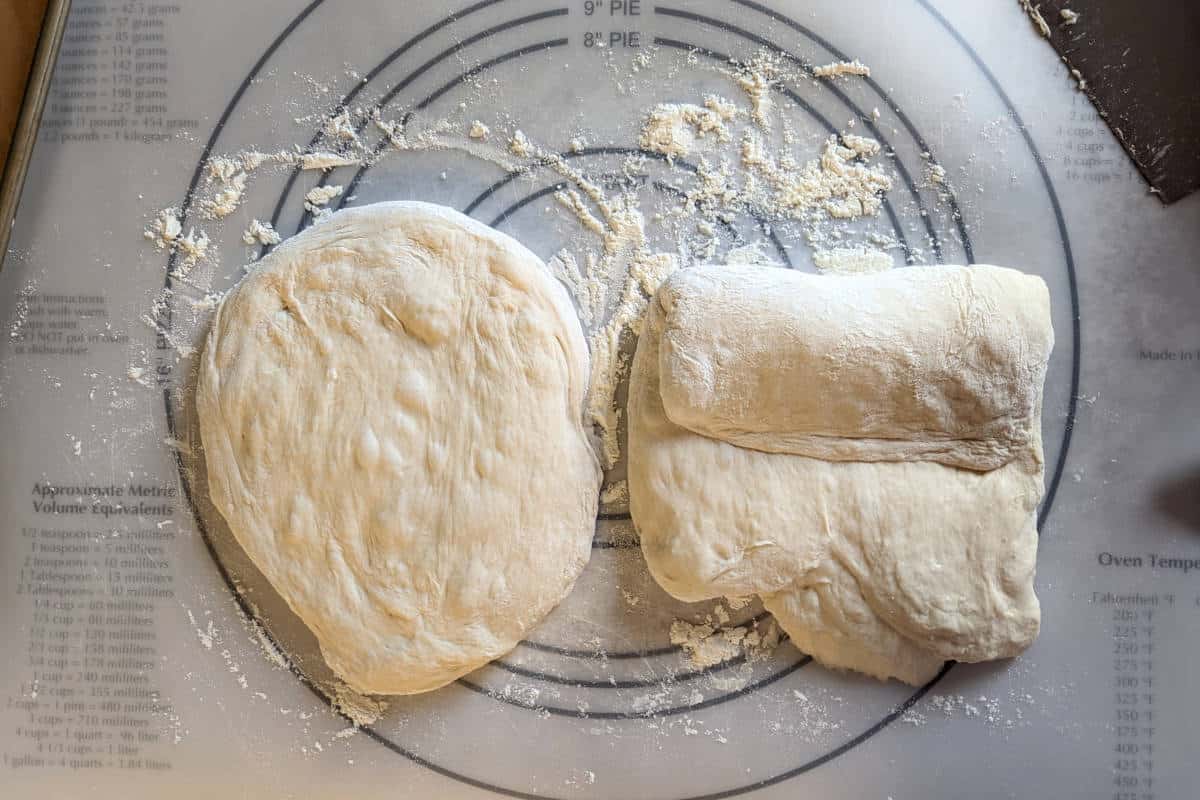
- Flatten each ball of dough into a disc, then pat into a rough, tall rectangle. Fold the top third of the dough over the middle third, like you would fold a paper or letter over.

- Next, fold the bottom third up over that seam, and seal the edge to the top edge of the dough.
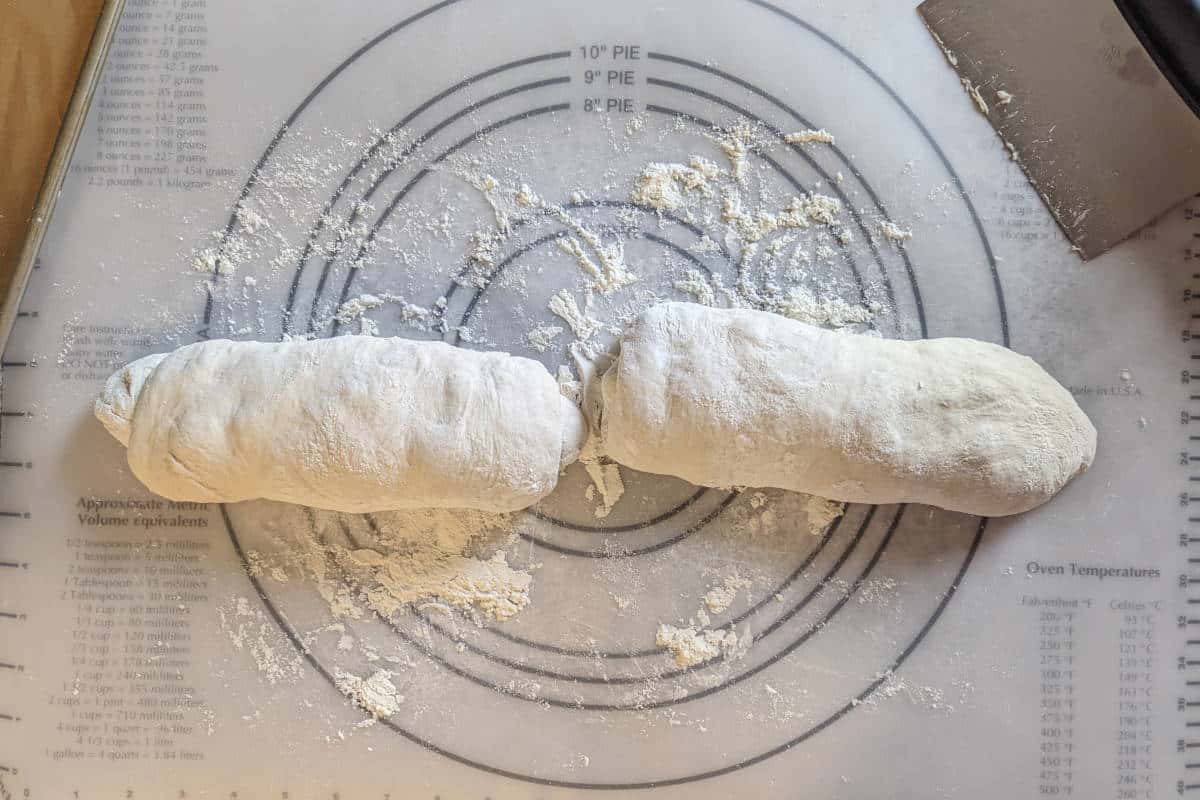
- Repeat with the other round of dough. You will have two rough, squat loaves.
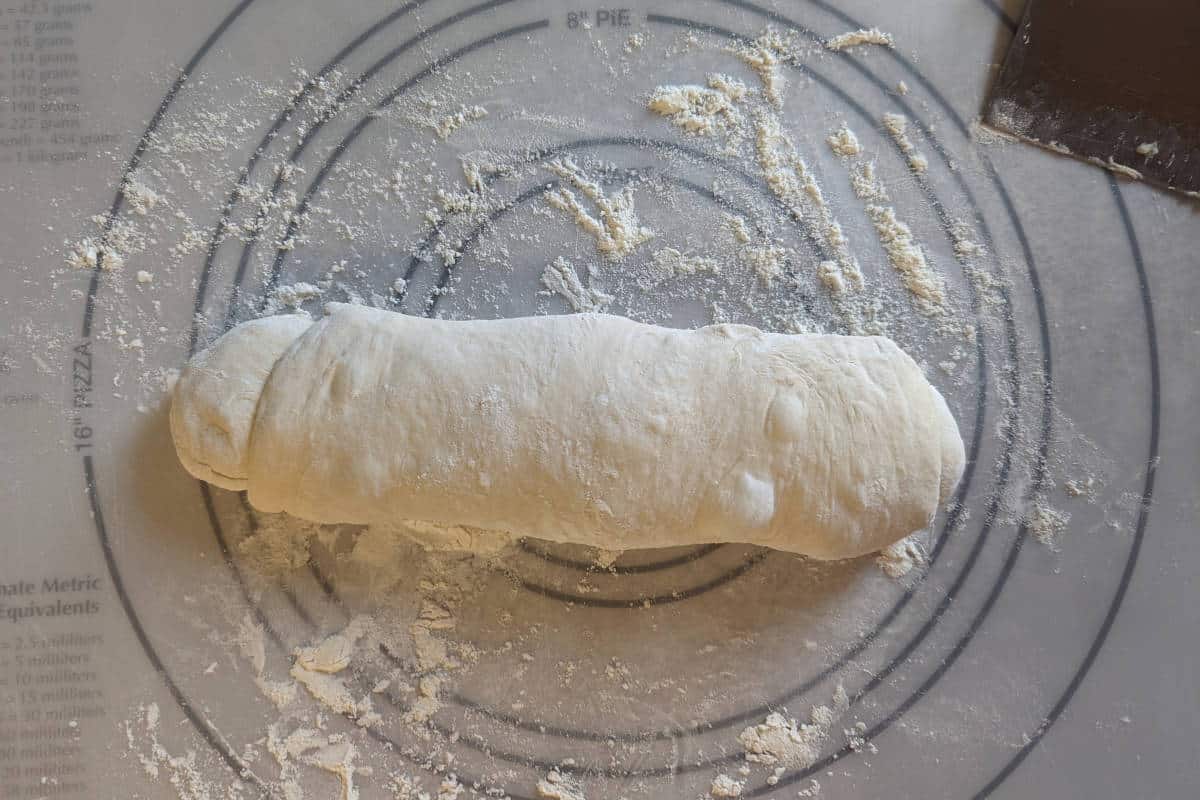
- Roll and stretch each one out until it's roughly 12 inches in length.

- Dust a sheet pan with a little semolina or cornmeal, then place the loaves on it. Spray the tops of each loaf with cooking spray, then cover with plastic wrap.
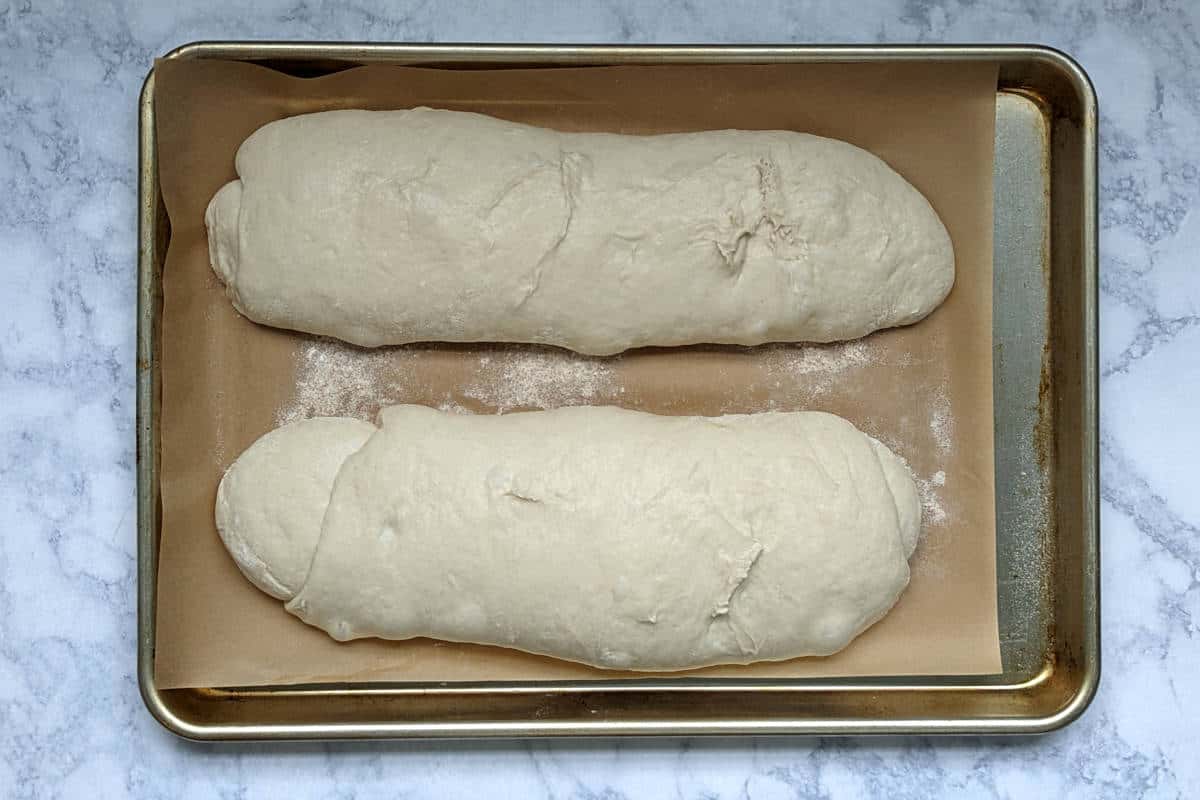
- Let rise until the loaves are about 1 ½ times their original size, about an hour.
Day 2: Bake
After the dough has risen for 45 minutes, place an empty metal baking pan on the bottom oven rack, and start preheating your oven to 475-500F - as high as you can without setting off your smoke detector. If you have a kettle, heat 1 cup of water.
Immediately before baking, make one vertical or a couple of diagonal slashes on your loaves. This allows steam to come out of the dough to create a better rise. If your knife isn't very sharp, just do the best you can.
- Place the baking sheet in the oven. Wearing an oven mitt, carefully pour 1 cup of hot water into the hot pan on the bottom rack to create steam, which helps the bread develop a nice crust.
PS: Don't let water spatter on the oven door's glass; it can shatter.
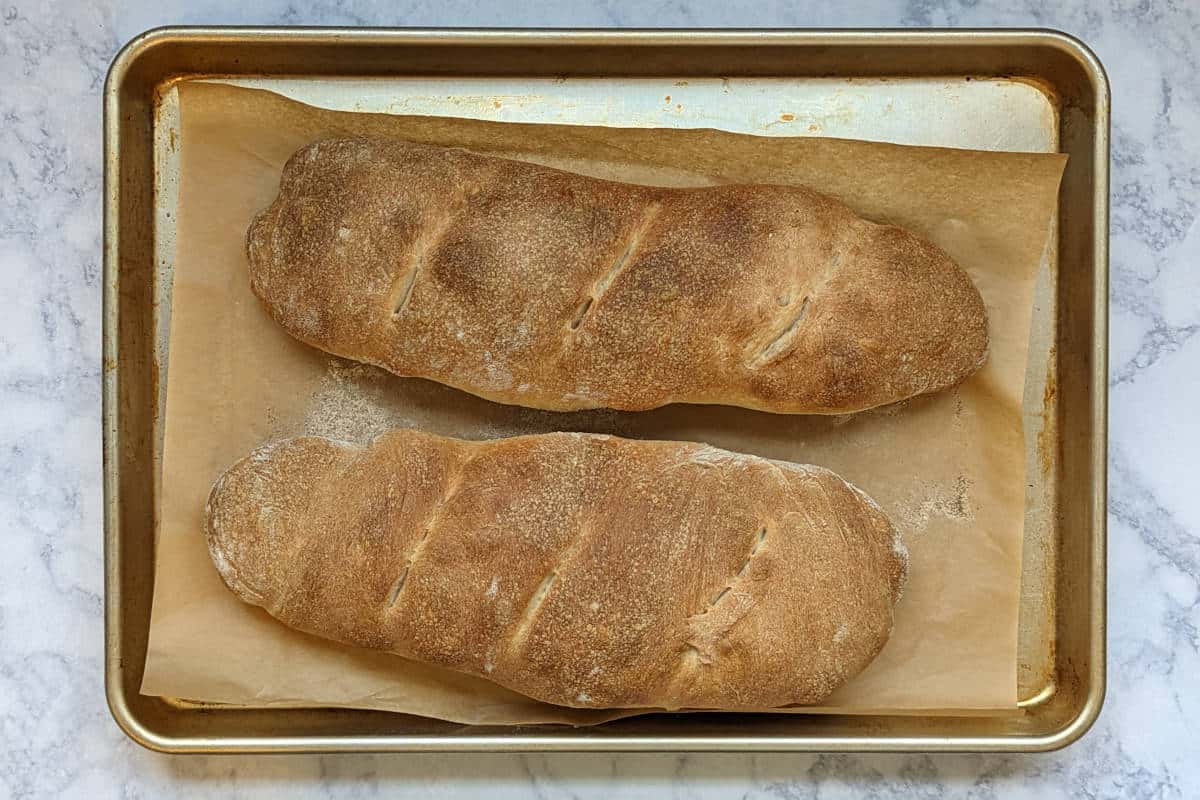
- Reduce the oven temperature to 450F. Bake the loaves for about 20 minutes, rotating halfway through if needed. The bread is done when it's golden brown and sounds hollow when you top on the bottom.
Allow bread to cool briefly, then transfer to a wire rack to cool completely - or at least an hour - before cutting.
Serving
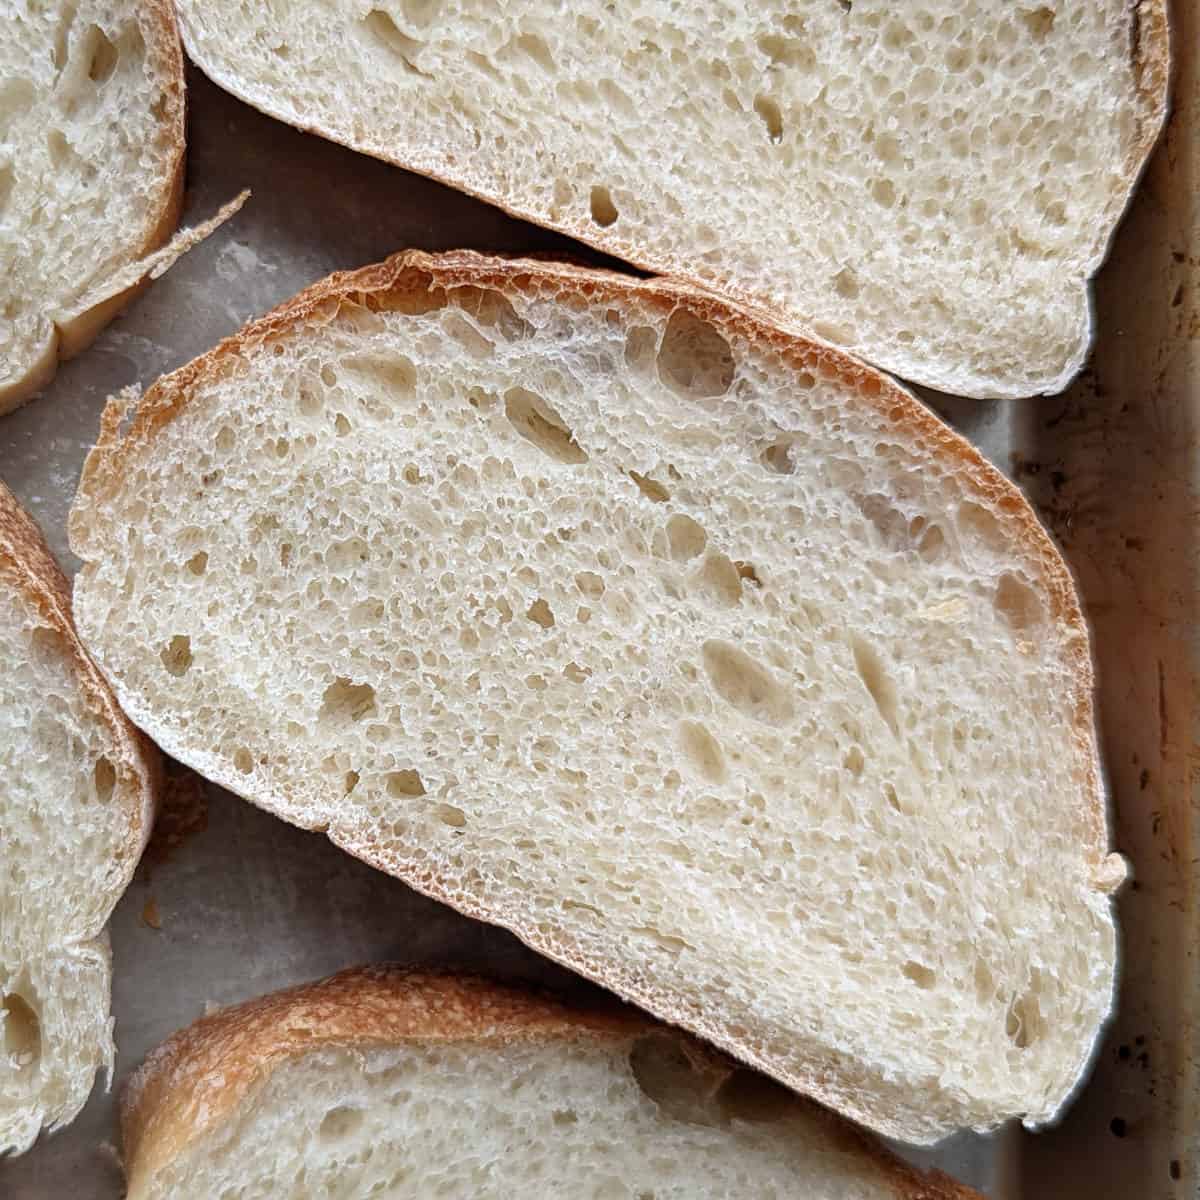
Cut cooled bread using a gentle sawing motion, ideally using a large serrated bread knife (affiliate link). I usually slice only what we'll eat at a given meal and leave the rest as a loaf - it dries out less quickly that way.
On baking day, I sometimes make a meal of fresh bread dipped in good olive oil with a little salt and pepper; I'll have a few baby carrots or other vegetables on the side, for balance. Otherwise, I love to serve this with soup, stew, or light meals.
On the second or third day, I turn it into garlic bread. My husband and daughter use it for nice grilled cheese sandwiches, or we just eat a slice with jam or almond butter for breakfast.
Storage
Room temperature: Store the bread in an airtight container at room temperature; it goes stale quickly in the refrigerator. I keep mine in a bread box (affiliate link) because it makes storage easy. Bread usually stays good for 4-5 days, although this depends on heat and humidity - it can become moldy in warm, humid weather.
Freezing: Italian bread freezes well. Cut a loaf in half; slice it if you'd like, but keep the slices together. Wrap your partial loaf or bundle of slices in a layer of aluminum foil, followed by 1-2 layers of plastic wrap. Store in a freezer bag and freeze for up to a month.
Thawing: Thaw the bread unwrapped at room temperature. If you froze slices, fan them out as soon as they're unstuck to help them thaw faster. Allow at least an hour for thawing, although an uncut partial loaf may take longer.

Tips for Making Great Italian Bread
Start with a wetter dough. It's easier to add flour to a wet dough than to fix a dry, stiff dough.
Expect sticky → tacky. The final dough will start off sticky and become tacky as the gluten develops.
Add extra flour gradually. If the dough is too sticky, add flour a tablespoon at a time so you don't overcorrect.
Cut the cold overnight dough into pieces. This helps it warm up faster and makes kneading easier.
Check the windowpane test. A thin, stretchy sheet of dough means you've kneaded enough.
Create a warm proofing spot. Use a briefly warmed, turned-off oven to help the dough rise.
Don't stress early overproofing. The overnight rise and first rise are flexible; you can fix issues during shaping. Don't let the shaped loaves overproof, though, or they'll lose their structure.
Slashing the loaves right before baking. This helps them rise better in the oven.
Use steam for a better crust. A preheated pan and hot water keep the crust moist for longer, allowing the bread to rise higher.
Be careful adding steam. Avoid splashing water on the oven door glass, which could crack.
FAQ
What we call Italian bread in the United States is a basic white bread enriched with a small amount of olive oil, which makes it softer than crusty French bread.
Making the overnight dough for Italian bread is primarily about building flavor. If you wake up wanting homemade bread, you can start the "overnight" dough, let it rise for about 2 hours, and then move straight into making the final dough. This bread will still be delicious and better than a grocery store loaf; it just won't have the same depth of flavor as the full overnight version.
Warming Soup Recipes
Not sure what to eat with your bread? Here's some of my favorite soup recipes.


More Homemade Bread Recipes
Here's some of my other favorite homemade bread recipes.


I hope this becomes a recipe you'll return to. If you try it, a star rating below helps others find it - and I'd love to hear how yours turns out in the comments! 💕 Questions or trouble? Drop a note, and I'll do my best to help.
📖 Recipe
Peter Reinhart's Italian Bread
Equipment
- 17-inch baking sheet
- stand mixer (optional)
- steam pan (optional)
Ingredients
Overnight Dough (Day 1)
- 2 ½ cups bread flour (11.25 ounces)
- ½ teaspoon yeast (.06 ounces)
- ⅞ cup water (7.5 ounces; ¾ cup + 2 tablespoons)
Full Dough (Day 2)
- 2 ½ cups bread flour (11.25 ounces)
- 1 ⅔ teaspoons table salt (.41 ounces)
- 1 tablespoon sugar (.5 ounces)
- 1 teaspoon yeast (.11 ounces)
- 1 tablespoon olive oil (.5 ounces)
- ¾ cup water (7 ounces)
Instructions
Overnight Dough (Day 1): 15 Minutes
- In a large bowl or stand mixer, mix together the flour and yeast. Stir in the water and make a dough that's neither too stiff nor too sticky. Add a little more flour or water as needed.
- Knead on a lightly floured surface - or in your stand mixer on medium-low - for about 6 minutes, until the dough is soft and pliable. The dough should be tacky, like a Post-It note clings to your finger but doesn't leave dough behind.
- Place dough in a lightly oiled bowl, coat dough with oil, and cover with plastic wrap. Let rise for 2-4 hours, until doubled in size. Degas the dough, return it to the bowl, cover, and refrigerate overnight.
Mix the Full Dough (Day 2): 15 Minutes
- Remove the cold dough from the refrigerator 1 hour before making the dough. Cut it into about 10 pieces (to make mixing easier), cover, and let sit at room temperature for 1 hour.
- In a stand mixer or large bowl, combine the overnight dough, flour, salt, sugar, yeast, olive oil, and ¾ cup water, and mix until a ball forms. The dough should be slightly sticky and soft; add a tiny bit more flour or water if necessary. It's better for the dough to be slightly too sticky now, since it's hard to mix water in later.
- Knead dough with your stand mixer on medium-low speed, or on a floured surface, for about 6-10 minutes. (Kneading by hand will take longer.) Your dough should be soft and tacky - like a Post-It note that clings to you, but not sticky. It will also pass the windowpane test; see notes below.
- Place in an oiled bowl, coat with oil, and cover with plastic wrap. Let rise for about 2 hours, or until doubled in size. If your kitchen is cold, see notes for tips on making a warm space to proof the dough.
Shape the Loaves: 20 Minutes
- Gently divide the dough in half, deflating as little as possible. (That said, I've degassed my dough a lot before, and it turned out.) Flatten out each ball of dough into a tall rectangle.
- Fold the top third of the dough over the middle third, like you would fold a paper or letter over. Next, fold the bottom third up over that seam, and seal the edge to the top edge of the dough. Repeat with the second piece. You will have 2 rough, squat loaves.
- Let the dough rest for 5 minutes to let the gluten recover, if needed. Stretch and roll each loaf out to about 12 inches in length. Place on a baking sheet lined with parchment or dusted with cornmeal or flour.
- Spray the tops lightly with oil, cover with plastic wrap, and let rise for about 1 hour, or until the loaves are 1 ½ times their original size.
- Preheat oven to 475-500F, and place an empty pan on the bottom rack of the oven so it can preheat for steam. Heat some water for later.
Bake the Bread
- When the oven is preheated, score the bread with a sharp knife. Place the baking sheet on the middle oven rack. Using a glove, carefully pour the water into the hot pan on the bottom oven rack. Avoid splashing, which can crack the oven glass door. Close the oven door.
- Lower the oven temperature to 450F. Bake the bread for about 20 minutes, rotating halfway through the baking time if needed. The loaves will be done when they're golden brown and sound hollow when tapped on bottom. They'll also be 200F if you take its temperature with a thermometer
- Transfer loaves to a wire cooling rack as soon as possible. Cool at least 1 hour, but preferably 2, before cutting.
- Store in an airtight container at room temperature for 2-3 days, or in the freezer for up to 1 month.
Notes
Nutrition
[Originally posted January 1, 2012 and completely redone in March 2022. Restructured January 27, 2026.]


Leona Konkel says
I really do reach for this recipe any time I want homemade bread - even on the same day I want to bake it. Although it seems intimidating, I promise it isn't. Let me know how it turns out when you try it!