
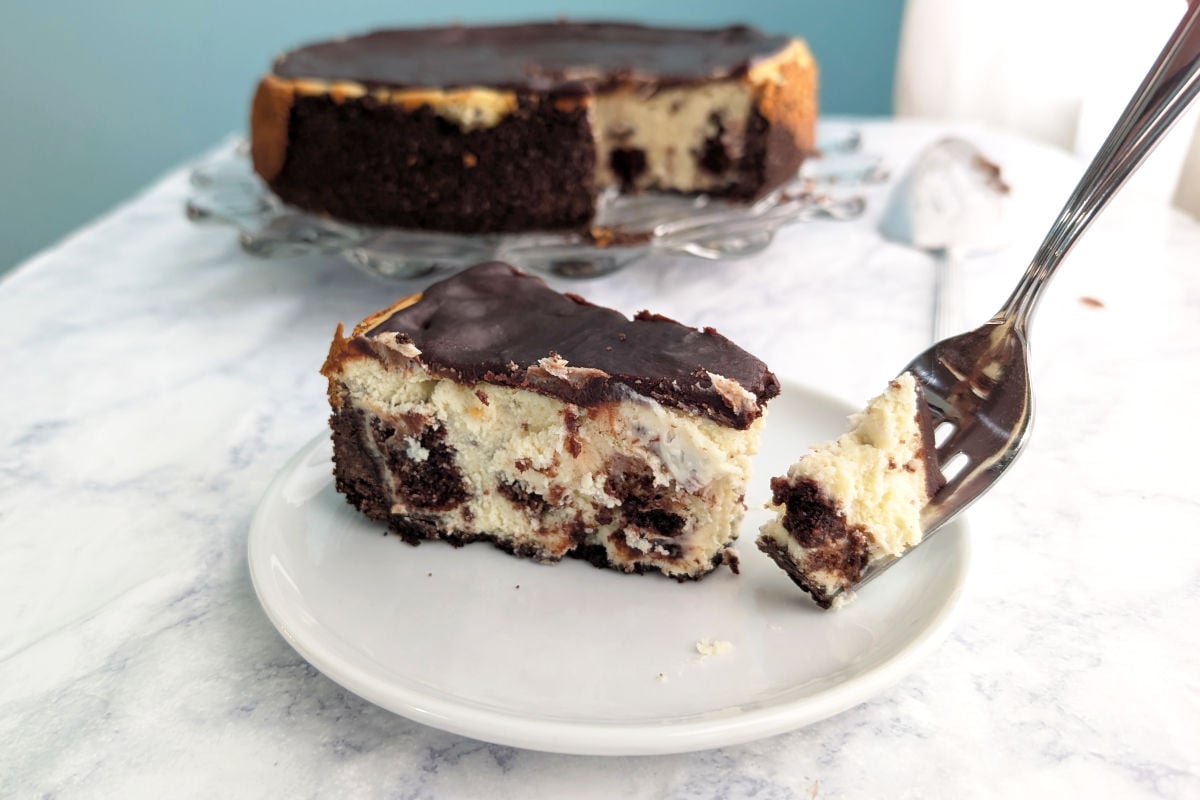
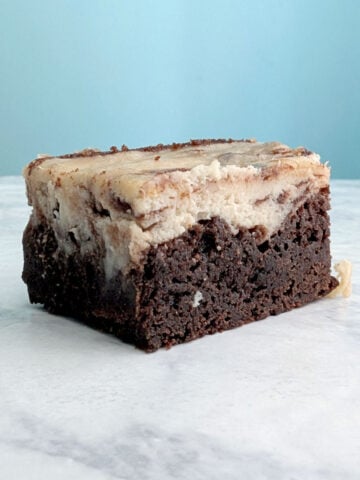
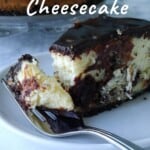
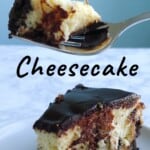
My go-to cheesecake is this delicious, versatile Brownie Cheesecake. It's smooth and creamy, with a chocolate cookie crumb crust and a batter that takes only 4 ingredients. I fold in brownie pieces, or whatever tidbits I have on hand, for extra flavor and texture.
I often make this to celebrate my cheesecake-loving sister's birthday from afar. It also helps me clear the freezer of tasty cookies that didn't bake right, delicious fudge that didn't set, or leftover cake that we couldn't finish.
Instead of a water bath, I use the same steam setup that I use for bake bread to moderate the temperature. With that method and patient, careful mixing, we get a cheesecake that's smooth, crack-free, and always satisfying.
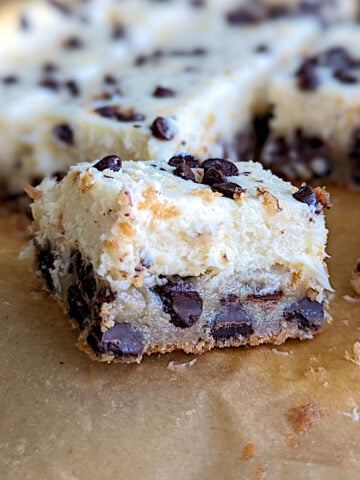
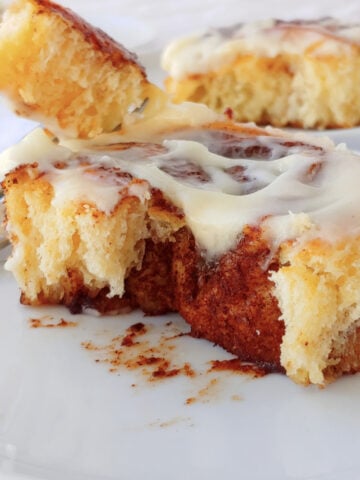
If you love sweet creamy cream cheese, check out my Chocolate Chip Cookie Cheesecake Bars, Cheesecake Brownies, Earthquake Cake from Scratch, and my Overnight Cinnamon Rolls with Cream Cheese Glaze.
Jump to:
Why You'll Love This Brownie Cheesecake
I love this brownie cheesecake, and think you'll love it too, because:
- It's smooth, creamy, and chocolatey - with a cookie crumb crust, cheesecake filling, brownie cubes, and ganache.
- It's a perfect way to use leftover brownies - even if you stashed them in the freezer first. Cubed brownies fold right into the batter, so nothing goes to waste.
- It's versatile and customizable. I've swapped in blondies, chocolate chips, graham crackers, and even fudge, and it always works.
- It bakes without fuss. No water bath required, but also no cracks! I use a steam setup in the oven to keep Brownie Cheesecake creamy and smooth.
Although I started from the original Brownie Mosaic Cheesecake recipe from Smitten Kitchen, I took some tips from American baking legend Dorie Greenspan's Baking: From My Home to Yours (affiliate link) to make my version even easier and better.
Ingredients
There's four components to this cheesecake: crust, cheesecake filling, brownie bites, and ganache. Luckily, none of them take too many ingredients. You'll need:
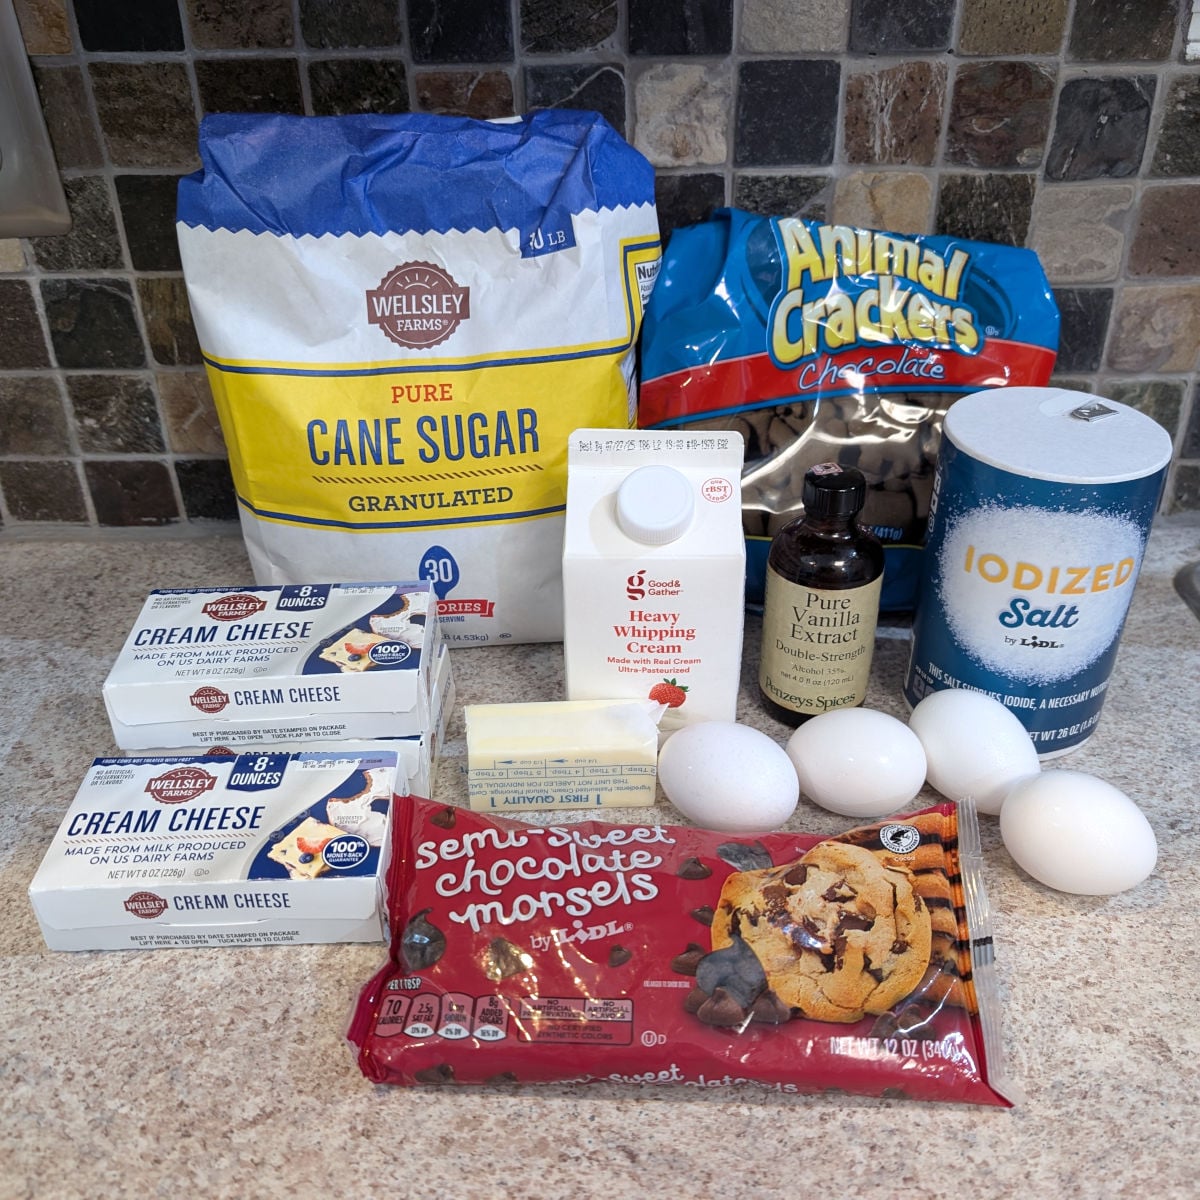
Chocolate Cookie Crust
You can use chocolate graham crackers for the crust, but I really prefer the taste of chocolate animal crackers instead. Use regular graham crackers instead if you'd prefer.
Butter binds the crust together, and a little extra sugar sweetens the crust - don't skip it! A dash of salt balances the flavors, but skip it if you want.
Cheesecake Filling
I use regular, full-fat cream cheese for cheesecake. Brand doesn't matter. Cream cheese must be at room temperature to beat properly; otherwise, you'll end up with lumpy cheesecake.
I've sometimes used lower-fat Neufchatel cheese to lighten up cheesecake, and it works here since the cheesecake is sharing the spotlight with brownies. Use it if you're used to eating it, but your cheesecake may have more cracks.
Sugar also sweetens the cheesecake and gives it texture.
Large eggs smooth out the cheesecake batter. A little vanilla adds richness.
Brownie Mix-Ins
I typically use cubed brownies that I've made and frozen. If you want them from scratch, I recommend my Hershey's Best Brownies or Fudge Brownies. From a 9-inch square or 9x13 inch pan, you'll need about 2 rows. If using anything you've frozen, be sure it's completely thawed before it goes into the batter.
Chocolate Ganache
I use semisweet chocolate chips to make ganache because I hate chopping chocolate. I prefer Ghirardelli chocolate chips, but they're expensive so I've also used Nestle's dark chocolate and store brands. Use what tastes good to you. Don't use milk chocolate, though, as I've found it doesn't melt very easily.
Heavy cream makes the ganache easy to cut, rather than hard like solid chocolate. Light cream would be too runny.
Tools You'll Need
You need a 9-inch springform pan with detachable sides because cheesecake is too delicate to flip over to remove. Line the bottom with a round of parchment paper if you're concerned about it being difficult to remove from the base. Although I always bake things like my Chocolate Peanut Butter Cheesecake in it, I also sometimes use it for regular cakes when I don't feel like turning them out.
You can use microwave-safe bowl, or a double boiler to make the small amount of ganache to top the cheesecake. I've got instructions on how to set up a makeshift double boiler in my Chocolate Truffle Cake recipe.
Make the Cookie Crust
Position your oven racks to the middle and bottom positions. Place a metal pan on the bottom rack; you'll use this to create steam later. Preheat your oven to 350F.
Before you start the crust, be sure your cream cheese is fully softened.
You can make chocolate graham cracker or animal cracker crumbs by hand or by food processor. By hand, crush them in a zipper bag with a meat mallet (gently, so you don't tear the plastic) or with your fists, as my daughter did when she was 6. My preference, however, is finely grinding them in a food processor.

- Crush the chocolate animal crackers into fine crumbs, either in a food processor or by hand. Add butter, sugar, and a dash of salt, and mix until moistened. Nothing should be soggy, but everything should stick together lightly.

- Gently pat the crumbs along the bottom and 1 inch up the sides of a greased 9-inch springform pan. Bake for 8-10 minutes to help it set, then set aside while you make the filling.
If you pat too hard, particularly in the corners, the crust will be hard to cut through. The height doesn't have to be perfect. Start the filling while you bake the crust.
Make the Cheesecake Filling
Be sure your cream cheese is completely softened. If it's not, you WILL have lumps, which no one wants in a creamy cheesecake.

- With a hand mixer or stand mixer, beat the cream cheese on medium until it's creamy. Give it a long mix - 4 minutes!
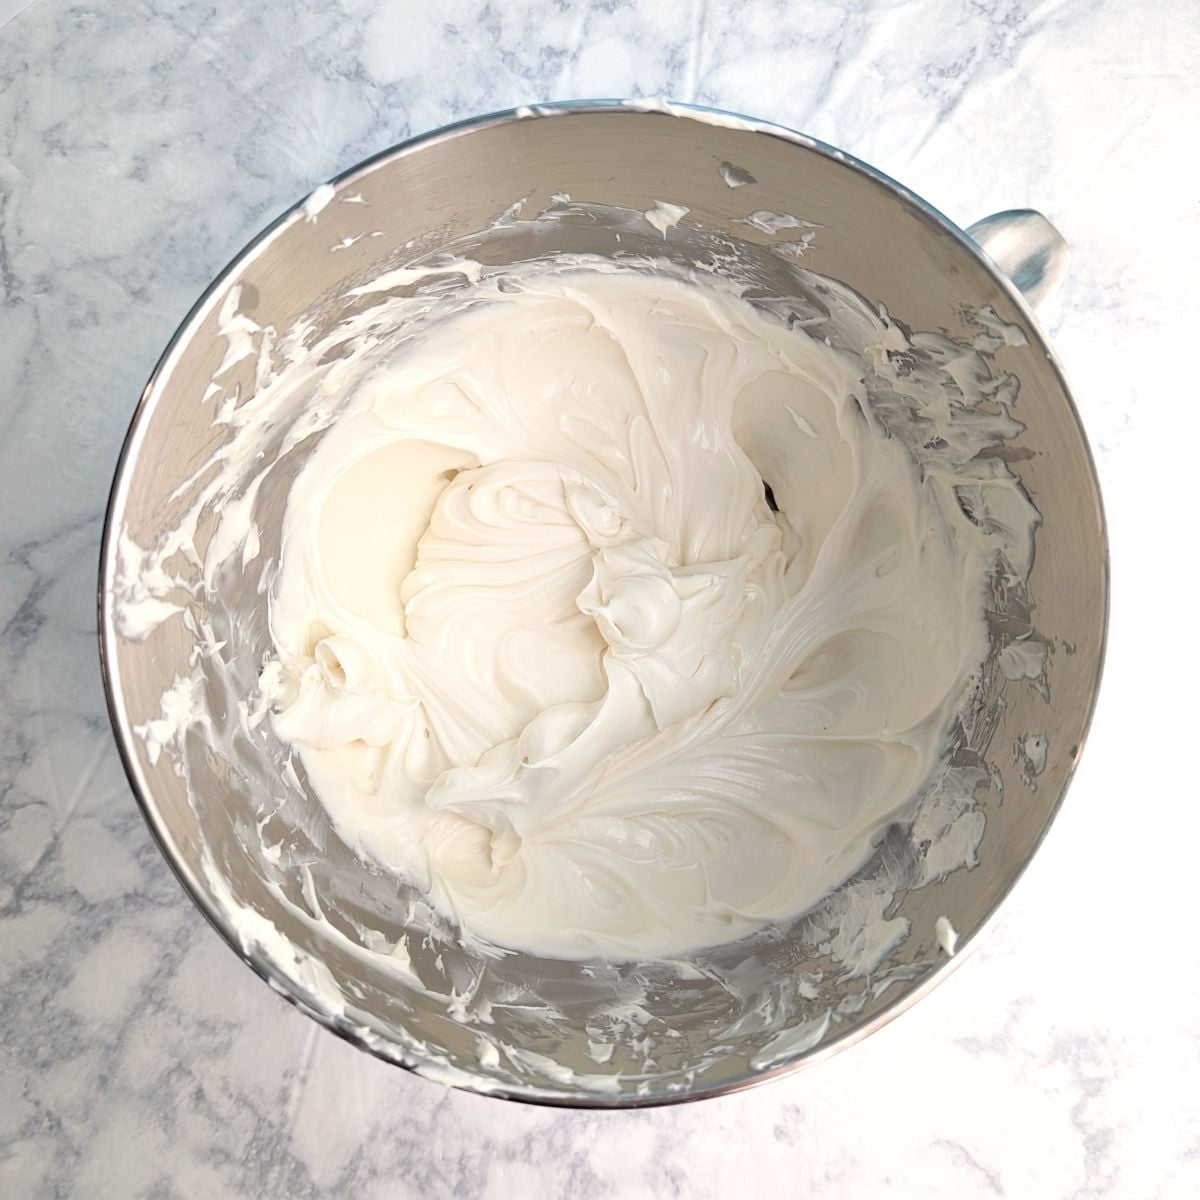
- Scrape down the bowl, then add the sugar and the vanilla. Beat for another 4 minutes on medium speed.

- Scrape down the sides. Add the eggs, one at a time, mixing on low speed for 1 minute after each addition. Scrape down the bowl between each egg. This is another 4 minutes of mixing time.

- Beat in the mix-ins with a rubber spatula or on low speed, until just combined.
Scrape down the bowl at least once during these long mixes; this will help prevent lumps as well.
Don't be tempted to skip out on all this beating. It aerates the batter and improves the texture of the cheesecake, making it very smooth and creamy.
If your brownies or other mix-ins come from the freezer, be sure they're completely thawed and don't have any condensation left on them before adding them. If they're frozen or wet, the cheesecake won't bake evenly.
Bake the Cheesecake
Some pans leak, so place your Springform pan on another baking sheet to keep your oven clean.

- Scrape the batter into the prepared crust. Tap it several times on the counter to help release air bubbles, and set it on a lined baking sheet, and place it on the middle rack.
Add hot water to the preheated metal pan on the bottom rack to create steam that will help prevent cracks.
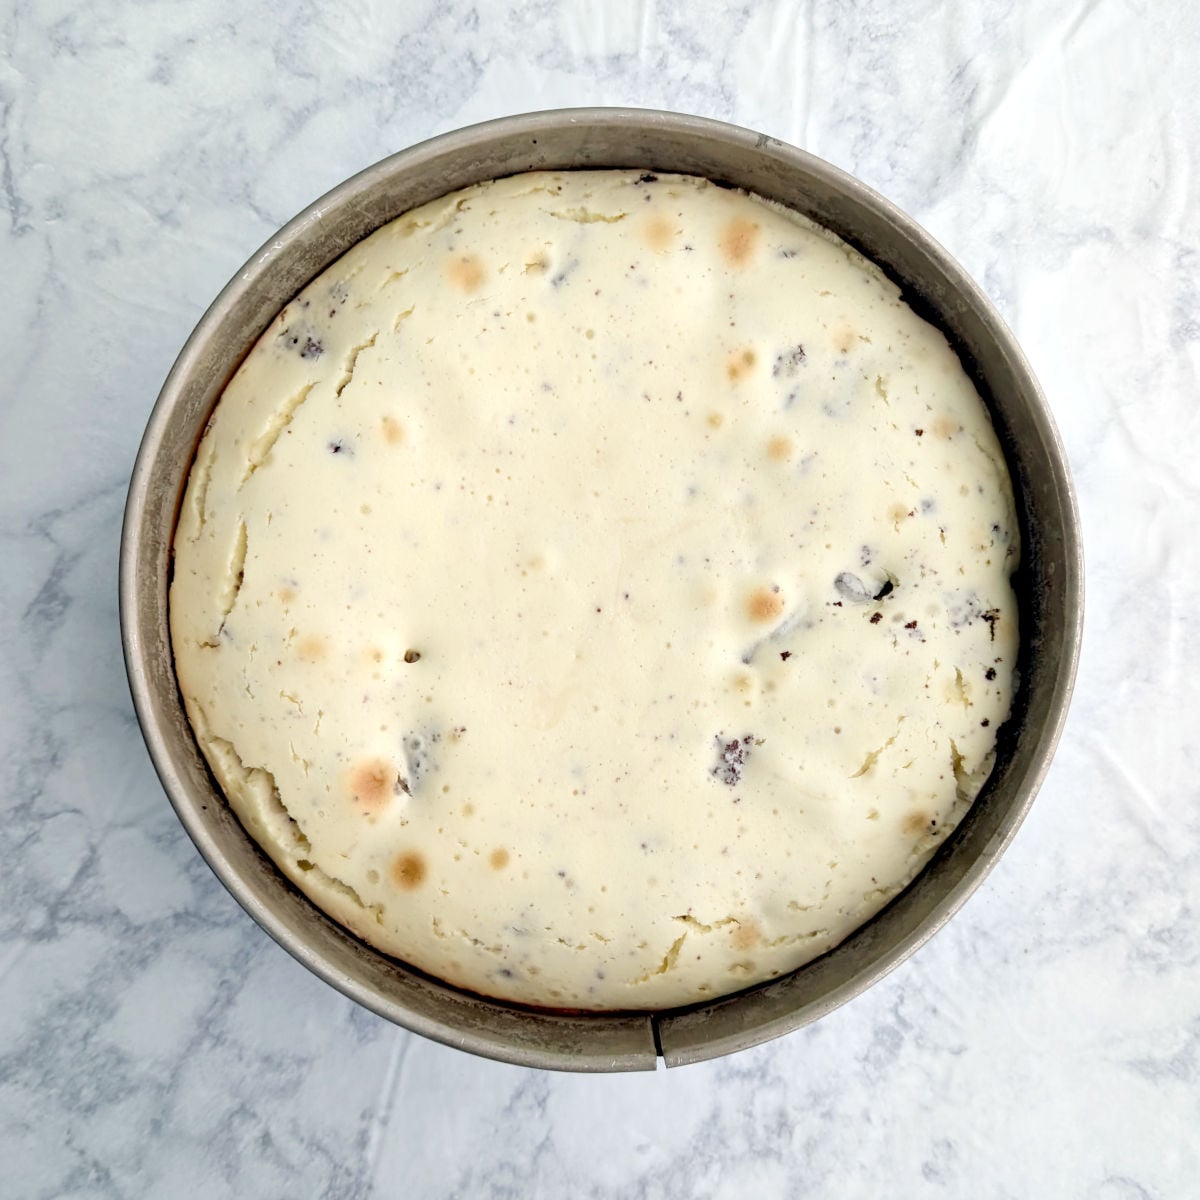
- Bake until the cheesecake is set 2-3 inches from the edge, but still looks wobbly and damp in the center. It's done; it'll continue to set as it cools.
The little cracks that formed along the edges aren't a problem; they'll collapse as it cools.
It's okay if the batter goes above the cookie crust. You've greased the sides of the pan, so it won't stick. Tapping the pan on the counter to release air bubbles from the batter makes for a smoother cheesecake.
Cool the baked cheesecake in the oven with the door propped open for about an hour. Once you can pick the pan up with your hands, move it to the counter for another hour.
After the 2 hours of cooling time, chill the cheesecake for at least 2 hours, until you're ready to make ganache.
Make the Chocolate Ganache
Once your cheesecake is completely cold and set, it's time to make the ganache. Ganache is not just tasty - it hides cracks that may have developed!
Right before you start the ganache, transfer your cheesecake to a serving plate and let set at room temperature just to take the chill off.

- Combine the chocolate and cream in a microwave-safe bowl. Heat in 15 second bursts, stirring after each one, until the chocolate is melted and smooth.
After 1 minute, switch to 10 second bursts to avoid scorching the chocolate, which will ruin it.

- Spread the ganache over the top of the cheesecake. Let set at room temperature before serving, and before refrigerating the cheesecake again.
After the ganache has set, be sure to refrigerate the cheesecake.
Serving and Storage
Storage Tips
Cheesecake will pick up odors, so store in a sealed container in the refrigerator. I once ordered cheesecake from a restaurant display case, and it tasted like garlic. Never again!
Serving Tips
Let the cheesecake rest at room temperature for 15-30 minutes before serving; it tastes better, and the texture becomes creamier. Don't worry about perfect slices - they'll taste great either way. I usually cut with a butter knife but switch to a sharper knife if the crust resists.
Freshness
Cheesecake is at its best in the first couple of days, so that's when I like to share it. We enjoy the leftovers for up to 5 days without issues; the texture firms up a bit after that. Once we've eaten half of the cheesecake, I cut it into slices and put it into smaller, airtight containers.
Freezing Cheesecake
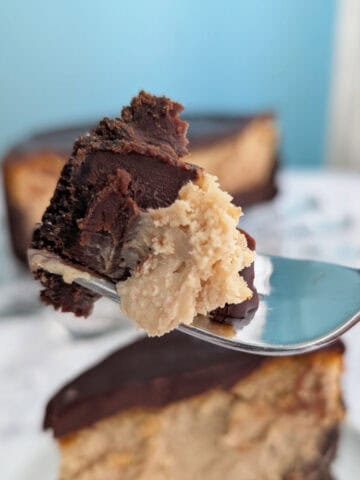
I've never frozen a whole cheesecake, but I have frozen slices of cheesecake like my Chocolate Peanut Butter Cheesecake.
Cut the cheesecake into slices, and wrap in a layer of plastic wrap. Wrap with a second layer of plastic wrap or aluminum foil, followed with a layer of aluminum foil. Store in a freezer bag.
You can freeze a bigger hunk of cheesecake that way too. Just realize that if you freeze an entire half a cheesecake, you need to thaw and then eat an entire half a cheesecake!
Mix-In Variations
If you don't have enough brownies, you can use blondies, other cookies, chocolate chips, graham crackers, or cubes of cake. I often freeze some of my sweets for this purpose!
I experimented with adding marshmallows to the batter for a s'mores version; however, they floated in the batter and browned a lot on top. It didn't work well, so I wouldn't recommend it.
Another trick I love: repurposing candy or baked goods that tasted good but didn't set quite right. Just chop it up and fold it in. I once used pieces of a fudge recipe I tried before I perfected my Easy Homemade Chocolate Fudge, and the result was fantastic!
Preventing Cracks in Cheesecake
Cracks happen, but they don't ruin your cheesecake - and ganache covers them wonderfully! Here's the steps I take to prevent them:
- Mix with care
Beat your cream cheese well before you add eggs; aeration of the cream cheese is what makes the filling smooth and creamy. Don't overbeat the eggs, which creates large air bubbles that burst and form cracks. - Add steam to the oven
Warm a metal pan on the bottom rack and fill it with hot water when you bake the cheesecake. Hot water creates steam quickly, and keeps the oven moist, which makes the dessert cook gently and evenly. Steam is easier than a water bath, and just as effective.

- Bake until barely set
A done cheesecake is set 3 inches from the edge, but the center is still jiggly. This preserves a creamy cheesecake texture since it keeps the eggs in the batter from overcooking. The cheesecake continues to set as it cools. Cracks from overbaking are the worst because they affect the texture, not just the appearance. Resist the urge to bake the cheesecake longer than necessary. - Cool gradually and avoid temperature changes
Avoid opening the oven door while baking. When it's done, turn off the oven and prop open the oven door slightly, such as with a wooden (not plastic or metal) spoon. You should be able to handle the pan with your bare hands by the time you remove it from the oven. Slow cooling prevents sudden temperature changes that lead to cracks.
If you've followed these steps and cracks appear, it's purely cosmetic - rich chocolate ganache hides them completely.
Cheesecake FAQ
Brownie cheesecake is done when the top is set 3 inches from the edges, but the center is still jiggly. The cheesecake will continue to set as it cools, so resist the urge to bake it longer.
I've sometimes used lower-fat Neufchatel cheese to lighten up my Brownie Cheesecake, and it works here since the cheesecake is sharing the spotlight with brownies. Use it if you're used to eating it, but your cheesecake may have more cracks. I cannot recommend using cream cheese spreads, whipped cream cheese, or any kind of cream cheese that has fillers other than what's found in bricks of cream cheese.
A graham cracker crust can be made from any kind of dry crumbly cookie. For the chocolate crust for this Brownie Cheesecake, I prefer chocolate animal crackers over chocolate grahams; they taste better. Regular graham crackers are fine as well. If you use something like Oreos, only use the wafer part; scrape off the filling, as the crust won't bake properly if you include it.
You'll want 2 ½ cups of animal crackers, which will crush down into 1 ½ cups of crumbs. This is 5 ounces by weight, which is how I usually measure.
Heavy cream works the best in ganache. Whipping cream is almost equivalent. Light cream and half-and-half do not have enough fat content to allow ganache to set. If you're in a big pinch, I've used ⅓ cup milk and 1 tablespoon of butter as a substitute for the heavy cream in this brownie cheesecake.
If you don't have the two cups of brownies to mix in to Brownie Cheesecake, you can use blondies, other cookies, chocolate chips, or graham crackers. If you've made candy that tastes good but didn't quite turn out, it works perfectly! I tried adding marshmallows to the batter once for a smores version; however, they floated in the batter and browned a lot on top.
I don't usually have trouble with cheesecake sticking to my pan. When I'm concerned, I run a cake spatula, rubber spatula, or butter knife (only if my pan isn't non-stick) between the cheesecake and the sides of the pan. With a thin, flexible cake spatula, I can usually run the tip between the cheesecake edge and the base; I do another round to get further underneath the cake. Sometimes I serve Brownie Cheesecake directly on the base, as long as the pan isn't non-stick. Otherwise, once the cake is loose most of the way, I use a large, wide cooking spatula to transfer the cheesecake to a pretty serving plate.
Is the ganache lumpy because it's not melted enough, or is it because it's overheated?
If there's still a few lumps in your ganache, you may be able to press them out against the sides of the saucepan. You can also put the mixture back on low heat and stir constantly to try to get rid of larger lumps. However, DO NOT overheat. Overheated chocolate will also be lumpy, and you cannot salvage it. You should be able to touch ganache with your finger without burning yourself. If it's too hot for your skin, it's too hot for chocolate.
Absolutely! Slice the cheesecake, place on a sheet of waxed or parchment paper, and fold the paper up the sides of the cheesecake. This protects them from air and keeps the slices from sticking together. Once it's frozen, store in a freezer bag after you squeeze the air out of it. Thaw slices in the refrigerator.
Cracks can happen if you overmix cheesecake batter or if you overbake it. Ones from overmixing are usually cosmetic issue and don't affect texture, while cracks from overbaking do affect the texture and should be avoided. To prevent cracks, be sure to check the cheesecake at the shorter baking time listed and rely on visual cues for doneness. Even if a small crack appears, it'll still taste delicious.
For step-by-step tips, see the full "Preventing Cracks in Cheesecake" section above.
Other Creamy Desserts
I hope this becomes a recipe you'll return to. If you try it, a star rating below helps others find it - and I'd love to hear how yours turns out in the comments! 💕 Questions or trouble? Drop a note, and I'll do my best to help.
📖 Recipe

Brownie Cheesecake
Equipment
- 9-inch springform pan (affiliate link)
- electric handheld mixer or stand mixer
Ingredients
Chocolate Crust
- 1 ½ cups graham cracker or chocolate animal cracker crumbs (5 ounces; from 2 ½ cups of chocolate animal crackers)
- 5 tablespoons butter (70 grams; melted)
- 3 tablespoons sugar (45 grams)
- ⅛ teaspoon table salt
Cheesecake Filling
- 24 ounces cream cheese (3 packages, completely at room temperature)
- 1 cup sugar (200 grams)
- 1 teaspoon vanilla (5 grams)
- 4 eggs (200 grams)
- 2 cups brownie cubes (completely thawed, if previously frozen)
Ganache
- ¾ cups chocolate chips or chopped chocolate (4.5 ounces/130 grams)
- 4.5 tablespoons heavy cream (2.25 ounces/68 grams)
Instructions
Chocolate Crust
- Grind animal crackers until fine in food processor if you haven't already. Add melted butter, sugar, and salt and process until well combined. (You can also mix this together in a bowl if you already have crumbs.)
- Gently pat along the bottom and press 1 inch up the sides of a greased 9- or 9.5-inch Springform pan with 3-inch sides. The height doesn't need to be perfect. Bake for 8-10 minutes at 350F. Set aside briefly while you make the batter.
- While you make the batter, place a metal pan on the bottom rack of your preheated oven, and heat about 1 cup of water on the stove.
Cheesecake Filling
- Beat (your completely softened) cream cheese with an electric or stand mixer at medium speed for about 4 minutes. Don't skimp! You need proper aeration.
- Scrape down the bowl, and add sugar and vanilla. Beat at medium speed for another full 4 minutes.
- Scrape down the bowl again. Add eggs on low speed, 1 at a time, scraping down the bowl and beating for 1 minute per egg each time - so, another 4 minutes.
- Gently fold in brownie bites with a rubber spatula. (You can also do this with your stand mixer, briefly on low speed.)
- Pour batter into the crust. Tap the pan on the counter several times to release air bubbles from the batter. Place pan on top of another baking sheet (to minimize drips from the seams of your pan).
- Place your cheesecake and baking sheet on the oven's middle rack. Pour preheated water from your pot or teapot into the preheated metal pan on the oven's bottom rack, being very careful to avoid letting water drip onto the oven door's glass (which would crack). Also, don't burn yourself!
- Bake the cheesecake at 350F for 45 minutes, until the cake is set 2-3 inches from the edge but still wobbly and damp looking in the center. It will keep cooking as it cools. Do not overbake.
- Cool in the oven with the door propped open with a wooden (not metal or plastic) spoon. Remove it after 1 hour, when you can remove it with your bare hands.
- Cool at room temperature for another hour. After these two hours of cooling time, refrigerate for at least 2 hours before making the ganache.
Ganache
- Remove the completely chilled cheesecake from the fridge while you make the ganache.
- Place chocolate and cream in a microwave safe bowl. Microwave in 15-second bursts, stirring after each one, until chocolate is melted and smooth. At 1 minute, switch to 10-second bursts.
- Spread over cheesecake. Let ganache set for 30 minutes before serving or refrigerating.
Serving and Storage
- Remove from refrigerator 15 minutes before serving. Store leftovers tightly sealed in the fridge, since cheesecake absorbs flavors.
- Cheesecake is best in the first few days after it's made, but is still good up to 5 days later. After that, the taste is still good, but the texture firms up and changes.
Notes
Nutrition
[Originally posted October 2, 2017, and overhauled in November 2021. Restructured and clarified November 18, 2025]
Leona Konkel says
I really do love this cheesecake - it's so straightforward to make! It really does turn out crack-free every time. Let me know how it turns out!