
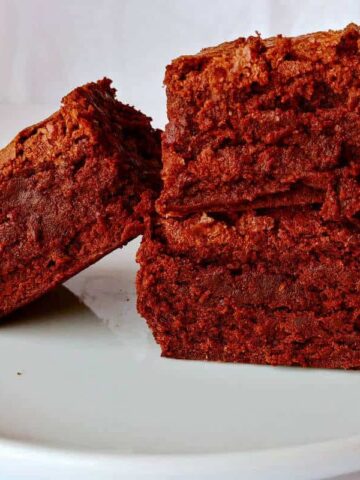
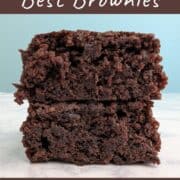
My go-to brownie recipe for the last 25+ years has been Hershey's Best Brownies. They're delicious, dependable, versatile, and super-easy to make!
I love so many things about the recipe. It's cocoa-based, so no melting chocolate, which I hate doing. The brownies take only 10 minutes to prep - the same length of time my oven preheats. The only perishable ingredients it takes are eggs and butter, which you probably already have in your refrigerator - and if you don't have butter, you can use vegetable oil instead.

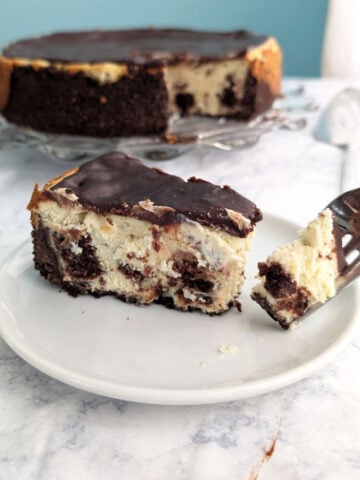
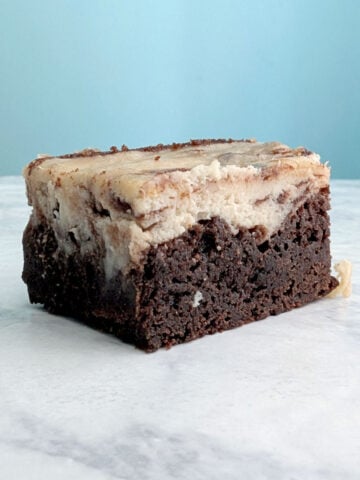
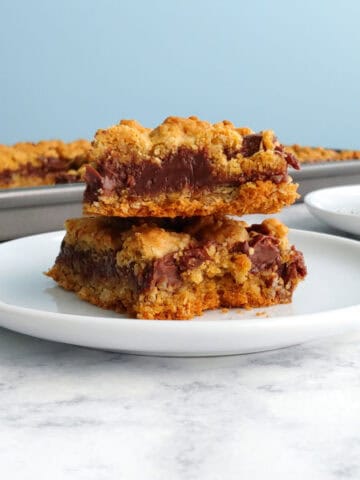
These brownies are a crowd-pleaser and incredibly versatile. They're wonderful warm from the pan, but they're also a great canvas for any kind of toppings or mix-ins you'd like to add. I used this recipe as the base for my Cheesecake Brownies recipe and S'mores Brownies recipe, too!
I hope you enjoy them as much as we do!
[This post contains affiliate links. I may make a commission for purchases made through links on this post. As an Amazon Associate, I earn from qualifying purchases.]
Jump to:
Why these are my go-to brownies
I love how versatile these brownies are. They're great with M&Ms, peanut butter chips, or candy that just hasn't quite turned out 😆 They are the Goldilocks of brownies: chocolately but not too rich, not too thick or too thin.
Seriously, everyone loves them. I used them several years ago in a blind brownie recipe taste test with my friends, comparing them to Alice Medrich's Best Cocoa Brownies and Alton Brown's Brownies. Hershey's Best Brownies performed well - sweet but chocolately, rich and moist, fudgy - a classic brownie recipe.
These brownies don't take any special ingredients, and I make them as a one-bowl recipe. We enjoy these brownies warm from the pan, when they don't quite hold together. They're great in a sundae, and as a mix-in for Brownie Cheesecake.
I've made the recipe often enough that I've memorized it. These brownies are the first thing I bake to test my oven whenever I move, because I know exactly how they'll turn out. I taught my husband to make them on his own.
I started making these as a teenager; we found it on the back of a canister of Hershey's cocoa (affiliate link) powder. We specifically tried it because it used cocoa powder, and it made a 9x13-inch pan of brownies - an 8 inch pan wasn't big enough! I'm glad we kept the wrapper, because I haven't seen it on a package in years. And I apparently took the wrapper with me to college, because my mom ended up asking me for a good recipe because she didn't have one!
Hershey's is in the name, but they haven't sponsored this post at all. I just love this recipe, and have for a long time. Besides which, I often make these brownies with any brand cocoa powder I have. And cocoa powder lasts a while; I know, because I once had 18 pounds of cocoa powder in my basement.
Ingredients
There's only 8 ingredients in this brownie recipe:

- Flour
- Cocoa powder
- Sugar
- Butter
- Eggs
- Vanilla extract
- Baking powder and table salt
I use all-purpose flour. A cup-for-cup gluten-free flour blend with xanthan gum included may work; if you try it, beat your eggs a little longer.
This recipe takes unsweetened cocoa powder, which I love because I hate melting chocolate. It's Hershey's brownie recipe, but I happen to have a different cocoa powder in my house.
Sugar, of course, provides sweetness and moisture. Vanilla extract rounds out the flavor. Eggs bind the brownies together.
Butter provides moisture and flavor. You can substitute vegetable oil, which makes for a denser brownie, but it lacks in flavor for me. I use unsalted butter. If you use salted butter (or margarine), omit the salt.
Finally, baking powder gives the brownies a little lift so they're not too dense. Salt rounds out the flavor.
Instructions
Making cocoa-based brownies is super easy!
First, prep your pan. If you want to remove the brownies from the pan, line it with parchment rather than greasing it. I usually store brownies in the pan and so only grease it, but it does mean I have to use a fork or scoop to remove each brownie; they won't just lift out.
To make the batter, you'll start by melting the butter on the stove or in the microwave. I usually microwave the butter for 30 seconds twice, so that it doesn't overheat and pop, making a mess. Once it's partially melted, microwave in 15 second bursts until it's almost completely melted.
If you melt the butter in the same bowl or pan you make the brownie batter in, be sure it's not so hot that you cook the eggs when you add them.

- Stir the sugar and vanilla into the melted butter, and then whisk in the eggs one at a time, mixing only just until combined. Everything will look mixed together, and you won't have streaks of egg.
Don't beat the eggs too much; you don't want it foamy. The more you beat the eggs, the more cakey the brownies will be. I don't want cakey brownies.

- Optionally, sift together the dry ingredients before adding them to the wet ingredients. (I usually just swirl them together on the surface of the wet ingredients before mixing them in.) Then, use a rubber spatula to fold the dry ingredients into the wet, stirring only until everything is mixed together. Break up any lumps.

- Scrape the batter into a well-greased or parchment-lined 9x13 inch pan. If you find any lumps of dry ingredients in your batter, break them up while you pour the batter in. Lumps will not break up while baking.

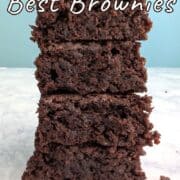
- Bake for 25-35 minutes. Brownies are best when underdone, so check early, especially if your oven runs hot. A toothpick inserted into the center of the brownies should come out with lots of moist crumbs. Also, the brownie edges will just begin to pull away from the pan.
Cool for at least an hour before cutting into the brownies to eat them. They will still be super soft at that point, and may break apart. If you're removing the brownies from the pan, I recommend waiting at least 2 hours before lifting the parchment from the pan and cutting them into squares.
Hint: I like tender brownies, not cakey brownies, so don't overmix the batter. I beat the eggs only enough to bind the batter together. Mixing too much after adding the flour can also cause more gluten development, which can make your brownies chewier, which isn't the texture you want here.
Substitutions
Gluten-free: You can attempt a gluten-free version of these brownies by substituting a cup-for-cup, gluten-free flour blend that includes xanthan gum as a thickener.
Dairy-free: You can substitute vegetable oil for the melted butter. Whisk all the wet ingredients together, then proceed. Brownies made with oil will be more dense, and I notice that they have a slightly different flavor.
So far, I have not been able to adequately substitute anything for the eggs in these brownies.
The thing I love about these brownies, though, is that they're a perfect canvas for mix-ins. We add M&Ms to them, or top them with chocolate chips. One time I topped them before baking with some Homemade Sesame Brittle that I overcooked. I recommend adding candy to the top immediately before baking, rather than mixing it in.

Equipment
You can melt butter on the stove or in the microwave, if you have a microwave-safe bowl. I have an 8 cup glass measuring cup (affiliate link) that I use so this becomes a one-bowl recipe, but I have to be careful scraping up batter from the bottom due to its steeper sides.
A wire whisk (affiliate link) does a great job at mixing together the sugar and butter, and breaking up the eggs. However, I switch to a rubber spatula when I add the dry ingredients because the batter becomes so thick.
I bake brownies in an aluminum 9x13-inch pan (affiliate link) that I love, that includes a lid which makes it ideal for storage. A dark or glass pan will bake more quickly, particularly along the edges; follow the manufacturer's baking recommendations for temperature and time adjustments. If using those, or a non-stick pan, I recommend lining the pan with parchment paper and removing the brownies from the pan before storing them.
Storage
Store brownies, covered, at room temperature for 4-7 days, depending on your weather and humidity. They're optimal up to Day 4, but are still decently good at Day 7. They stay best if you cut them as you eat them; otherwise, brownie edges dry out slightly.
I usually store them in the same pan I baked them in, since it has a lid. Since I don't remove them from the pan, I cut rows of brownies as I go.
To reheat a brownie (say, for a sundae!), microwave it for 5-8 seconds. Don't overheat.
Sometimes, we somehow don't eat all the brownies quickly enough. I usually freeze them to turn into Brownie Cheesecake! Wrap the brownies, either already cut into squares or in larger pieces, in an airtight layer of aluminum foil. Cover that with a layer of plastic wrap, and stick in a freezer bag. Frozen brownies also work well for sundaes.
Top Tip
The key to brownies is to underbake them! Check the brownies early for doneness, particularly if you don't bake often or your oven runs hot. The top will look dry, and the edges will just start to pull away from the sides of the pan, but the most important way to tell is with a toothpick test.
The toothpick test: Stick a toothpick into the center; it should come out with lots of moist crumbs on it. If there's batter, bake for another minute or two and test again. If there's only a couple of crumbs, remove immediately!
FAQ
I prefer using melted butter in brownies instead of oil, because the melted butter provides flavor. Sugar also dissolves into butter since butter has water content; oil does not. However, using vegetable oil instead of butter does make the brownies dairy-free! (Most margarine is not dairy-free.) In my experience, brownies made with oil instead of butter are usually more dense. When I make this recipe with oil, I usually add toppings or mix-ins to add flavor that butter usually provides.
I do not recall if I've tried these brownies with gluten-free flour, but I think they would likely work since the brownies don't depend on gluten development for texture. I would try a cup-for-cup, gluten-free flour blend that includes xanthan gum as a binder in place of the flour.
If you just want to make the brownies wheat-free, I have used rye flour in them. Those brownies were a little more fragile, and had a chewier texture, likely because my rye flour was whole-grain.
I've tried to substitute other things for eggs in these brownies, but so far I haven't had any success. I'd recommending searching for a vegan brownie recipe if you need an egg-free option.
I'm hoping my walkthrough kept you from having overbaked brownies. However, if they still ended up overdone, you have options!
🍰 Freeze them to use for Brownie Cheesecake.
🔥 Heat them for 5-8 seconds before eating, because heating baked goods usually makes them more moist.
🍨 Use them for a base of an ice cream sundae.
🍫 Turn them into a trifle, or see how they would work as part of a Chocolate Espresso Tiramisu.
😍 Crumble them and mix them with frosting to turn into cake pops.
🍫 More brownies
Although Hershey's Best Brownies is my go-to brownie recipe, I have other brownie-related recipes I love!

Interested in other recipes? I save and share recipes I like or want to try on my Pinterest page - follow me there! You can also check out my Facebook page for more recipes and helpful tips. I'm also happy to try to help troubleshoot my recipes there.
Have you tried this recipe? Or have a question about it? Rate it or leave a comment below! (PS: rating my recipes helps other people find them, too!)
📖 Recipe

Hershey's Best Brownies
Ingredients
- 16 tablespoons unsalted butter (227 grams/2 sticks)
- 2 cups sugar (400 grams)
- 2 teaspoon vanilla (10 grams)
- 4 eggs
- 1 cup all-purpose flour (120 grams)
- ¾ cup cocoa powder (60 grams)
- ½ teaspoon baking powder
- ¼ teaspoon table salt
Instructions
- Line a 9x13-inch baking pan with parchment, or grease very well. Set aside. Preheat your oven to 350F.
- Melt butter. Stir in sugar and vanilla extract, and stir until well combined. Check to be sure your bowl isn't too hot, or it will cook the eggs as you add them.
- Use a whisk to add the eggs one at a time, mixing until just combined. Be sure there's no streaks of egg in the mixture, but don't overmix or you'll have cakey brownies.
- Add flour, cocoa powder, baking powder, and salt. Use a rubber spatula to fold the dry ingredients in. Mix only until just combined, but do break up lumps if you find them.
- Scrape the batter into the prepared pan, breaking up any lumps you may find as you pour.
- Bake at 350F for 27-35 minutes. Check early if your oven runs hot. Brownies are best when they're underdone.
- Insert a toothpick into the center; it should have moist crumbs clinging to it. If it has batter, bake another minute or two, then check again. Brownies will no longer look wet on top, and they'll begin to pull away from the sides of pan.
- Cool brownies at least 1 hour before cutting into them to eat them out of the pan; they will still be very fragile at that point. Wait at least 2 hours before removing them from the pan.
- Store brownies, covered, at room temperature. They'll be optimal for about 4 days, and still tasty enough for up to 7.
Notes
Nutrition
[Originally written in 2010 and redone in March 2018. Rewritten and clarified in May 2025.]


Suzanne Middleton says
I have made these twice and both times they were perfect.
I have to spread the batter around the pan. I baked 27 minutes and the toothpick came out clean. Cutting was super easy; now I know why I had problems cutting brownies - I never let them cool completely.
The first time I used the parchment paper and while they were very good I did not like having the paper there.
Next I will try the ones with the chocolate chips. I have made those before but it has been a long time.
This is a very easy recipe for anyone who is new to baking or, like me, has not done it for a long time.
Leona Konkel says
Thank you so much for commenting. I'm so glad you liked them!
Teresa Wood says
I was happy to see this recipe. It is the same recipe that I have been making for decades. I first found the recipe in a magazine back in the late 1960's. I was advertising Hershey's cocoa. I still have the magazine page that I tore out. I have never put anything on them I have put nuts in it. Now I want to put chocolate chips in it but I don't know how much to put in. Can you tell me how much to put into the batter?
Leona Konkel says
I think I add around 1 cup of M&Ms to the top when I use them, so I'd try 1 cup of chocolate chips. You could use up to 2 cups, as I do in a different brownie recipe, but it would be more decadent. I'd love to hear what you try and how they turn out!
Vanessa Perry says
These were a huge hit! They we’re moist and just the right amount of chocolate. My family ate the whole batch in one sitting. It was easy enough for my small children to help. Thank you for the recipe!
Leona Konkel says
I'm so glad that they turned out and that you enjoyed them!
Vanessa Perry says
When do you add the M&Ms?
Leona Konkel says
With these, I sprinkled them on right before I put the pan in the oven. Sometimes the candy sinks in while the brownies bake, so I check about halfway through baking time and sprinkle them on top if I want them visible as decoration.