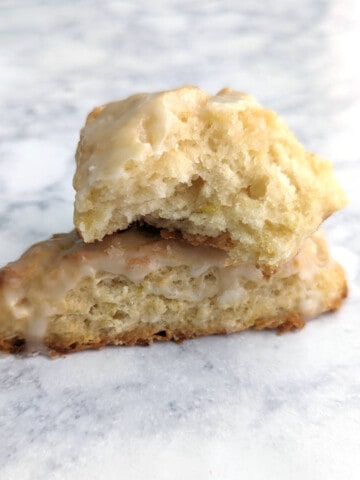
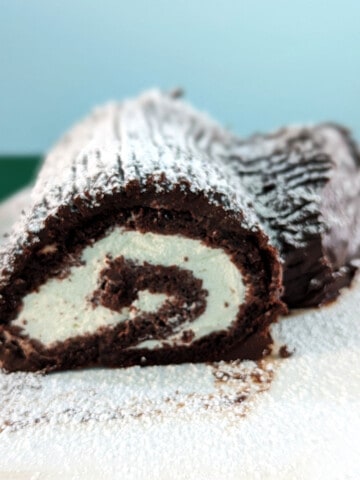
Wednesday was my final day at home before starting my new job. (Yay!) Since I'll have less time to cook and blog now (as evidenced by the fact that it took three days to get this post written), I wanted to make to make the Heavenly Chocolate Cake Roll to celebrate. Although not a time-consuming cake to make, it is a technique-intensive cake. This cake is flour-free, and gets its structure from egg whites. It takes a not-overwhelming amount of chocolate, and a similarly reasonable amount of whipping cream. And 6 eggs.
There are two tricky parts to making this cake. The first is separating and successfully whipping egg whites, which still makes me a little nervous. (Folding them into the chocolate is tricksy too, I guess.) The second is rolling the cake without breaking it. I can say that I succeeded at perfectly whipping egg whites, but my cake did break some as I tried to assemble it. Luckily, as long as a cake tastes good (as this one did), I forgive it its appearance.

Making the cake only took a few steps. The first thing I did was separate the 6 eggs, and let them come to room temperature. [Egg whites need to be at room temperature to be whipped properly.] Once they were ready, I melted 1 cup chocolate chips with 3 tablespoons water in the microwave. I let the chocolate cool a little so it wouldn't cook the egg yolks once I combined them.
Next, I lined a jelly roll pan (affiliate link) with parchment. I hate lining with parchment paper and so I generally avoid it, but I wanted my cake to be easy to remove from the pan, so it was necessary. I cut strips as necessary to fit into gaps, and I must say that spraying the pan with oil before applying parchment really helped it to stay in place. Make sure your pan is the right size as specified in the recipe (10x15 inch); too big and the batter will bake too quickly, and if you use a smaller pan, it won't all fit.
Once my pan was ready, my eggs were room temperature, and my chocolate was cooled, it was time to actually make a cake. I whipped the egg yolks with ⅔ cup sugar in my stand mixer, trying to get them to lighten. Then I added the cooled chocolate to the egg yolk mixture.
I used my hand mixer (affiliate link) to whip the egg whites with a little salt (¼ tsp) in a metal bowl. You want them to form stiff peaks. I've found whipping egg whites to be intimidating in the past. If you don't beat enough air into them then your cake could deflate, but if you overbeat them, your cake can be dry. I've overbeaten them before, which helps me determine now when they are done. Basically, you remove your beaters from the egg whites, turn it over, and the egg white peaks should not flop over. If they do, beat a little more. [Check out this slideshow if you want a little more guidance; seeing it is really the only way to know how they should be.]
I stirred ¼ of my egg white mixture into the chocolate mixture to lighten it. The important part for this first addition of egg whites is to completely mix the chocolate into egg whites. Don't worry about deflating egg whites yet; worrying about deflation is what you do when you add the rest. Fold the remaining egg whites into the chocolate in 3 additions. You basically use a spatula to drape the chocolate from underneath and alongside the egg whites on top of the egg whites without deflating them. (At least, that's the best I can describe it without pictures or video.)
I carefully poured and spread the batter in the pan, then baked it at 350F for 15 minutes. My oven was actually a little below temperature according to my oven thermometer, and I checked it a few times as the cake baked.
Once the cake was done (toothpick comes out clean), I removed it from the oven and covered it with a damp towel. After cooling it for 10 minutes, I rubbed some cocoa powder along the top of my cake. I placed my pastry cloth over the top and inverted the cake onto my largest baking sheet to remove it from the pan; this was easy because the edges of the cake had shrank back. I peeled away and threw out the parchment and rubbed cocoa on that surface as well. Using the towel, I rolled the cake up (perhaps too tightly?) and let it cool.
At dinner time, 5 hours later, I combined heavy cream (1 cup) with powdered sugar (2 tbsp) and vanilla (½ tsp) and beat it with my hand mixer (affiliate link) until it was whipped cream. This part was easy - just make sure you don't whip the cream into butter. I unrolled the cake, perhaps not carefully enough, because it developed great cracks at this point. Undeterred, I spread the whipped cream along the cake and rolled it back up. The cake retained its rolled shape, and honestly didn't look too badly, considering it developed cracks down its length.

I'm not sure why my cake broke because I thought I had followed the instructions. I'm thinking I may have rolled it too tightly, or unrolled it too quickly. It may not look perfect, it tasted great! This was a very light cake with a rich chocolate flavor. Alex was surprised that there was no flour in it, and no cocoa powder in the cake, either - no kind of starch that one would expect to use to build and structure a cake. The cake itself was tender and moist, even without the whipped cream. It was chocolately, but not overly sweet. This cake had a nice balance between cake and whipped cream.
Overall, this was a great, delicious cake. My cake was very presentable even broken, and the texture and flavor were excellent. It's definitely a recipe worth trying again.
Leave a Reply