
I've shared numerous pies with you, but never the recipe for the pie crust I always use. But no longer. You, too, can enjoy this all-butter, homemade pie crust!
Pie crust seems intimidating, but don't worry - I'll walk you through it.

For the longest time, I only viewed pie crust as a container for fillings. Only recently, as an adult, have I started to enjoy eating it. A good crust recipe makes a difference!
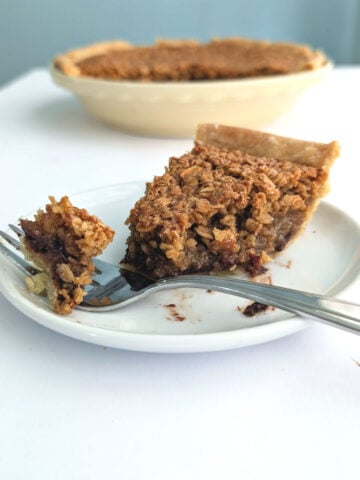
Fall is prime pie season, is it not? If you're going to make a special pie for Thanksgiving (or Christmas, as I always do!), you may as well make the crust worthwhile as well.
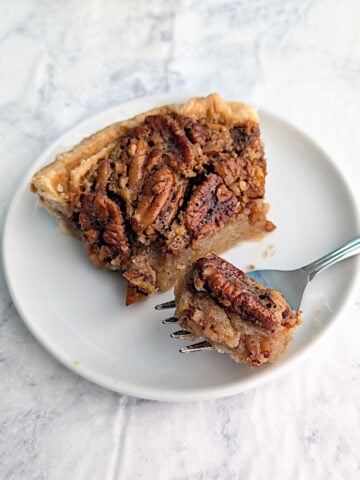
I always use this crust for my November pecan pie, as well as every other pie I make. You should try it too! I promise, you won't be disappointed.
[This post contains affiliate links. I may make a commission for purchases made through links on this post. As an Amazon Associate, I earn from qualifying purchases.]
Jump to:
Ingredients
A good pie crust is part ingredients, and part technique.
You only need 4 ingredients:
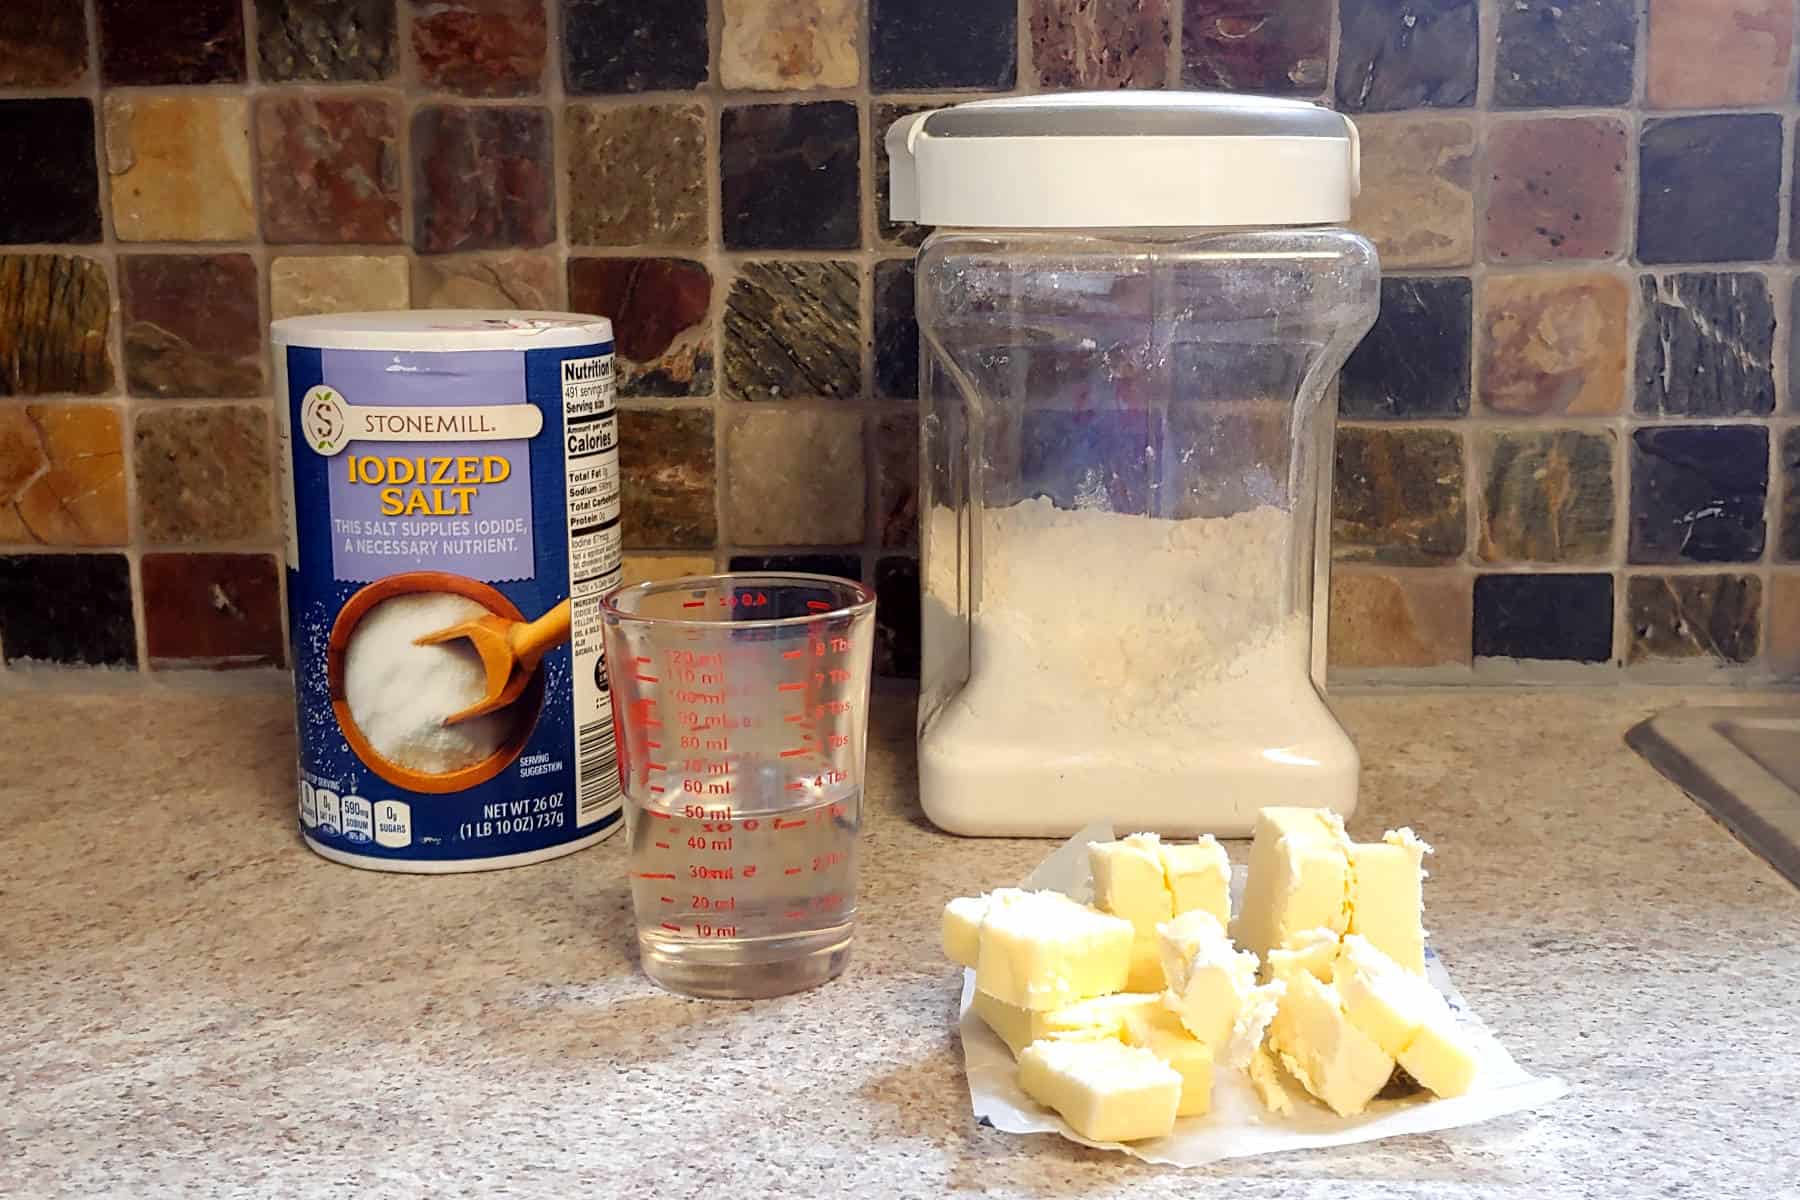
- all-purpose flour
- salt
- cold, unsalted butter
- ice-cold water
I use all-purpose flour. Cake flour would be too delicate; bread flour, too gluten-forming. Whole wheat flour would be gritty. You're making a treat. Use all-purpose flour. I can't recommend anything other than wheat flour in this recipe.
I use table salt, but any fine-grained salt will work.
Using ice-cold water inhibits gluten formation and helps keep the butter cold, making for a better-textured crust. I say ice cold, but I don't usually bother with ice. You just want it as cold as possible.
Use unsalted butter, since this will allow you to control the amount of salt that goes in your crust. If you only have salted butter, omit the salt.
You want your butter cold, so that it will cut into small but irregular pieces, and not melt too quickly.
How to Make Pie Crust Dough
You've gathered your ingredients. Time to get started!
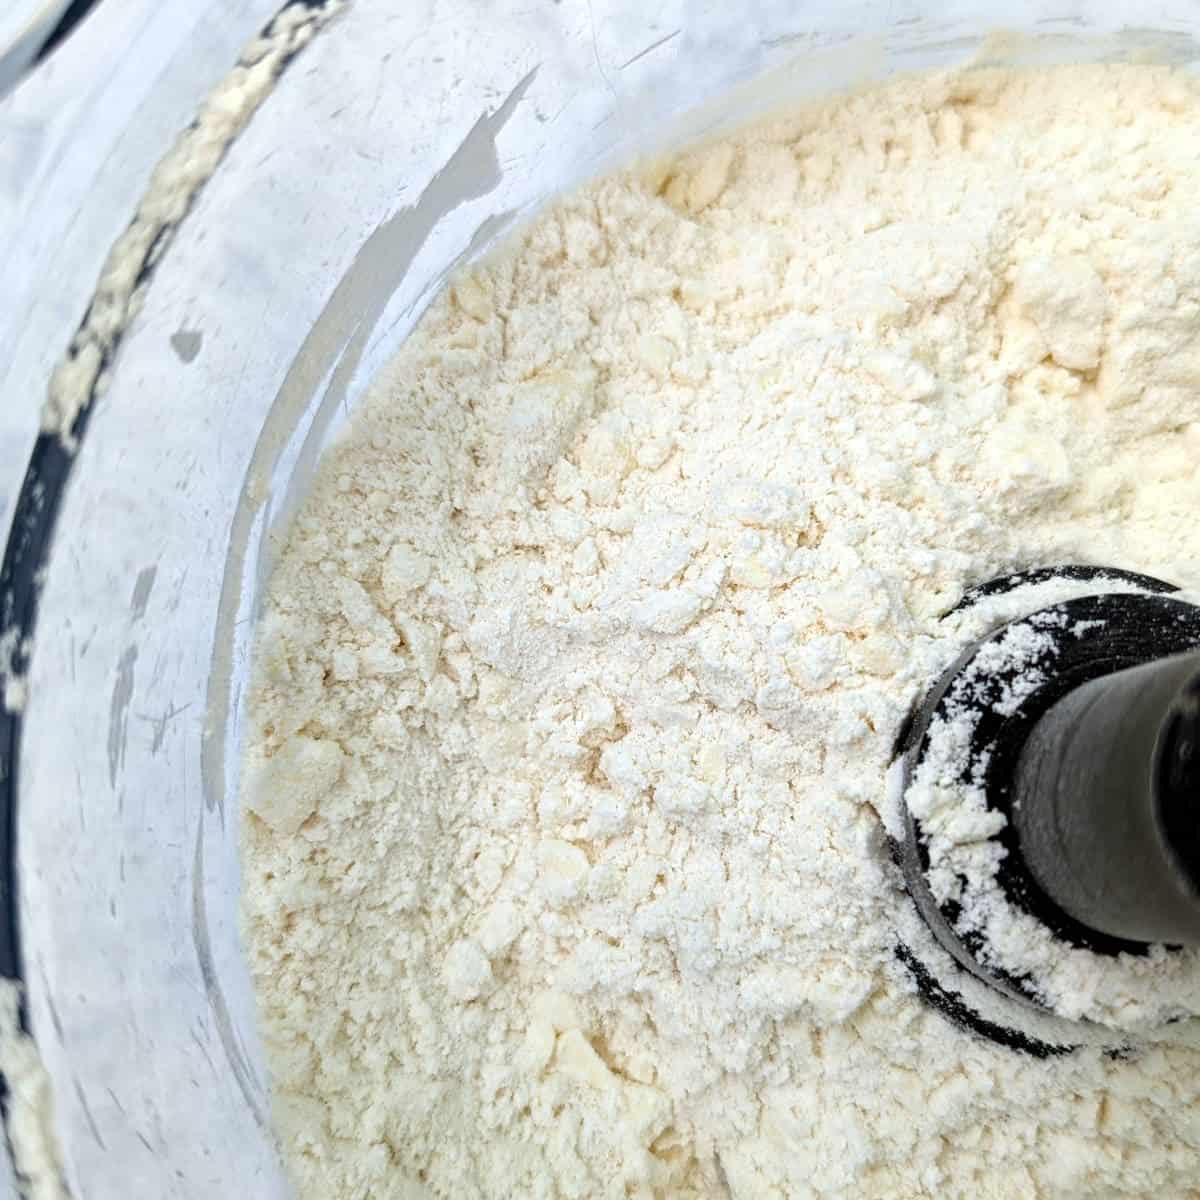
Pulse flour and salt briefly in the bowl of a food processor. Cut the butter into chunks, and add to the flour. Pulse (short bursts) until small but visible crumbs form.
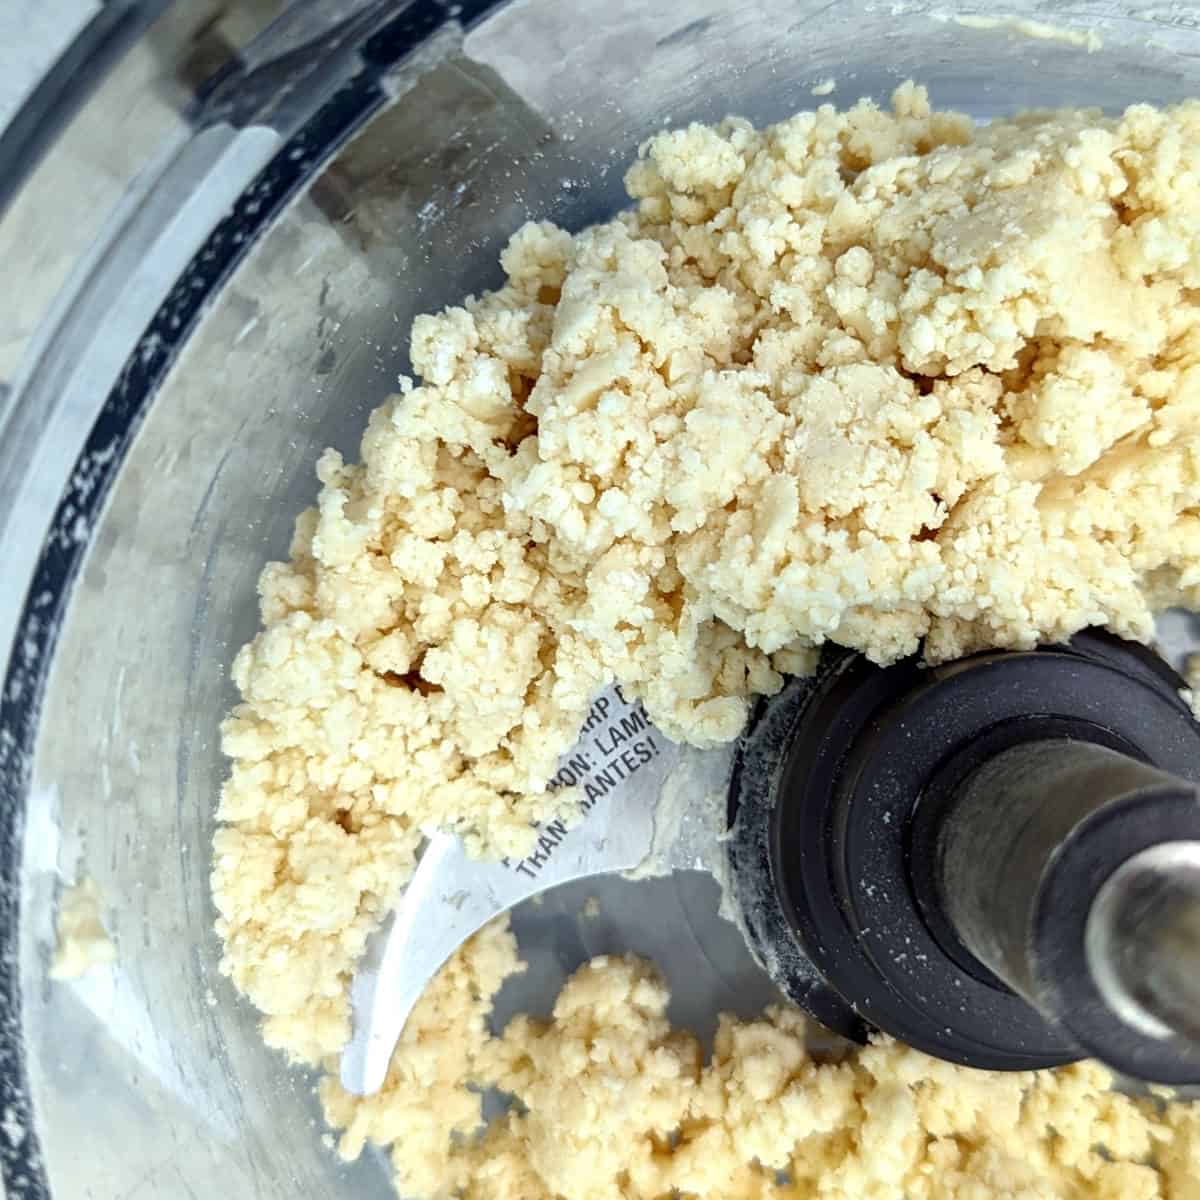
With the food processor running, drizzle in the water until clumps of dough form. Don't overprocess it.
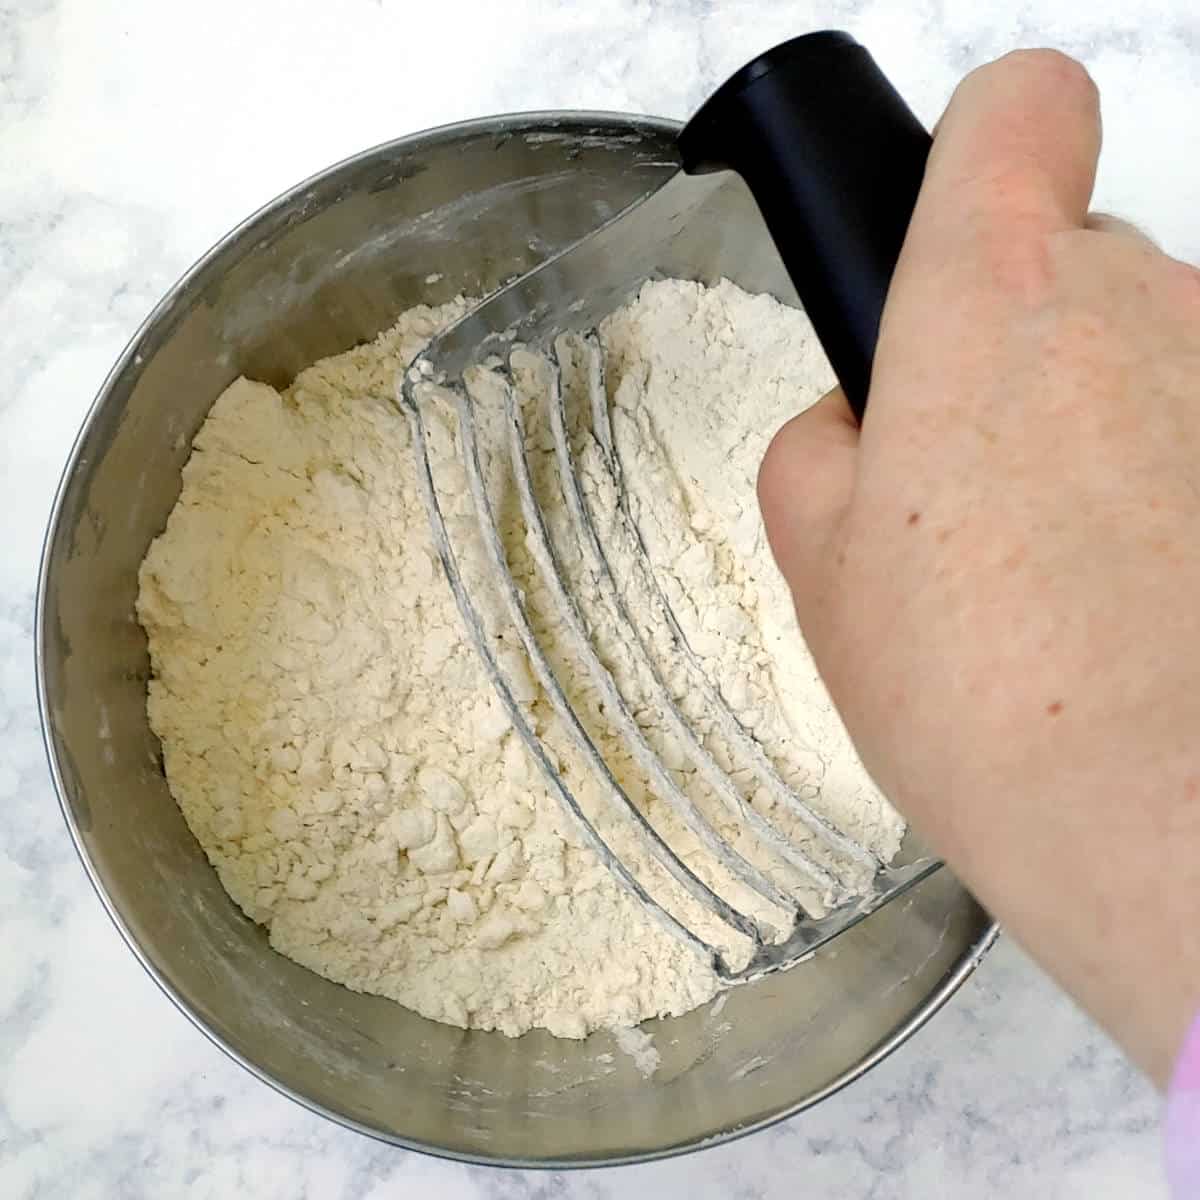
If mixing by hand, use a pastry cutter (affiliate link) (or two knives, crossed) to cut the butter into the flour. Continue until your largest crumbs are no larger than peas, but most are smaller.
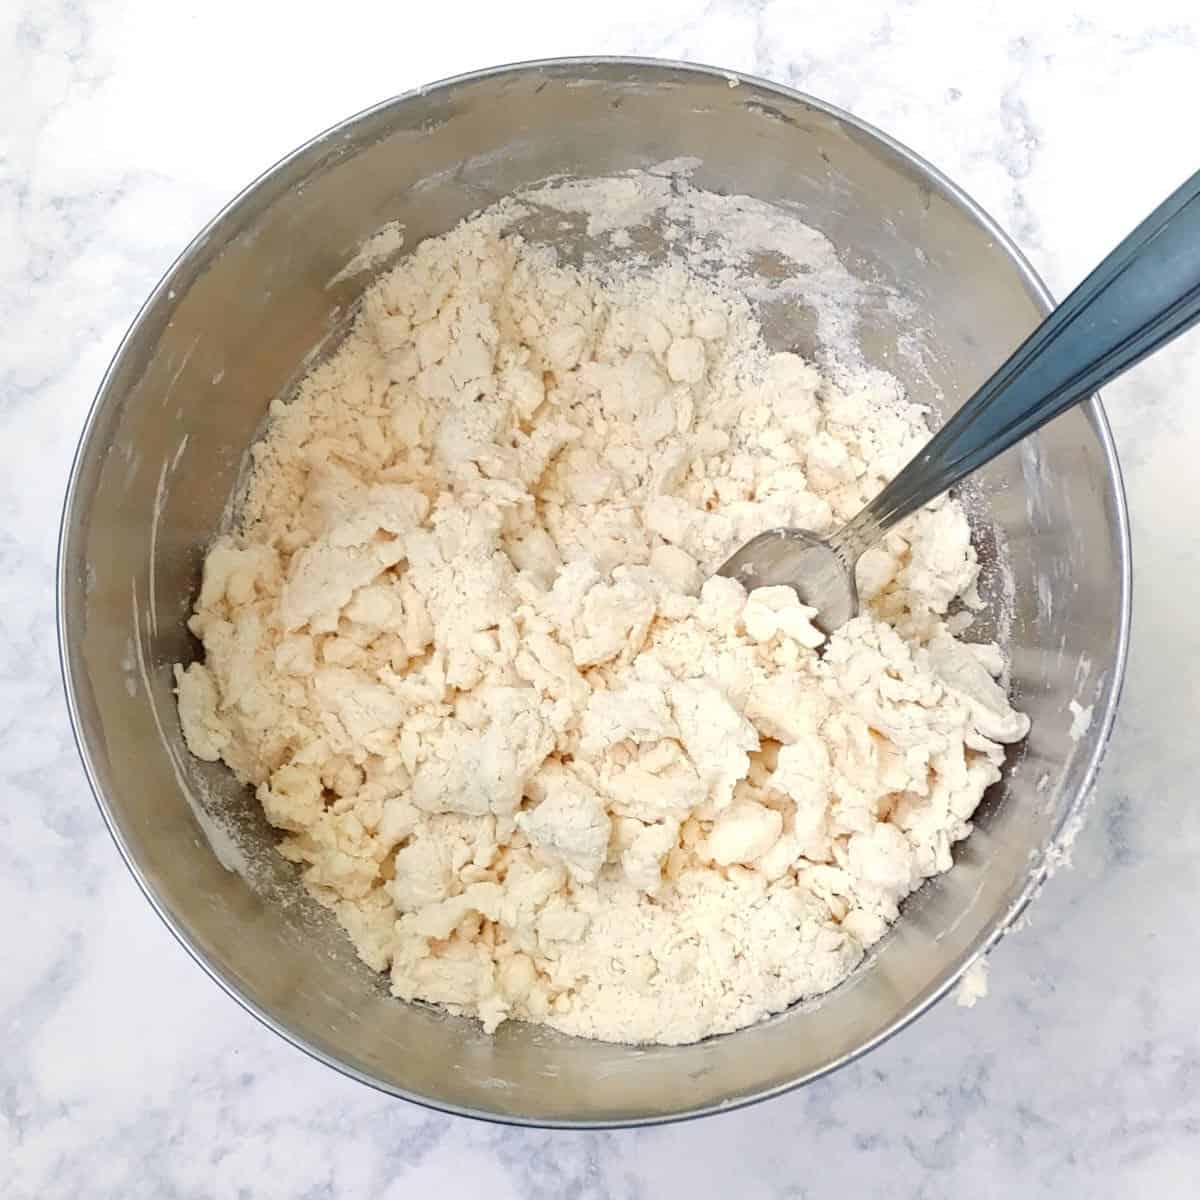
Use a fork (not a spoon) to toss the flour together with the lesser amount of water. Continue until the dough starts to clump together, adding small amounts of water as you go. The dough in this picture needs more water.
I use a fork, not a spoon, because it makes finer, smaller clumps. A fork mixes the dough less, which is important so you don't have as much gluten form from your flour.
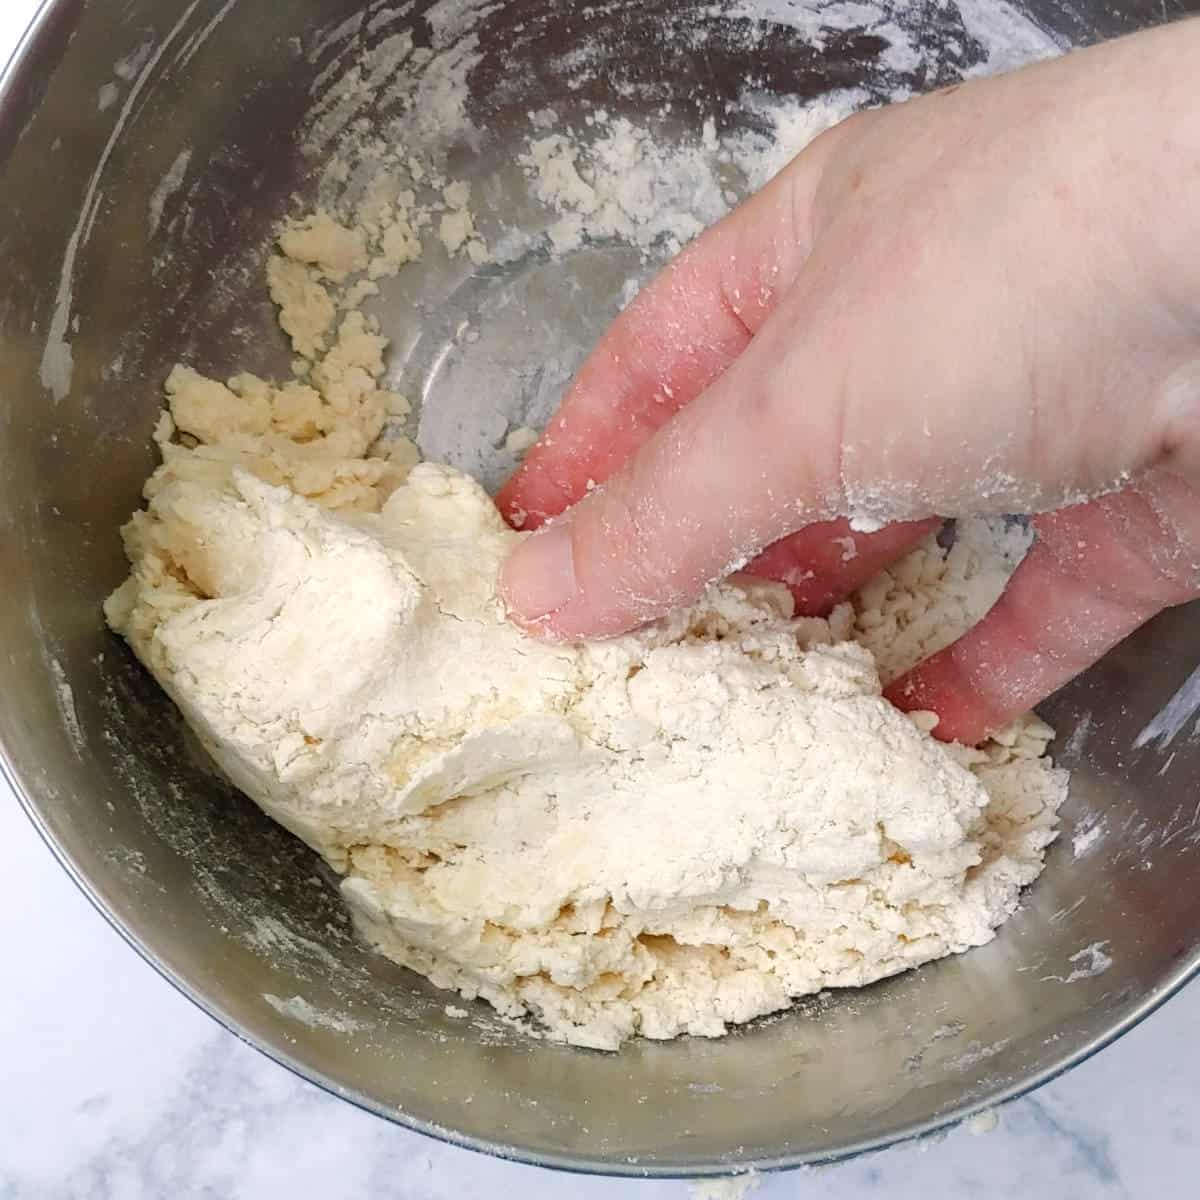
Use your hands to mold the dough together if necessary, but you shouldn't need to use much pressure. (The dough pictured needs a little more water.)
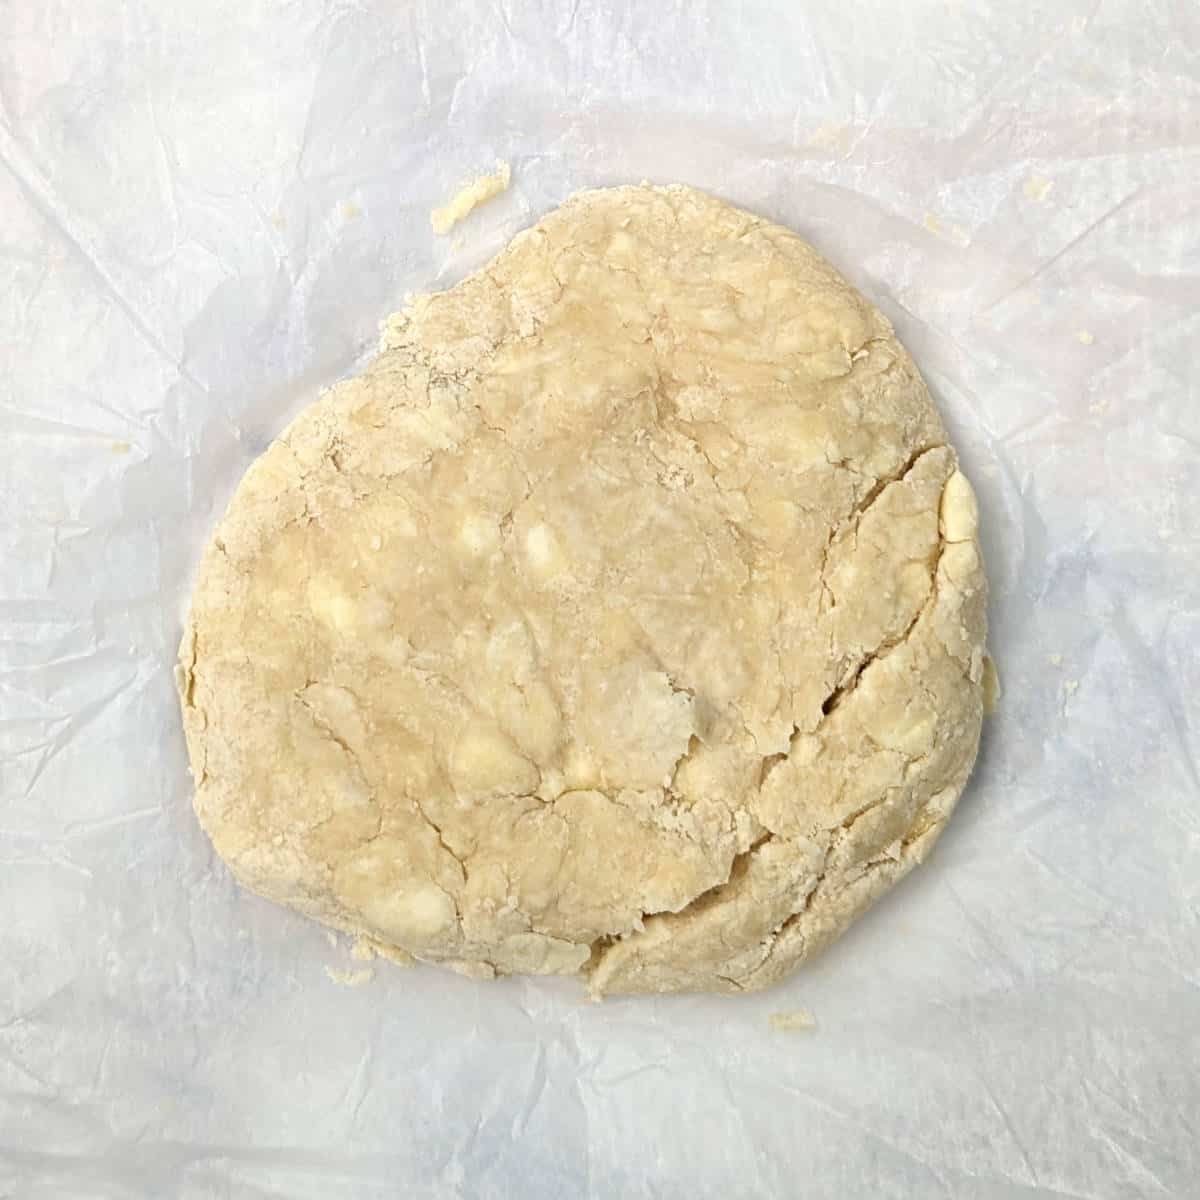
Turn the dough out onto a sheet of plastic wrap or waxed paper. Flatten into a disc, wrap, and refrigerate for 30 minutes. (This specific dough cracked because it needed more water.)
Chill, Warm, and Roll
Refrigerating the dough allows the flour in the dough to hydrate. The pie crust will turn out better. While you *can* roll the crust out immediately, I don't recommend it.
One thing I only recently learned, is to remove the pie crust dough from the refrigerator for 15 minutes before rolling. This makes it so much easier to roll.
Yes, it seems counter-intuitive - why don't you just chill the dough less? Or not at all?
- The butter needs to firm back up after you've mixed your dough, so your crust can be flakier. But -
- Butter is too stiff to roll directly from the refrigerator unless you've got arms and wrists of steel.
It isn't necessary to warm a margarine crust up after it hydrates, because they don't stiffen up the same way that butter does.
How to Roll Out Pie Crust Dough
Next, roll out your pie crust.
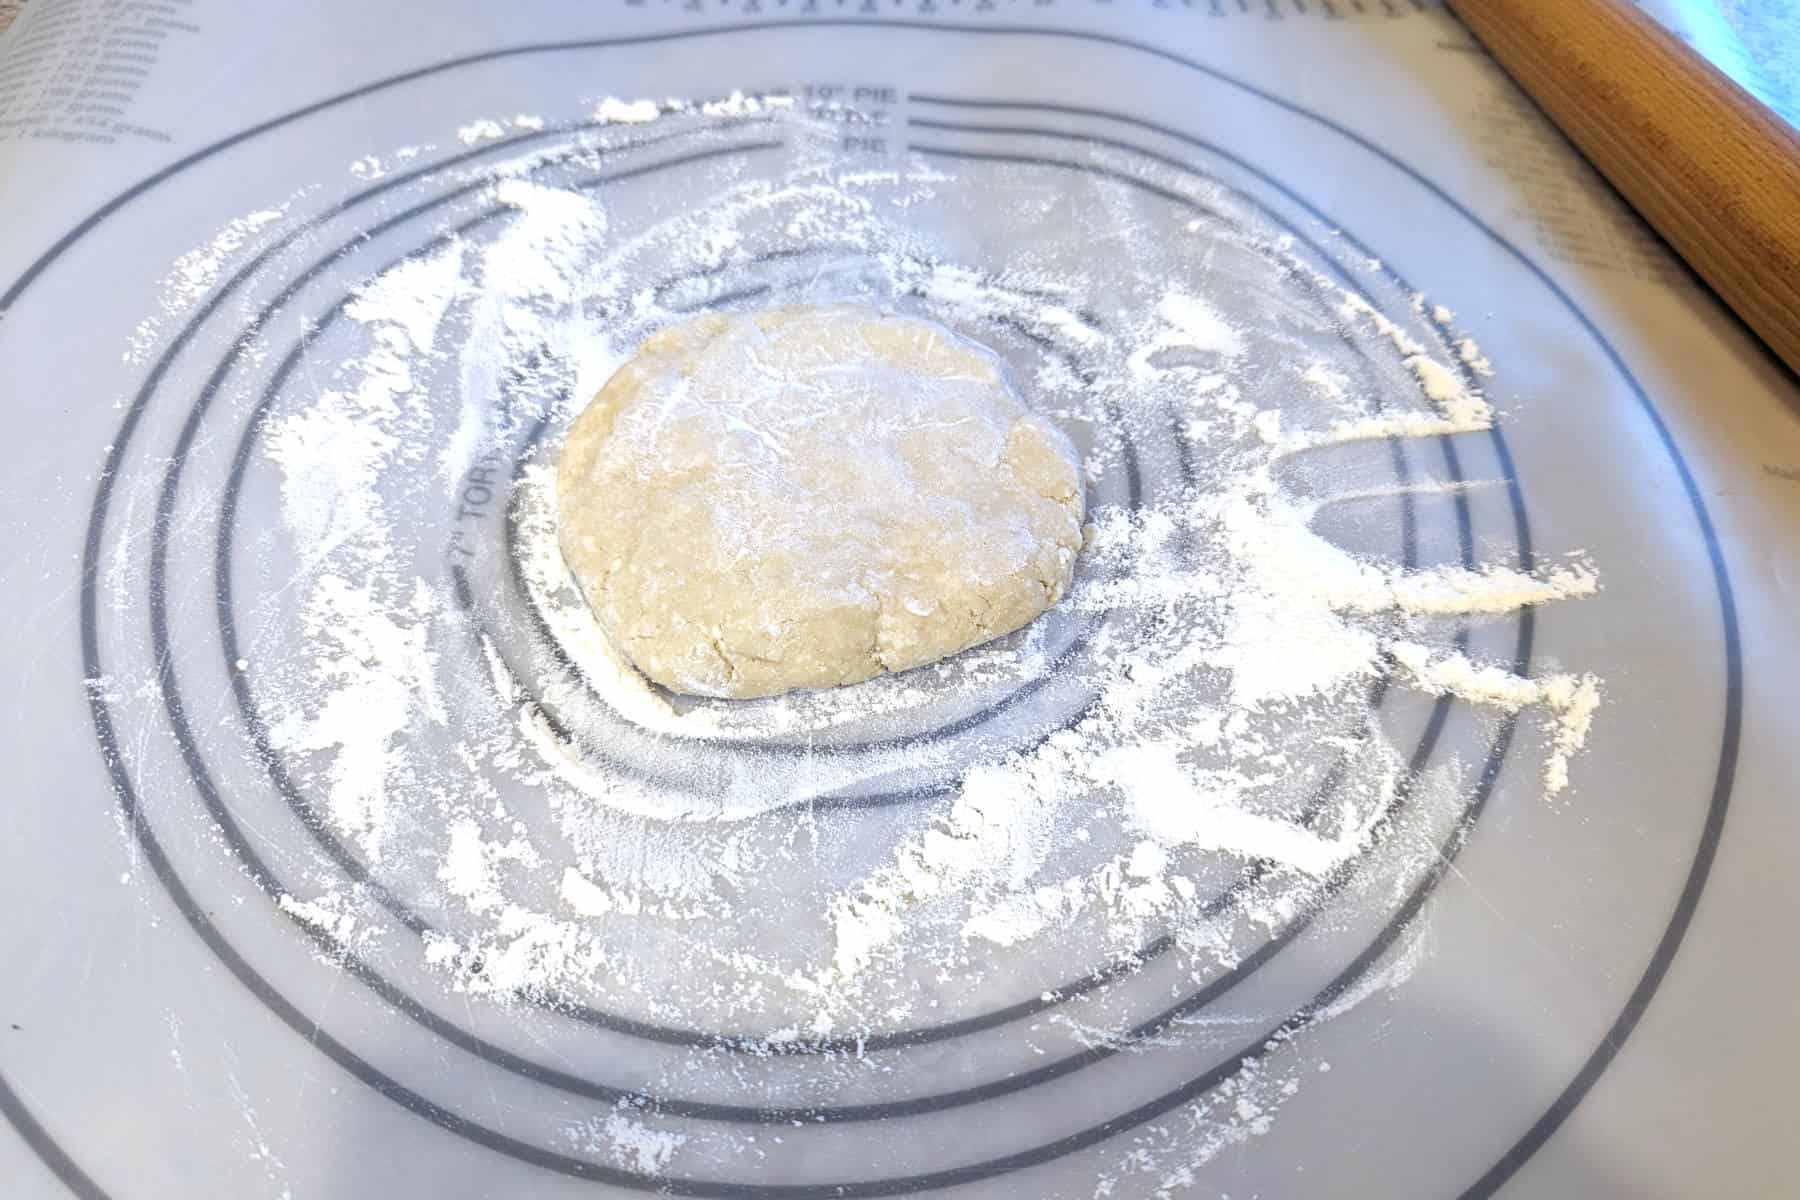
Unwrap your dough and place on a lightly floured surface. Dust the dough lightly with flour.
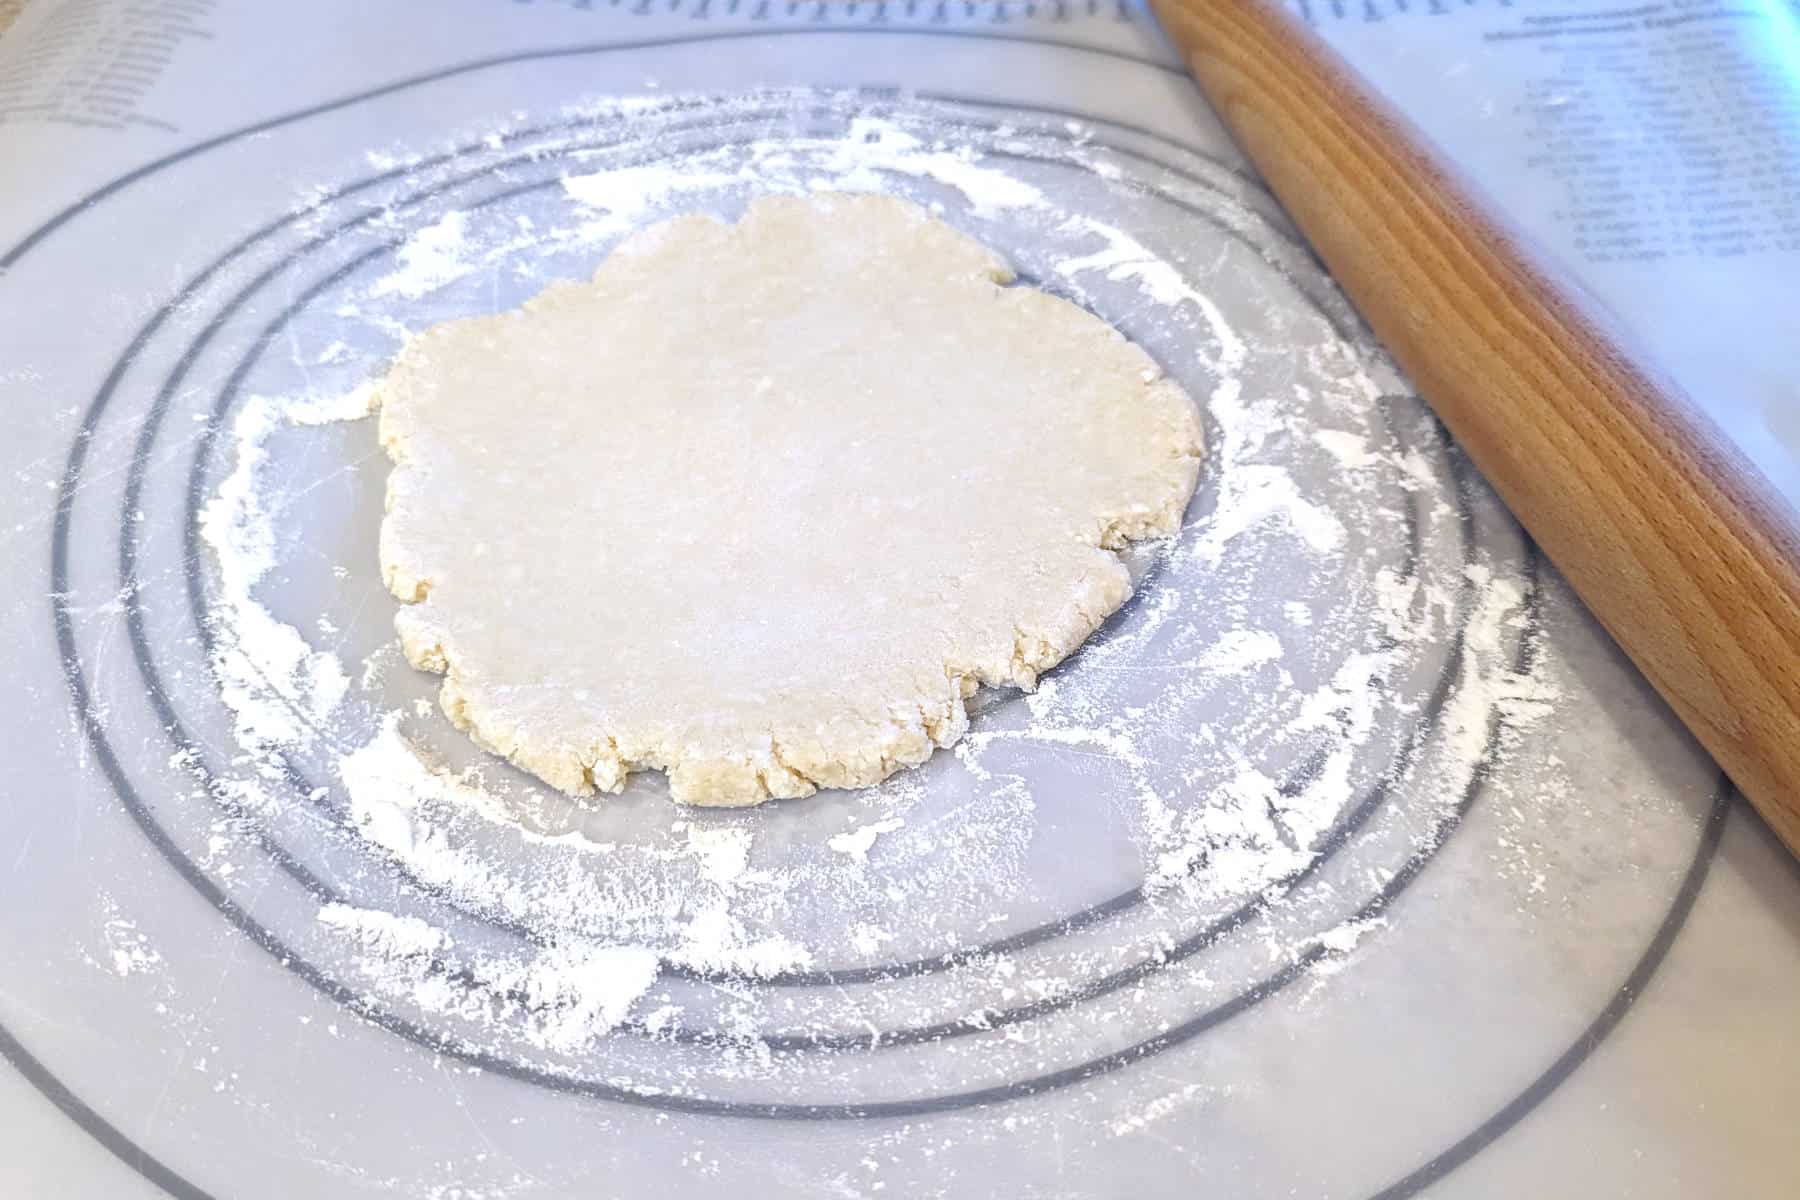
Place waxed or parchment paper back on top of the dough, to keep your rolling pin from getting as messy. Use the rolling pin to roll out the dough, from the center to the end. Repeat in every direction. This part can be slow-going.
Once the dough relaxes, you can roll from one end to the other. Lift it from the waxed paper and mat occasionally to keep it from sticking. Trim off extra dough that sticks out, and place it over the gaps to even it out.

Roll those patches of dough into place. It may stick to the waxed paper or rolling pin, but if it does, try, try again.
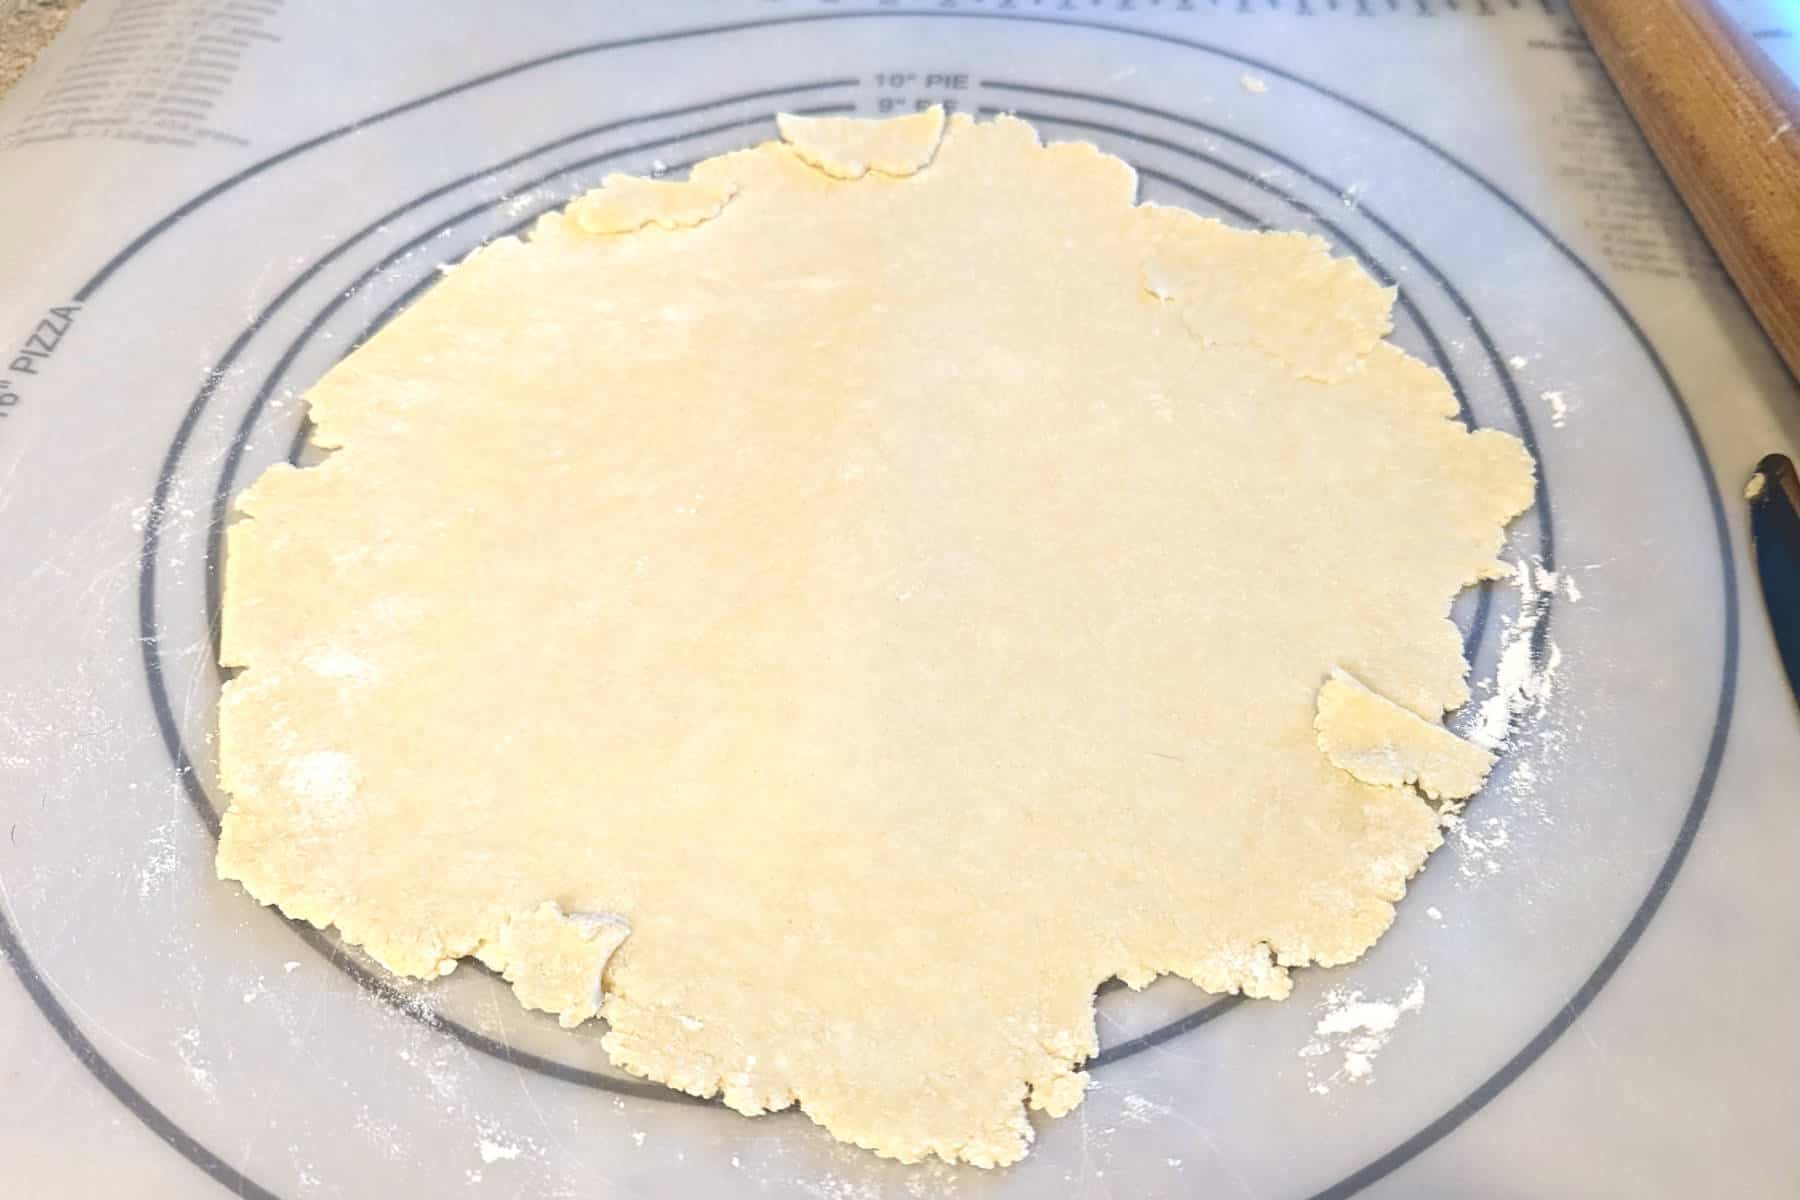
Roll the dough until it's 2 inches wider than your pie pan. (3 inches wider if you're making deep dish pie.) My mat here has handy guidelines, but you can also invert your pan over the dough to measure.
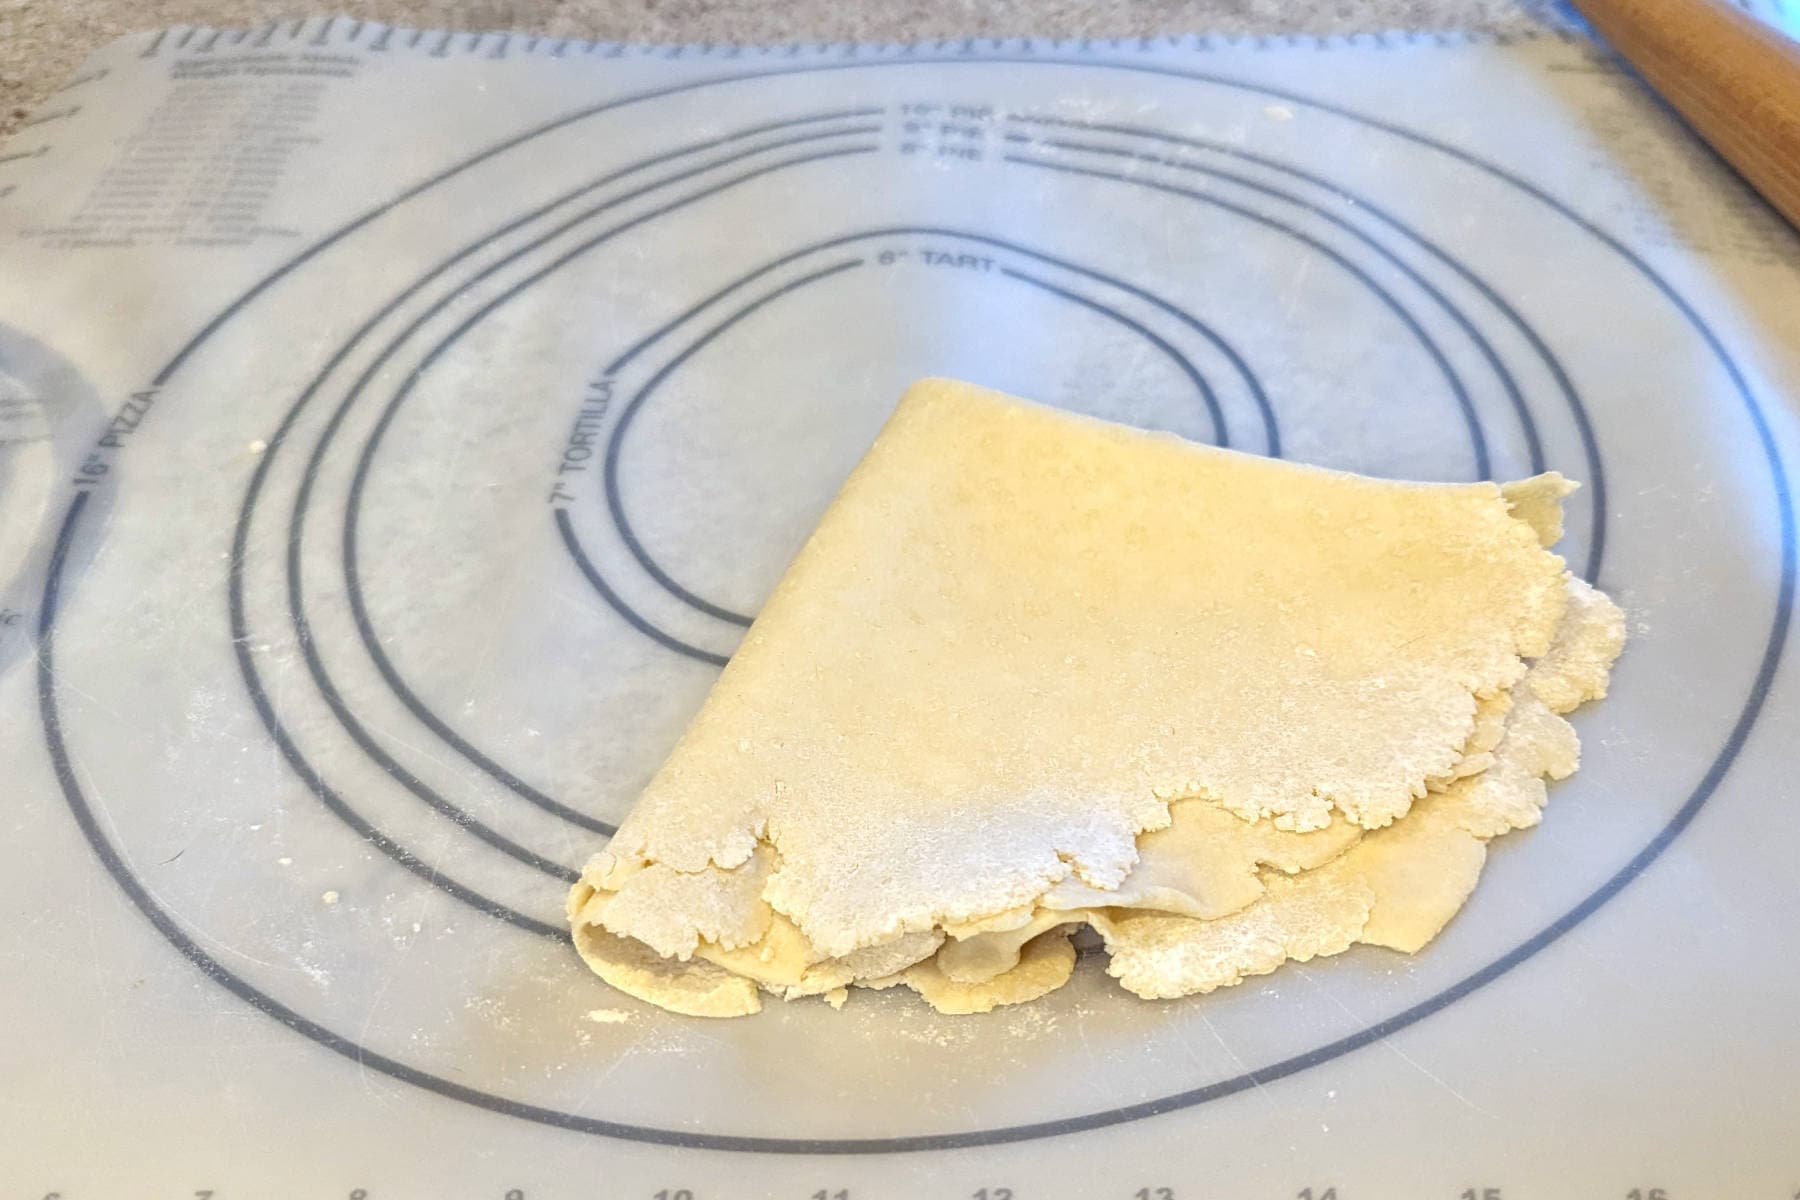
Fold the dough gently in half, then into a quarter. This will make it easier to move.
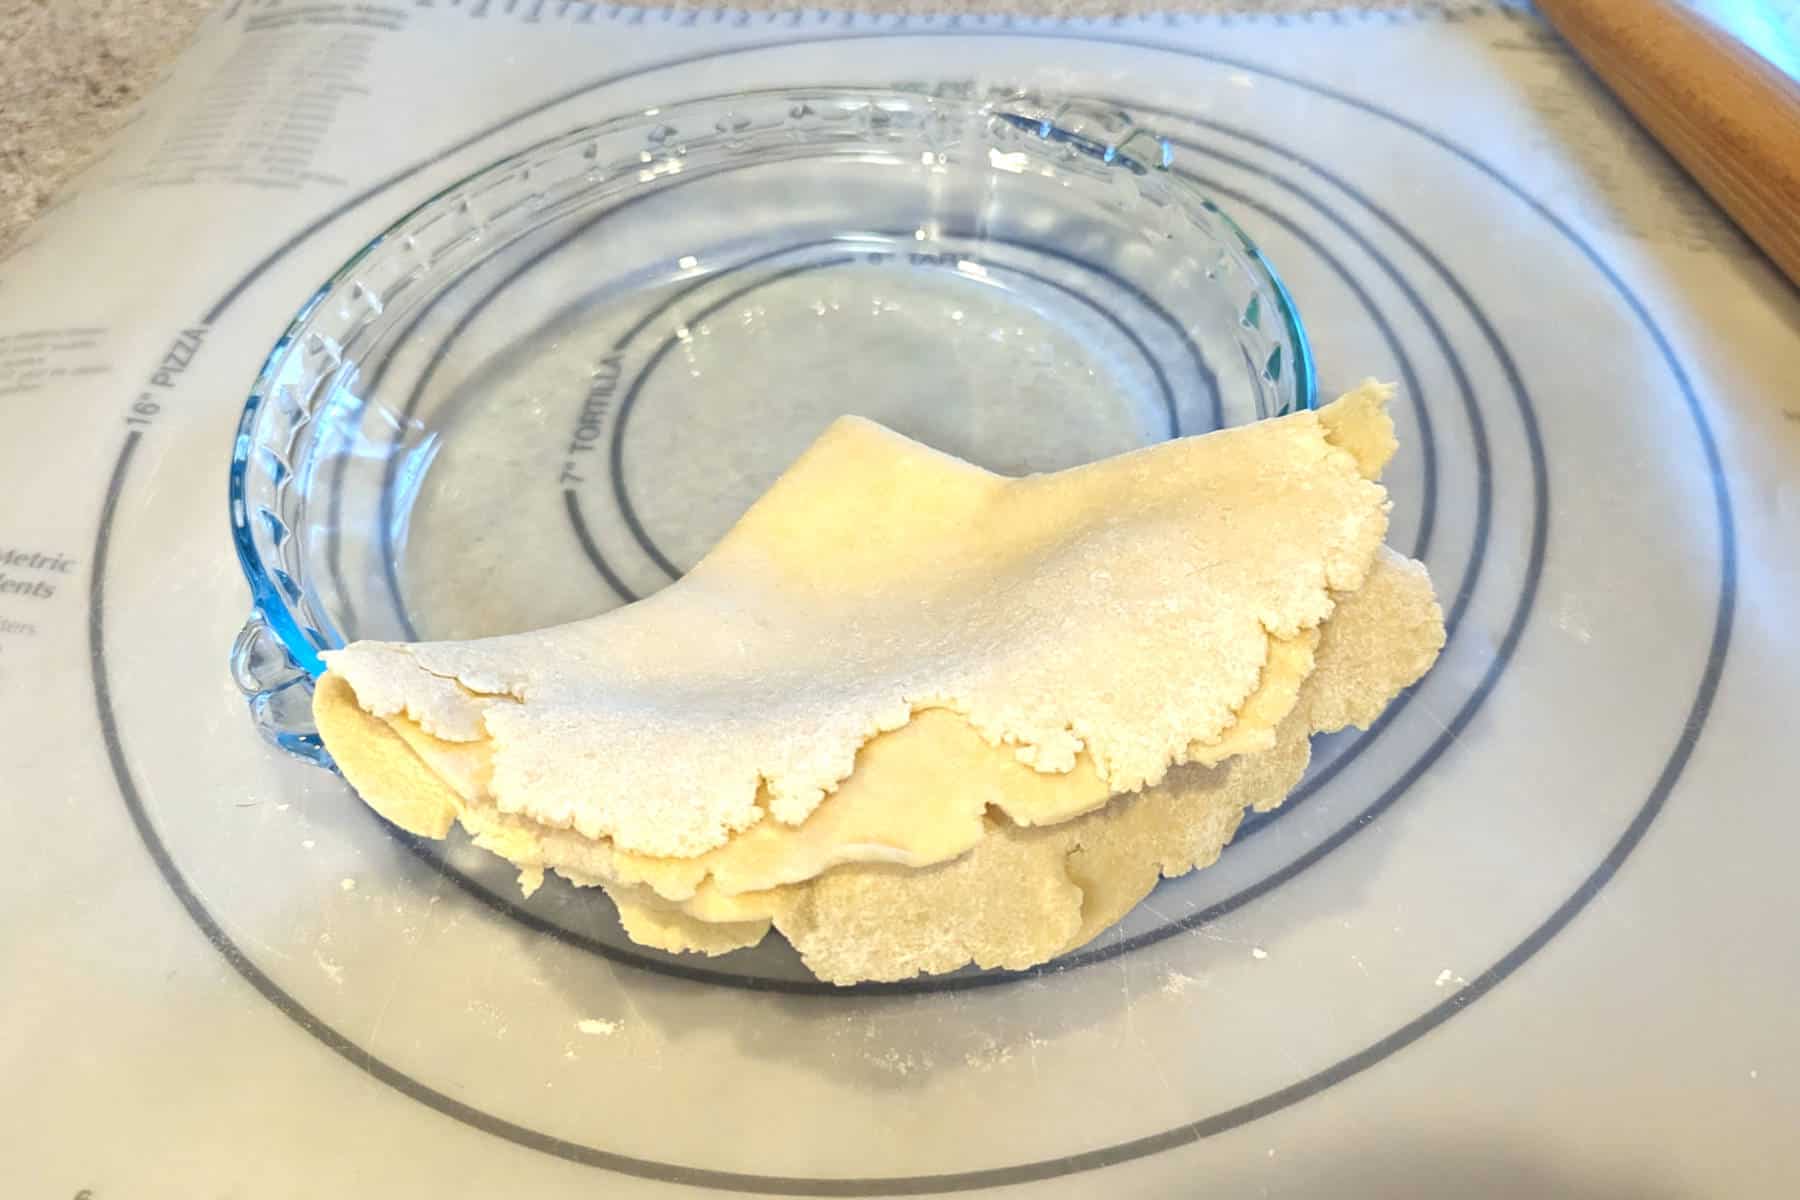
Place the dough in the pie pan. Be sure to center it.
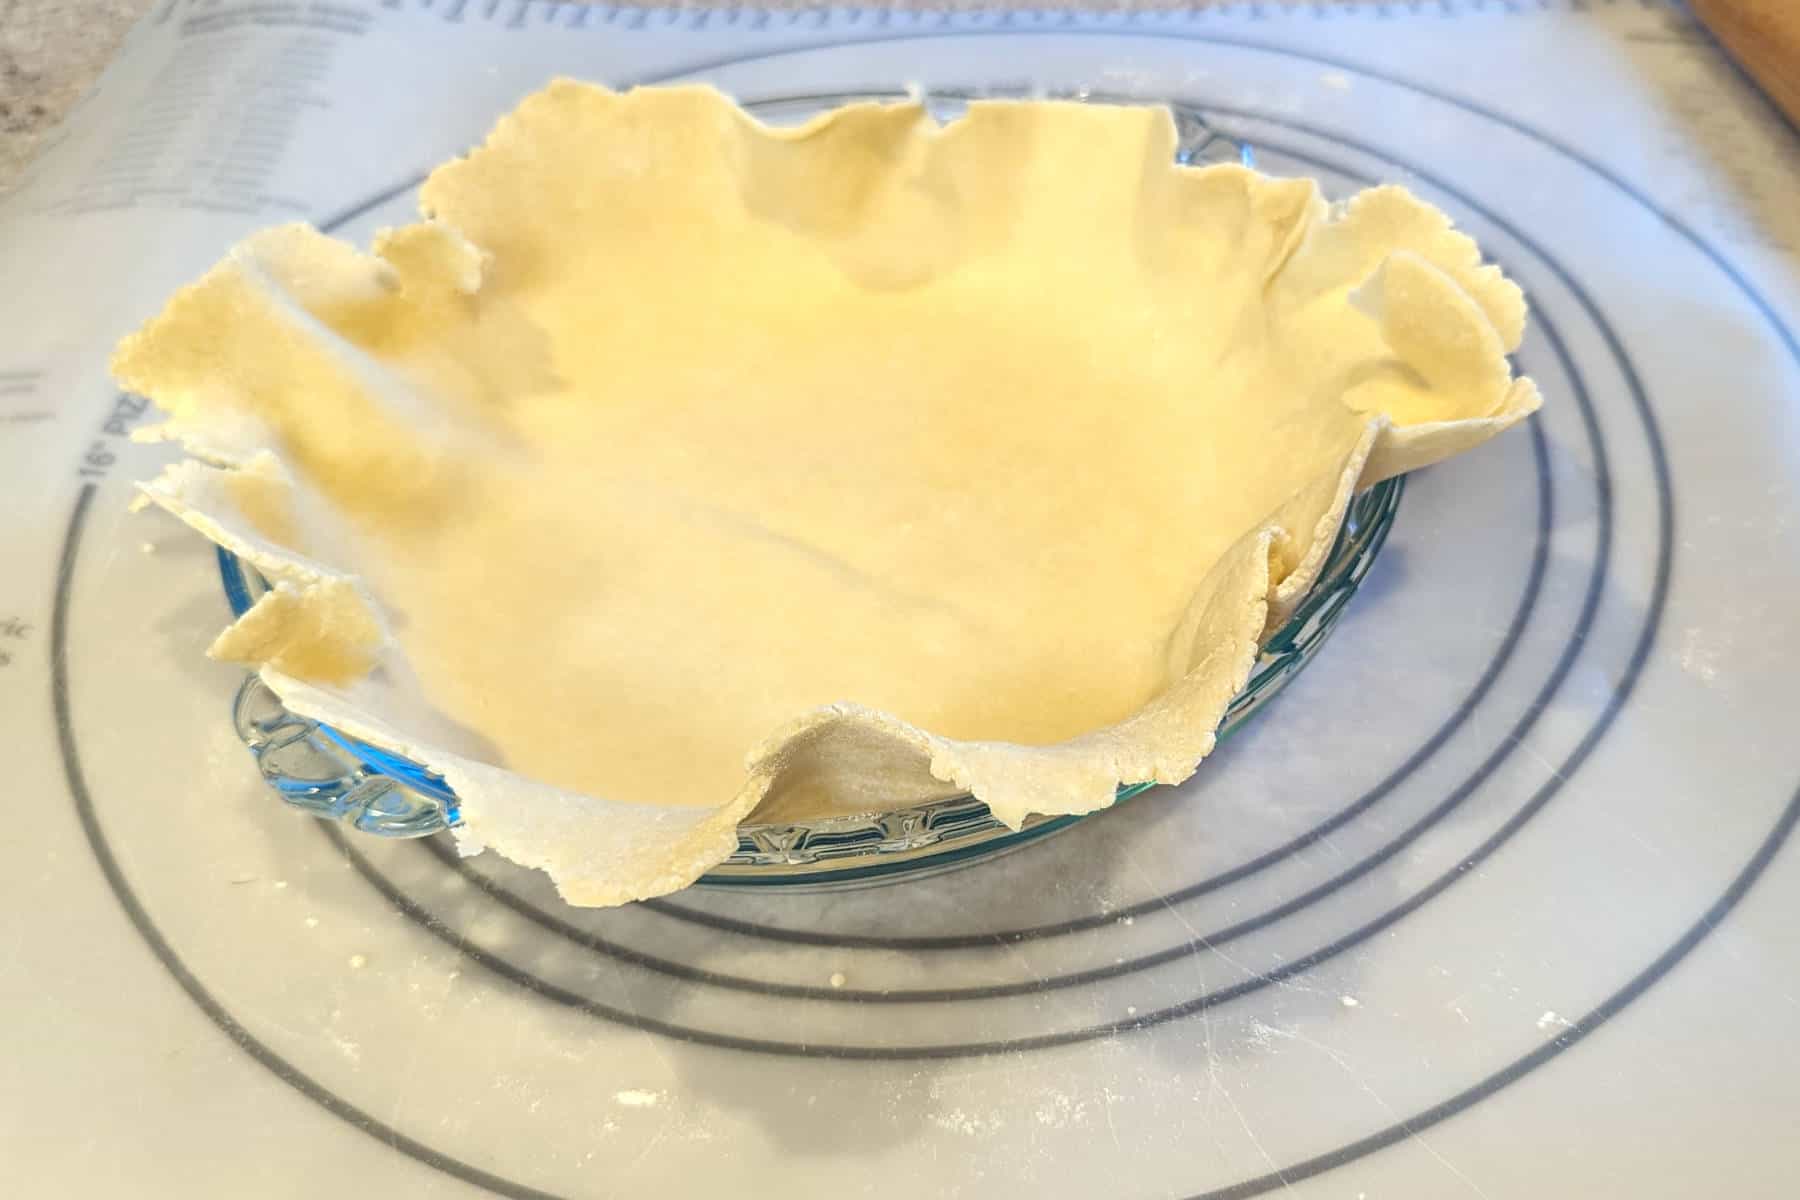
Unfold the dough into the pan. Recenter it as necessary so that you have enough crust around the edges.

Settle the pie crust into the bottom corners of the pan, without stretching the dough. If you stretch the dough, it will shrink during baking.
You're almost there!
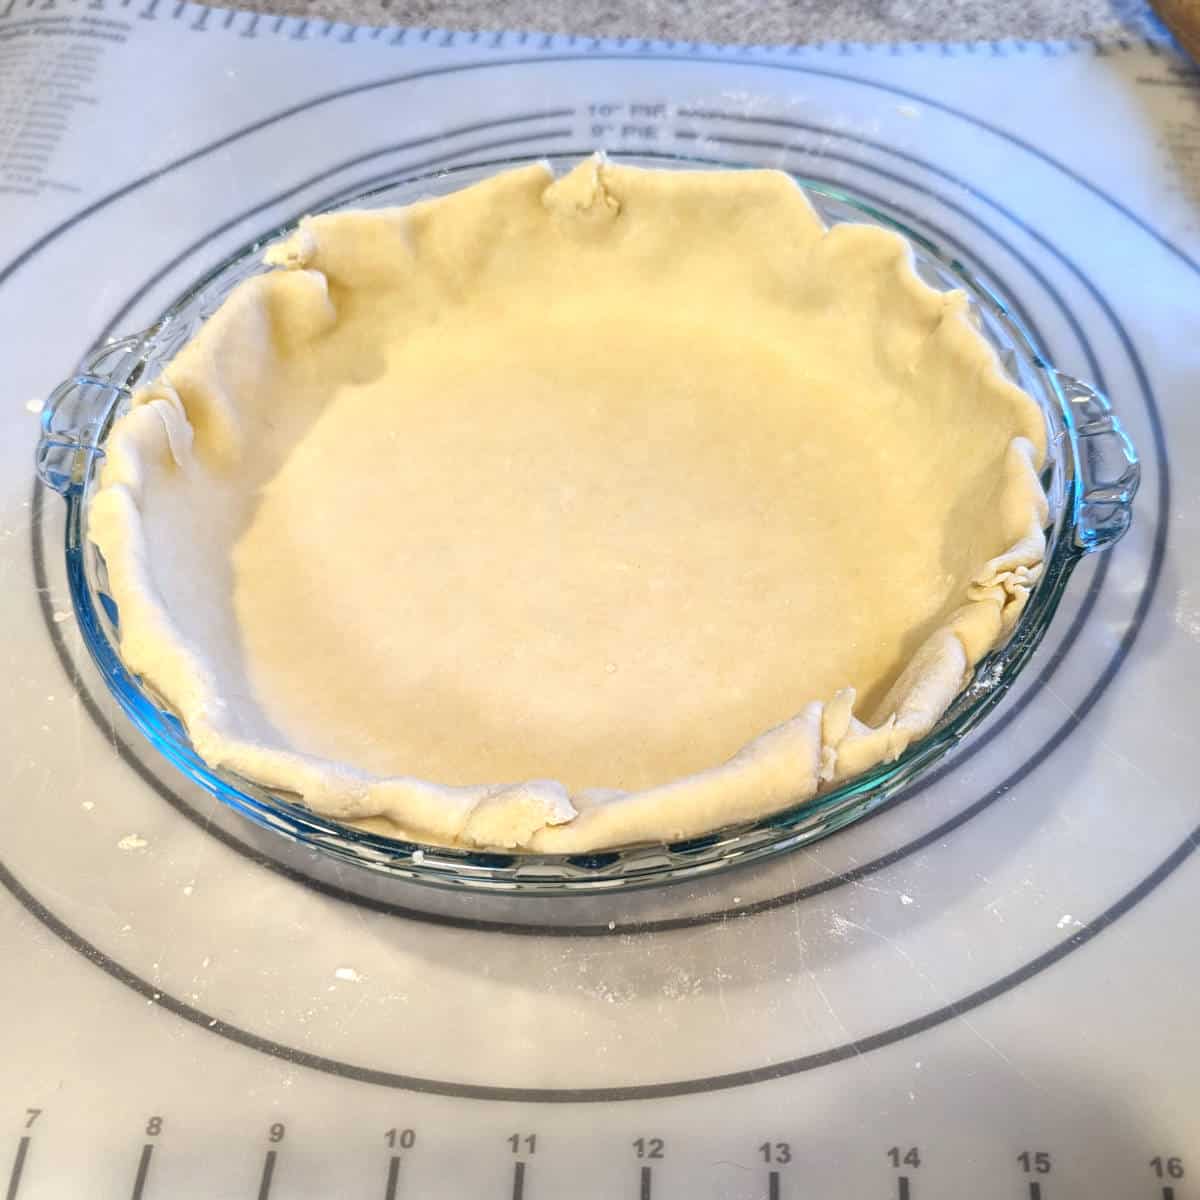
Fold the edge of the dough underneath itself, so that it lays between the pie pan and the rest of the crust. It's like folding a piece of paper so that you see a smooth rounded side, instead of an uneven tear.

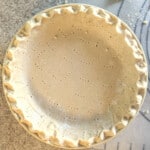
Seal the edge of the crust, to seal the top and bottom layers of the edge together, and also to make it pretty! I prefer to pinch it between my fingers. You can also use the tines of a fork for an old-fashioned look.
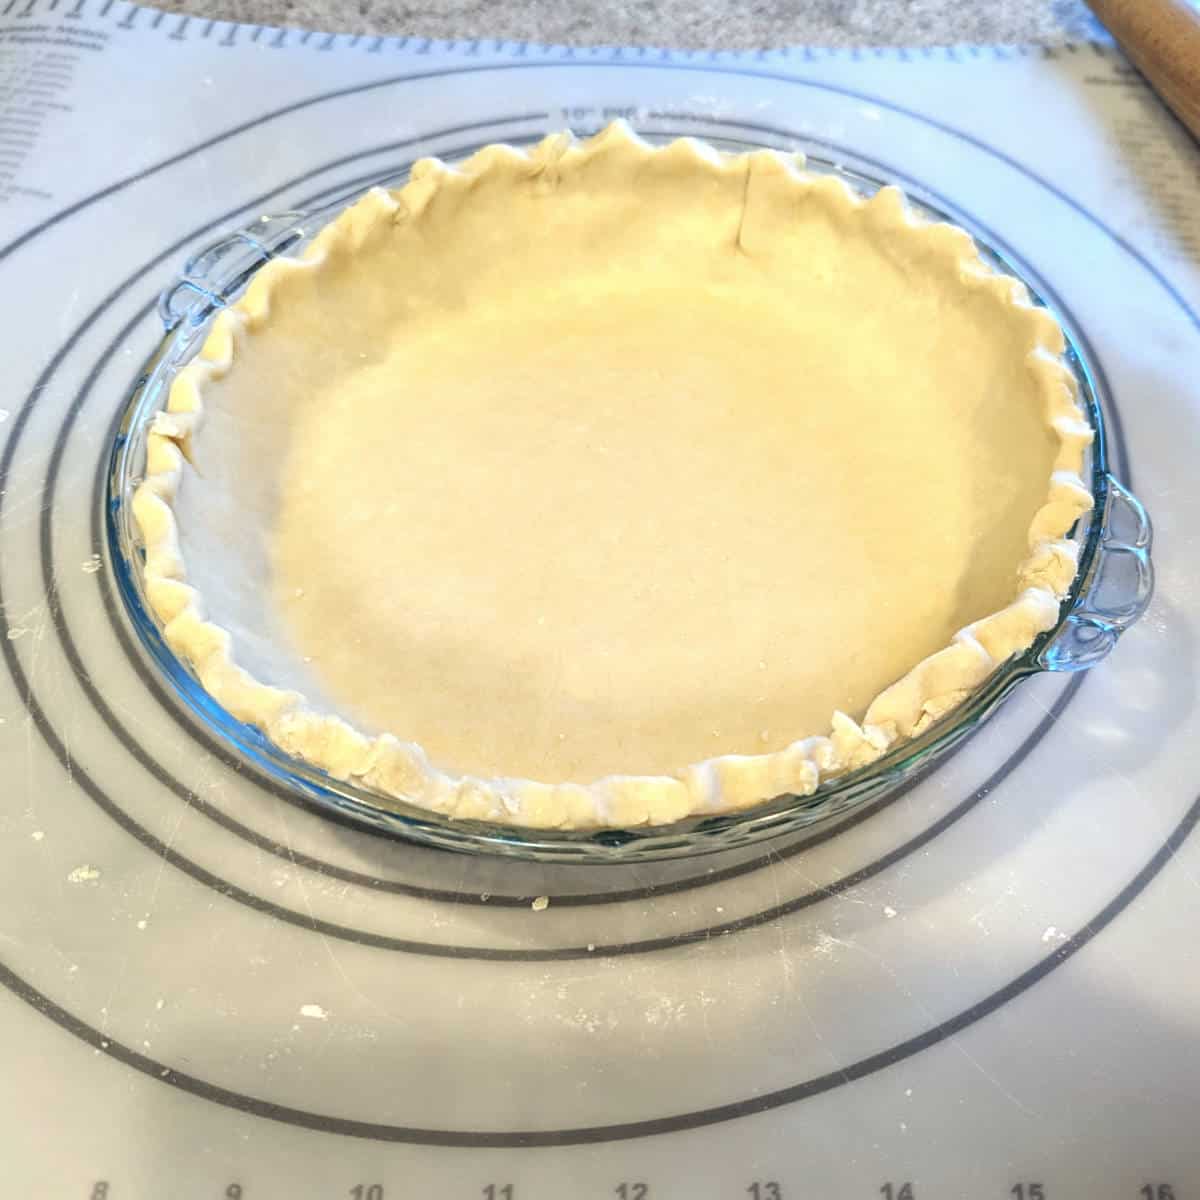
You did it! You've made a pie crust!
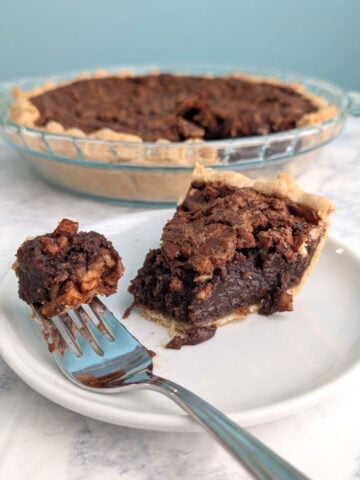
It's ready to bake! Follow the directions in your recipe. For classic pecan pie or a pecan fudge pie, you'll add the filling while the crust is raw, and bake everything together.
For a chocolate pie or a coconut cream pie, you will want to bake the crust in advance.
Prick the sides and bottom of the pie crust all over with a fork. This is called docking. This will help the pastry release steam as it bakes. Don't go all the way through the crust if possible.
Bake the crust at 475F, until it's golden brown, about 8-10 minutes. (If it's not golden enough, bake a few minutes more.) Keep an eye on it to be sure the sides don't sink into the bottom.
If the crust puffs up when you bake it, use a fork to poke holes to release the steam. If the edge crust gets too dark, cover the edge only with aluminum foil or a pie crust cover.
My mother prefers her pie crust shells to be soft for her chocolate pie, so we usually only bake those pie crusts for 10 minutes. I prefer my shells to be more crisp overall, so I do 15 minutes or until I like the way it looks.
Butter, Shortening, and Substitutions
I only use butter in my pie crusts, mainly for flavor. Other options include shortening, margarine, vegan butter sticks, and coconut oil. Of these, I've really only used the first two.
Butter versus Shortening
Butter adds flavor and creates a flaky crust. Shortening makes for a rather tender crust.
Some bakers use a mix of butter and shortening for pie crust. Best of both worlds, both flaky and tender! To do this, I would use ⅔ butter, ⅓ shortening. However, I don't keep shortening on hand, so I never do this.
Butter versus Margarine
I used to use margarine in all my baking, many years ago. Margarine adds flavor in comparison with shortening, and is easier to work with than butter because it is softer. Margarine also makes for a more tender crust than does butter.
When I have compared my own butter crusts with margarine crusts, I've found that butter made for prettier, tastier crusts that browned well.
Although margarine is a butter substitute, it often contains whey or milk solids, and so is not vegan. Pie crusts are easy to make vegan, however. Shortening, for instance, is vegan and readily available.
Vegan Butter Sticks
For flavor, you can try vegan butter sticks. These are easier to find now than they were years ago. The flavor can be good. I have not used these in pie crusts in years, and do not remember the results.
Coconut Oil
Coconut oil is also vegan. Certain types of coconut oil will give your pastry a coconutty flavor.
Unfortunately, coconut oil is liquid at a warm room temperature, so it would not be an ideal substitute. If you want to try coconut oil, I recommend portioning the oil, freezing it, and using the frozen oil in the pie crust. I expect it will give a more tender crust like shortening does, but I haven't tried it.
Liquid oil will not work. If you only have liquid oil, I recommend making a crumb crust instead.
Equipment
I prefer to make my pie crust dough in a food processor. It's fast, and it's easier on my wrists than cutting in butter by hand. I have a Breville food processor (affiliate link) that I love, but it's pricey. Any food processor should work.
If you don't have a food processor (or don't want to wash it - that's the worst part!), the second best option is using a pastry cutter (affiliate link). I specifically like the Oxo one because it has sharper edges for cutting in cold butter, but I've used other, more basic ones too.
Finally, if you don't have a pastry cutter, you can use your fingertips dipped in flour, or two knives. Cross the knives to form an X shape, then pull them out from each other to form a V shape. Hard to describe - I promise it works.
I have a pastry mat to roll out my crusts, but it's not essential. It just makes my counter less messy.
You do need something to roll out your crust, like a rolling pin. If you don't have rolling pin, you can try a smooth-surfaced bottle, like a wine bottle, in a pinch.
I prefer glass or ceramic pie plates over metal. I feel like metal heats too quickly for a properly baked pie. With glass, you can look under the bottom to see how your pie crust has baked.
Just as important as the material is the size of the pan. Some pies, like cream pies, work best in regular pie dishes; others, like pecan pie or apple pie, require deep dish pie plates, so that they don't overflow.
A 9-inch pie plate (affiliate link) is the standard. The Pyrex one I use often is a 9.5-inch deep dish pie plate. I have a fun ceramic one that I love, but it is 10 inches; with it, I often have to roll this dough a little too thin. For a 10-inch pie, use the crust amounts from my Black Bottom Oatmeal Pie.
Storage
Pie crust dough, tightly wrapped, will last up to 3 days in the refrigerator.
You can also wrap a disc of raw pie dough in 2 layers of aluminum foil, inside a freezer bag, and store it in the freezer. I would use this within 3-6 months. Thaw in the fridge overnight before using. If you've forgotten the day before, you can thaw for 90 minutes at room temperature; it may be stiff to roll out.
I think pie crusts are best when freshly baked, so I personally not freeze a baked pie crust.
That said, unfilled baked pie crusts, if covered airtight, will be fine on the counter for a 2-3 days. They may lose their crispness, but you may not mind that.
Once you've assembled your pie, store your pie as per the recipe's instructions. Be aware that the crust's texture may change depending on your pie's filling.
Top tip
Be patient! My worst mistakes come from when I'm rushed. Remember, anyone who will criticize your homemade pie crust is not really your friend, and doesn't deserve your pie!
My Favorite Pies
You've made a pie crust! What next? Turn it into one of these pies:

Interested in other recipes? I save and share recipes I like or want to try on my Pinterest page - follow me there! You can also check out my Facebook page for more recipes and helpful tips. I'm also happy to try to help troubleshoot my recipes there.
Have you tried this recipe? Or have a question about it? Rate it or leave a comment below! (PS: rating my recipes helps other people find them, too!)
📖 Recipe
Single Pie Crust
Equipment
- pastry cutter (affiliate link)
- Rolling Pin
Ingredients
- 1 cup flour (130 grams)
- ½ teaspoon table salt
- 6 tablespoons butter (84 grams; cold, cut into small pieces)
- 2-3 tablespoons water (30-45 grams; very cold) (I often need even more when mixing by hand)
Instructions
Food Processor Instructions
- Combine flour and salt in the bowl of your food processor; pulse to combine. Add the butter and pulse (short bursts) until the mixture resembles small crumbs.
- With the food processor running, drizzle in the water. Add just enough water to make a ball of clumpy dough form. Add a little extra if necessary.
Hand-Mixing Instructions
- In a mixing bowl, combine flour and salt. Use a pastry cutter (affiliate link) or two knives to cut in the butter, until the mixture resembles small crumbs. Some will be larger; some will be smaller. The largest should be about the size of peas.
- Drizzle in the lesser amount of water. Using a fork (not a spoon!), toss the crumbs with the water. Stir in just enough water to make clumps of dough form. Add a little extra as necessary. The clumps of dough should cling to each other.
Chilling the Dough
- Use your hands to shape the dough into a ball. Place on plastic wrap and flatten it into a disc. Wrap and place in the refrigerator for 30 minutes to let the butter in the crust chill.
- After a 30 minute chill, remove the crust from the refrigerator. Let rest at room temperature for 15 minutes to make the crust easier to roll out.
Rolling the Pie Crust
- Turn the disc of pie dough out onto a floured surface. Dust the surface of the dough with flour on both sides.
- Place a sheet of waxed or parchment paper on top of the dough. Use a rolling pin to roll the dough from the center to the edge in all directions. It's tough going at first, but will get easier.
- Once the dough is more pliable, roll the dough evenly from one end to the other, in all directions. Pull the crust from the work surface and from the waxed paper to be sure it's not sticking.
- If you develop cracks or uneven places, cut extra dough from the sides and use it to patch your crust. Gently roll over it with your rolling pin to seal the patches into the crust.
- Roll out the dough into a circle about 2 inches larger than your pie pan (3 if using a deep dish). It's easy to measure this by placing your pie plate upside down over the crust, and seeing if there's 1 inch of dough on either side of it.
- Carefully fold the crust in half, and then into a quarter. (You can also drape it over your rolling pin to move it.) Transfer it it to the pie plate, then center and unfold it.
- Settle the crust into the bottom edges of the dish without smashing or stretching the dough. Trim off any ragged pieces of dough, but leave a ½-to-1-inch circumference around the edge.
- Tuck the edge of the dough underneath itself (so the seam is against the rim of the pie pan). Gently pinch the edges of the crust between your fingertips to seal the edge and form the edge crust into a wavy shape.
Baking
- To make a pre-baked shell, prick the sides and bottom of the crust all over with a fork. (This will release steam.) Bake at 475F for 8-10 minutes, or until the pastry reaches your desired color. Keep an eye on it to be sure that the edges do not sink into the bottom.
- For a filled pie, you optionally can prick the crust as above and parbake the crust at 425F for 8-10 minutes if desired. I usually do not. If not parbaking, fill pie and bake as specified in your recipe.
Storage
- Discs of pie crust dough can be wrapped in plastic wrap and refrigerated for up to 3 days.
- Dough can be frozen. Wrap in 2 layers of plastic wrap, and cover that with a layer of aluminum foil. Dough can be frozen for 3-6 months.
- Thaw frozen pie crust dough in the refrigerator overnight, after removing all but one layer of plastic. If you've forgotten, you can thaw it at room temperature for 90 minutes, but the dough will still be stiff when you roll it out.
Notes
Nutrition
[Restructured slightly 11/21/2025.]


Leave a Reply