I enjoy baking, and it seemed like if I were going to make bread that was shaped like bones (and wasn't intended to be a dog biscuit or a cookie for a dog-themed party), the appropriate time would be before Halloween.
Pan de Muerto Bones (literally "Bread of the Dead," shaped like bones) caught my eye when I first saw it, sometime last year. Bone-shaped rolls looked fun, and the thought of scents of citrus and anise wafting through my house as I made soft, fluffy bread called to me.
However, I didn't have the time. Now that I'm more-or-less settled in my apartment, it's time to bake some delicious bread. The recipe yielded 18 bones - definitely more than my husband and I could (or should) comfortably eat, so I planned to make them when I would have some friends over. I could have halved the recipe, but what would have been the fun in that?
I could tell you a little more about Pan de Muerto or Day of the Dead (which encompasses All Saints Day, November 1, and not just/necessarily Halloween), but I honestly don't know more about it than what I learned in high school Spanish 12+ years ago, or what I'd look up online. I'd rather just tell you about making and eating this bread.
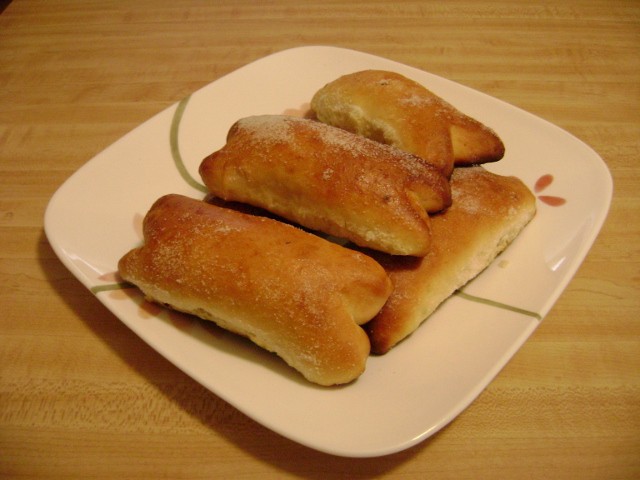
All measurements for this recipe are in weights (such as grams), and I tried to make a note of volumetric measurements to list here, but it was late and I didn't actually write them down. All I can remember is that it took around 5 & ¾ cups of flour.
You start the dough for the bread the day before you want to eat them. I started the dough in my stand mixer, as I do for most bread recipes nowadays. I combined most of the ingredients in my stand mixer (using the dough hook), leaving out most of the sugar and all of the butter. Susan's recipe says to mix until gluten starts to develop. This takes a while. I believe sugar inhibits the gluten-forming process and that's why you mix the dough so much first.
Once your dough is a little stretchy or doesn't tear (or you're tired of overtaxing your stand mixer, like I was), add the sugar little by little. Sugar acts as a liquid ingredient, slackening the dough. I'd never added the sugar after I'd mixed the dough, and it was really cool to watch it liquify.
Susan's recipe said to continue mixing until gluten is almost fully developed. [If you're curious about that, look up "windowpaning" and dough. It basically means you can stretch a small piece of dough so that sections of it are transparent; if it's transparent like a bubble in bubble gum, you've got a ton of gluten development. WildYeastBlog has a few great pictures of it.]
Next, I added butter, and mixed until it was incorporated into the dough. The dough was incredibly soft and sticky. I transferred it into a well-greased metal bowl and covered it. I folded it over itself a few times after 30 minutes and an hour; folding it helps redistribute the gases and yeast. When I folded it, I could tell that the dough was relaxing and becoming stretchier, meaning better gluten development. After an hour, I put the dough in the fridge to chill and ferment overnight.
The next day, I used my trusty kitchen scale to portion the dough into 75 gram pieces. (There's not a lot of leeway here. They need to be exactly 74 or 75 grams.) I shaped them into balls, and then put them back in the fridge to firm up before shaping them into bones. If I were to do this again, I would actually shape them into oblong rolls before chilling them again, because that would make the final shaping easier.
After an hour, I rolled the balls into oblong sticks, working in batches. I chilled the half I wasn't working on because my hands warmed the butter in the dough, making it harder to shape. I shaped the dough into 6-inch pieces, which then shrank back a little. I used a sharp knife to split the ends, cutting down through the dough rather than dragging the knife through. I wish I had made my ends a little thicker so that the bone shape was more prominent.
After I arranged the bones on two Silpat-lined sheets, I brushed them lightly with a little egg, covered them with plastic wrap, and left them on the oven to rise a little. (I made Chex mix while they rose, in part to create a warm space for the dough to rise. My kitchen is rather cold without the oven running.)
After over 2 hours, the dough was a little puffy and I was ready to bake the bones. I preheated my oven to 400F and baked each pan for 15 minutes. The recipe said to brush them with additional egg, but I didn't bother. If your oven has warm spots like mine does, rotate your pan 180 degrees halfway through baking. I didn't, but wish I had since some of my bones had dark bottoms, while others didn't brown as much. I left my oven thermometer in the oven with the pan, so I know that my oven heated up to 425F at some point, which also led to over-browned bottoms.
Cool the bones briefly, then brush with a little melted butter (a tablespoon might suffice if you go sparingly) and sprinkle with sugar. I'm glad I didn't skip this step. The sugar topping the bread was delicious.
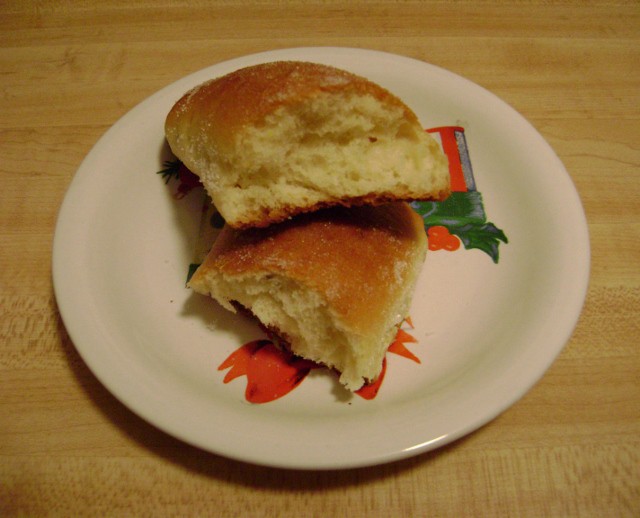
This bread was delicious in addition to being fun and festive. Citrus was the prominent flavor here, followed by anise. Anise is the herb used to make licorice, but it's simply a nice, herbal flavor here - and trust me, because neither Alex nor I like licorice. The bread was soft and rich, and had a nice, fluffy texture.
Soft, enriched bread such as this is always best the day it's made, but I'm reviewing it a day after and it's nice when gently rewarmed in the microwave. It's good with a nice mug of rich hot chocolate.

Leave a Reply