
I've always loved making food for others. As an adult living far from family, I pivoted from sharing fresh, home-baked cookies and treats to shipping my relatives candy, cocoa, and other homemade food gifts at Christmas. It's something I enjoy, and I'd like to share recipes for some of my favorite DIY food gifts, plus tips on how to package and ship them.
I always saw my extended family for the holidays during my childhood, and there would be a flurry of cookie-making and pie-baking, both before and during the visit. My parents moved after I started college, however, and we didn't see each other as much. When I first started mailing gifts, I tried sending the same kinds of cookies I'd always baked, but I finally realized that they don't keep or transport well.
That's when I began experimenting with goodies that do keep well - candies, cocoa mixes, granola, and other pantry-friendly items that stay fresh and arrive intact. Over the years, I've learned what works - and what doesn't - when you're sending homemade food through the mail.
Before we dive into the recipes, let's talk about what actually makes a good food gift.
[This post contains affiliate links. I may make a commission for purchases made through links on this post. As an Amazon Associate, I earn from qualifying purchases.]
Jump to:
What Makes a Good Food Gift?
When you're making food to give as a gift, you want to consider perishability and portability. If you're handing food to your neighbor, it can be something soft or delicate because they'll eat it right away. However, if you're bringing treats to coworkers or mailing gifts to family, you'll want foods that stay fresh for days and can handle a little jostling.
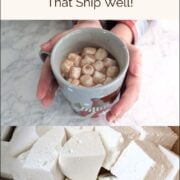
Some homemade gifts - like layered cookie or soup mixes - really need to be delivered in person to maintain those neat layers. Many of my recipients live far away, so I focus on gifts that are shelf-stable, sturdy, and travel well. I skip the soft Christmas cookies I love and choose things I can make ahead and trust to arrive in one piece.
Sweet Treats for Gifting
These candies are my go-to December gifts. They're shelf-stable at room temperature, keep well for a few weeks, and are sturdy enough to survive shipping. They arrive just as they should - intact and delicious.
Microwave Peanut Brittle
I made traditional peanut brittle on the stove a couple of times but always found it finicky. Making it in the microwave was a game changer. I make 3-4 batches every December. It's naturally gluten-free, easy to make vegan or dairy-free, and you don't need a candy thermometer!

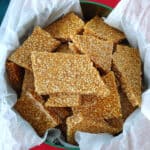
Homemade Sesame Brittle
One of my favorite brittles, this stovetop sesame version is crisp, but not too hard to bite. It's far less common than peanut brittle, which makes it especially fun to give - and receive! I make 3-4 batches of this gluten-free candy each year, including a dairy-free/vegan version.
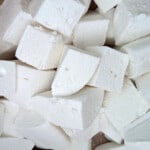
Homemade Marshmallows
One of the first candies I made when I started this website was marshmallows, and they're still a favorite. Homemade marshmallows are worlds better than the bagged grocery store kind - soft, creamy, and pillowy, rather than being dry and generic. You'll need a candy thermometer (affiliate link) and electric mixer to make these, but the results are worth it. I make at least two batches of both my vanilla and my chocolate chip versions each year.
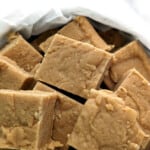
Homemade Fudge
Creamy homemade fudge is my newest addition to my candy gift rotation. Since I make at least two batches of each recipe each year, I use a "shortcut" method evaporated milk for convenience and store-bought marshmallows for stability. Even with those pantry helpers, you're still boiling sugar syrup and stirring candy! My chocolate fudge recipe takes no candy thermometer (affiliate link) while peanut butter version does.

Cozy Cocoa and Hot Chocolate Mixes
I often pair homemade marshmallows with a homemade cocoa or hot chocolate mix. These mixes are easy enough to buy, but there's something special about gifting a version you made yourself.
When you make your own mix, you control exactly what goes into it. My hot cocoa mix takes dry instant milk instead of powdered creamer with additives. My decadent hot chocolate mix can be made dairy-free for friends who avoid milk. All these mixes are customizable with your favorite ingredients, so you can make classic versions or a luxe one made with premium chocolate.


Fruitcake and Boozy Treats
Desserts made with alcohol aren't just fun to give - the alcohol acts as a natural preservative, meaning they'll last a while. This makes them excellent for gifting and shipping. Plus, many of them get tastier with age!
Just keep in mind that the alcohol doesn't cook out of these treats, so they're not for kids. Share responsibly.
Fruitcake
Homemade fruitcake is not the same as the grocery-store version - and it's definitely not the stuff of jokes. When you make it yourself, you choose exactly what goes into it: dried (not necessarily candied) fruit, your favorite spices, and nothing you don't love. I can skip cloves and raisins but include dried apricots and cherries.
I don't make fruitcake often nowadays; I mainly baked it for family who've since passed on. But believe me - even people who say they don't like fruitcake enjoy eating a mini homemade loaf.
And if you have leftovers, turn them into fruitcake French toast! Dip thick slices into a simple batter of 1 cup milk and 1 egg, cook for a minute per side, and top with whipped cream. It's better than it has any right to be.

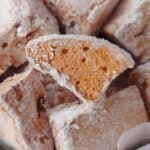
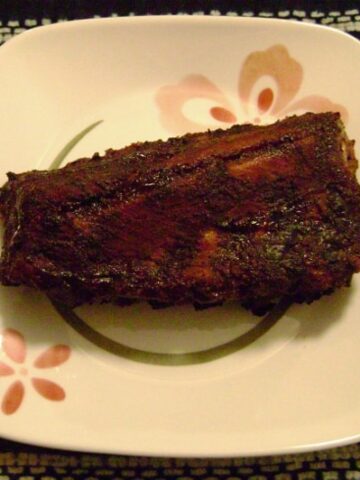
Bourbon or Rum Balls
I like bourbon and rum, but that's not why I love making bourbon or rum balls at Christmas. I love that I can make them early in December and they'll still be delicious at the end of the month! They're basically a bourbon-soaked brownie truffle - rich, decadent, and perfect for gifting.
They're vegan if you use chocolate animal crackers, and you can make non-alcoholic versions so kids don't miss out.

Crunchy, Snackable Gifts
Most of my gifts are sweets, but we all know people who need to avoid sugar - and sometimes it's nice to mix things up. That's where these crunchy, snackable treats come into play.
Homemade Granola
Granola made at home can be as sweet (or lightly sweet) as you want it, and you get to choose exactly what goes into it. You'll end up with flavor combinations you won't find in a grocery store. You can use less oil than storebought granolas; one of my granola recipes has no added oil whatsoever!
Best of all, one batch of granola makes a lot. It stores beautifully and stays fresh for a long time.


Other great snacks with a long shelf-life include seasoned or candied popcorn or nuts, seasoned pretzels, and snack mix like Chex Mix. They also ship very well.
DIY Pantry Staples
Pantry staples are fun to make and gift because people don't always expect them. They're nonperishable, which means your recipients don't have to use them right away - fudge won't be good six months later, but spice mixes will be.
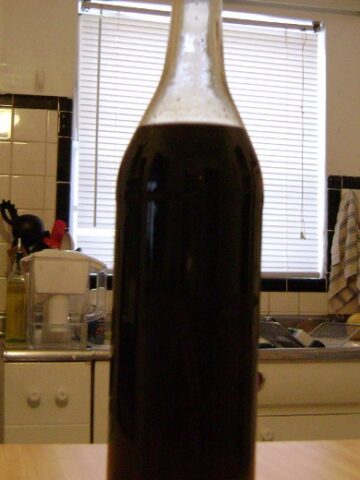
Vanilla Extract
As a baker, I've made my own vanilla extract for years. While not inexpensive, it's economical when you make it in batches. It tastes far better than store-bought, and believe it or not, you can customize it. Vanilla extract is usually made by soaking vanilla beans in a neutral alcohol like vodka, but some bakers prefer theirs with rum or whiskey for a richer flavor.
Vanilla isn't a quick project; the beans need to soak for at least a month, and longer is better. When you're ready to make a batch, order vanilla beans from an economical online source rather than buying them at the grocery store. Decant finished extract into small bottles for gifting.

Spice Mixes
Although there's plenty of spice blends at the grocery store, homemade versions are completely customizable. You can omit or reduce the salt, adjust the heat, and leave out any ingredients you don't love. This makes them great for friends and family with allergies and other dietary restrictions.


Once you've chosen what to make - nonperishable, portable food that'll still taste great when it arrives - it's time to package it up so it arrives in one piece.
Practical Tips for Packaging
I've learned a lot about packaging up food as gifts in the last 20 years. My focus is always on practical ways to keep the gifts fresh, delicious, and intact - not fancy decorating, just what works.
Glass Jars
I use glass jars for dry foods like hot chocolate mix, spice mixes, and granola. They're my choice for in-person gifting because they feel substantial and gift-ready without much effort, and Mason jars are inexpensive. Cleaned, unlabeled jam jars also work well. Since the lids screw on, they're ideal for food that would be messy if the top popped off.
If mailing a gift, skip the glass; it's too heavy and breakable.
Cellophane Bags
These are inexpensive, lightweight, and great for showcasing food. They're ideal for marshmallows and pieces of brittle. Close them with a twist-tie, then add curled ribbon for a little color. The downside, however, is that the bags are prone to breakage if overstuffed - which I can never resist doing, because I always want to give as much food as possible!
If you're shipping, place the bag inside a tin or plastic container so it doesn't get crushed.
Metal Tins
Tins are sturdy, stackable, and protect soft and fragile food from breakage. They're usually already decorative and are my go-to containers for both gifting and home storage. I use them to store just about everything I make in December, from Chex Mix to cookies to fudge. Separate layers of cookies or fudge with sheets of waxed paper.
Line tins with waxed paper or parchment paper to make cleanup easier; this also lets you reuse tins the following year. Tins are the only thing I hand-dry immediately, because the seams will rust otherwise. Tins that stored strongly-spiced Chex mix will sometimes hold on to smells.
Hint: Some of my friends give me tins at the end of the season, so they don't have to throw out or recycle them. You'll often find great deals on tins on clearance after Christmas. Tins hold up extremely well in the mail.
Plastic Containers
If you're mailing a gift, skip glass and use plastic instead; it's lighter and sturdier. Decorated plastic containers are an easy way to go festive without fuss. I prefer hard, reusable plastic over patterned storage bags since they look nicer and protect food better. Their snap-on lids are great for things like bourbon balls that you don't want smashed, but they're not ideal for anything powdery or crumbly.
For a handcrafted approach, I've had my daughter decorate cleaned Talenti gelato jars. You can cover the sides with wrapping paper, and top them with a bow. In addition to using them like tins or plastic containers, they're okay for powdery items like hot chocolate mix since the lids screw on.
Labels & Instructions
When you give food as a gift, keep in mind that your recipient won't be the only person eating it - they'll share it with their own family and friends.
Always include an ingredient list of allergens. You don't want to be the reason someone got sick! Copying the ingredient list is fine, but keep in mind:
- chocolate chips often contain dairy so they're not vegan-friendly
- marshmallows contain gelatin, so they're not kosher or halal
If you're giving something with alcohol, note that it's not cooked out. Rum balls and fruitcake made with real alcohol aren't kid-friendly - and you don't want anyone to discover that the hard way the next morning.
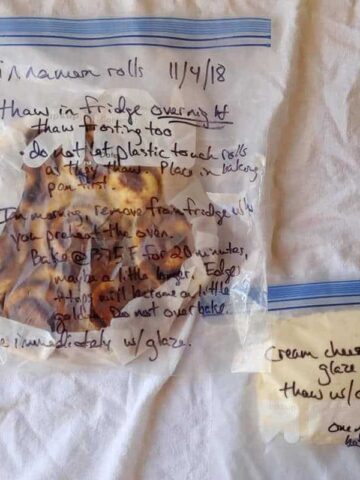
Always include preparation instructions - how much hot chocolate mix to use with milk, and how to heat it.
I often write everything out on a single note by hand - what's included, what ingredients I used, and how to prepare it. However, the safest labels are ones you've attached to the containers; my recipients often discard my handwritten notes by mistake.
If you're shipping to a warm climate, stick to hot cocoa mix, granola, and snacks. Brittles shouldn't spoil, but may become sticky or messy in warm weather.
Tips for Shipping Food Gifts
I've given you my favorite recipes for food to gift - they're all nonperishable and portable, perfect for gifting on your own schedule.
However, shipping them adds complexity; you need to prevent movement, protect items from breakage, and keep everything sealed. I'm careful about how I package the food inside its containers, and very particular about how I arrange sturdy containers in the shipping box. I learned this the hard way the year a cocoa container lid popped open and covered everything with chocolate dust; my relatives didn't let me forget it.
Although I'm focusing on how I ship food gifts, this advice applies to most things you would ship.
Protect Fragile Items
Double-bag anything potentially messy, or place inside a tin or plastic container. Brittle can puncture cellophane and make a mess inside the box. You don't want cookies coated with powdered sugar causing a scene at the post office if the package bursts.
The insides of containers should be securely packed. Include crumbled parchment paper inside to keep the candy from sliding around and crumbling. Cellophane bags of marshmallows do double duty inside tins - they provide cushioning too!
Although it's not pretty, tape the lids of tins and plastic containers closed, to be sure they're not jostled open. Heed my advice and avoid my chocolate disaster!
Choose the Right Outer Box
We save shipping boxes from Amazon, Target, and Chewy, as well as the packaging. Although it makes the basement messy, I'm thankful in December because I have boxes the right size for gifts, as well as lightweight bubble wrap and air cushions. Small boxes can be used in place of metal tins for protecting items. Best of all, all of that packaging is free!
Choose sturdy boxes with firm sides and crisp corners. Floppy boxes will warp in transit. And, mailing boxes can only be reused so many times before they're too beat up.
Gather your food gifts into one spot to see how much space they take. Then add about ⅓ extra for padding. You'll want a box large enough for cushioning, but not so large that it's hard to fill.
Stabilize Every Container
A metal tin inside a box without cushioning is basically a rattle; the tin will move during transit, breaking the food inside. It can damage other items in the package, and vice versa.
Place heavy items on the bottom. Your most fragile items should be away from the edges. Although you've secured them with tape, position any lids that can pop off so that they can't be jostled, and cushion them with something soft to keep them from moving.
Use Sturdy but Lightweight Packaging
If you've saved your boxes, you've probably also saved the packaging. Bubble wrap is perfect for fragile items, or pretty tins you don't want scratched. Air cushions are nice to fill in gaps between items. Crumpled kraft paper is good for sides and corners. Newspaper can work in a pinch. Avoid anything that compresses too easily.
Fill the Box Completely
Once you've filled your package, close it just as you would tape it to ship. Shake it back and forth, and up and down. If you hear items move, you need more packaging.
Movement is the enemy of intact food gifts.
Seal Well and Label Clearly
We all know someone who tapes their Christmas presents too vigorously; I'm that person when I ship packages - I seal every seam.
Use sturdy packing tape to seal the box, especially if it's been used before. Tape both along and across seams. It's okay to use boxes that have dents, but tape over them to be sure they're secure. You should choose a different box, however, if yours seems weak.
Remove old labels to prevent confusion. You can write "fragile" on the package, although it doesn't guarantee gentle handling, especially during the month of December.
After you've sealed your package, you should be confident that it'll be intact if you drop it. If you're not, you've got more packaging to do.
Choose the Best Carrier
Send packages early if you can. None of the major shipping companies guarantee ground shipping times at Christmas.
USPS is the most affordable option for lighter-weight packages; however, delivery times are slower during December. For heavier packages or larger boxes, I usually choose FedEx or UPS, as their prices are competitive and service is often better. FedEx prices are slightly less than UPS, but this will vary based on weight and destination.
I recommend using each company's shipping calculators to determine which carrier will work best for you. Since I can never get my packages out early, I almost always ship via FedEx or UPS. Although most packages are timely, I've had packages arrive late with USPS each year, so I only use them if I have time to spare.
At the risk of sounding cheesy, homemade food gifts are such a joy to make and give. I hope this guide helps you choose and make gifts that your friends and family love. Whether you're sending them across the country or giving to neighbors nearby, these treats always make the season a little brighter.
Leave a Reply