
I didn't like bread very much until I started making my own. One of my favorites is Focaccia, this open chewy, delicious bread seasoned with herbs and olive oil. When it's in my house, I can't stop eating it!

The bread is springy, tender from lots of olive oil, and savory from plenty of herbs and garlic. The oil in the crust gives it an almost-sandy texture that's addictive!
I always get the urge to bake bread again in the winter when it's cold and I've got lots of time at home. This focaccia is perfect alongside a warming soup or any main dish that isn't very carb-heavy, like my Fennel-Crusted Pork.
I have a long history with this bread. I first posted about it in 2011, and then I wrote about it again as Bread Week 32 of my year of bread in 2014. Although I take long breaks from this bread, but I'm always thinking about it.
Kneading bread dough doesn't have to be intimidating, but if it makes you nervous, start your bread-making journey by trying my Easy, No-Knead Pizza Dough.
What is Focaccia?
What is focaccia? Delicious. It's delicious.
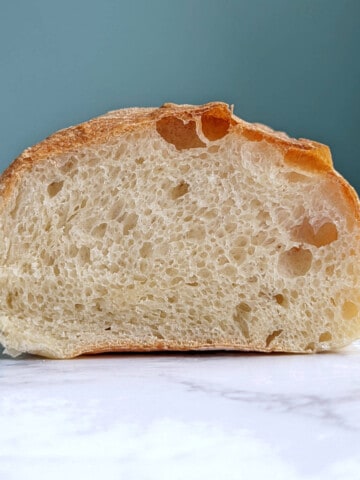
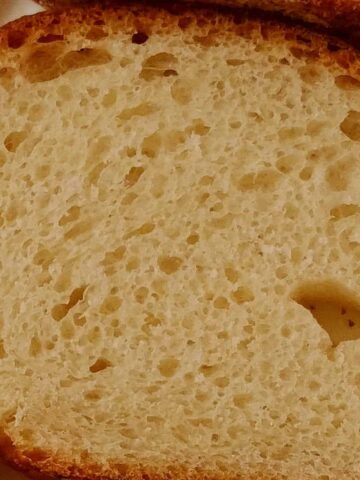
More definitively, focaccia's a flat, Italian, yeast-leavened bread with an open crumb. It's usually flavored with olive oil and herbs. It's made with high-gluten bread flour, and a relatively large amount of water to create airiness.
This recipe is Peter Reinhart's Focaccia, from The Bread Baker's Apprentice (affiliate link). I highly recommend this book for anyone who wants to delve into the whys and hows of bread making. This is the book that taught me how to make bread.
This recipe takes 2 days to make, like many of Reinhart's bread. And for good reason! The dough has a lot of water, which makes it slack and grow outward in a sheet pan in addition to upward. That overnight rise also allows the bread to develop additional flavor.
Ingredients
I think bread is amazing, because it comes from so few ingredients.

Bread flour is a high-gluten flour. Gluten begins to develop when flour gets wet, and you continue to develop it through kneading. Gluten is important in bread-making because it binds the flour together, giving the bread a chewy texture.
If you don't have bread flour or don't want to seek it out, you can use all-purpose flour. The bread will still be delicious and better than store-bought.
I always use unbleached flour in my baking. I think it performs a little better. If you have a choice and not much of a cost difference, it's worth trying unbleached flour. You can read a little more about unbleached flour in the FAQ.
I use table salt because it's what I have, and it always has a uniform texture.
You can use active dry or instant yeast to make bread. Instant yeast tends to make dough rise more quickly. Time isn't a factor for this recipe, so both will work interchangeably.
Water activates the gluten in the flour. Just as importantly, the larger amount of water in this dough creates the puffy texture of the bread.
Olive oil in the dough tenderizes the bread. This is one of the differences between focaccia and other high-hydration breads like ciabatta, which is not tender.
You also use olive oil to coat the parchment underneath the bread, as well as to make an herb oil for topping and flavoring the bread.
Since you bake the bread, there's no need to use extra virgin olive oil. The heat will neutralize any subtle flavors that you might get from premium olive oil.
Finally, you'll need herbs and other seasonings to flavor the herb oil you'll make. You can use fresh herbs, although I use dried for convenience.
I add dried oregano and thyme to my herb oil, along with garlic, salt, and pepper.
Instructions
You'll need to start the focaccia the day before you'd like to bake it. The majority of your effort will be on Day 1.
Day 1
You can make this dough by hand instead of using a stand mixer. It will take longer. Be careful not to work too much flour into the dough, and follow the guidelines for how the dough should look and act to know when to stop kneading.

- Mix all of the dough ingredients with a dough hook in a stand mixer. Once a wet, sticky ball forms, mix on medium for about 5-7 minutes to create a smooth, sticky dough.

- You'll want a sticky dough that will clear the sides, but not clear the bottom of the stand mixer bowl. If the dough barely touches the bottom, it needs more water. The dough will stick to your finger when you touch it.
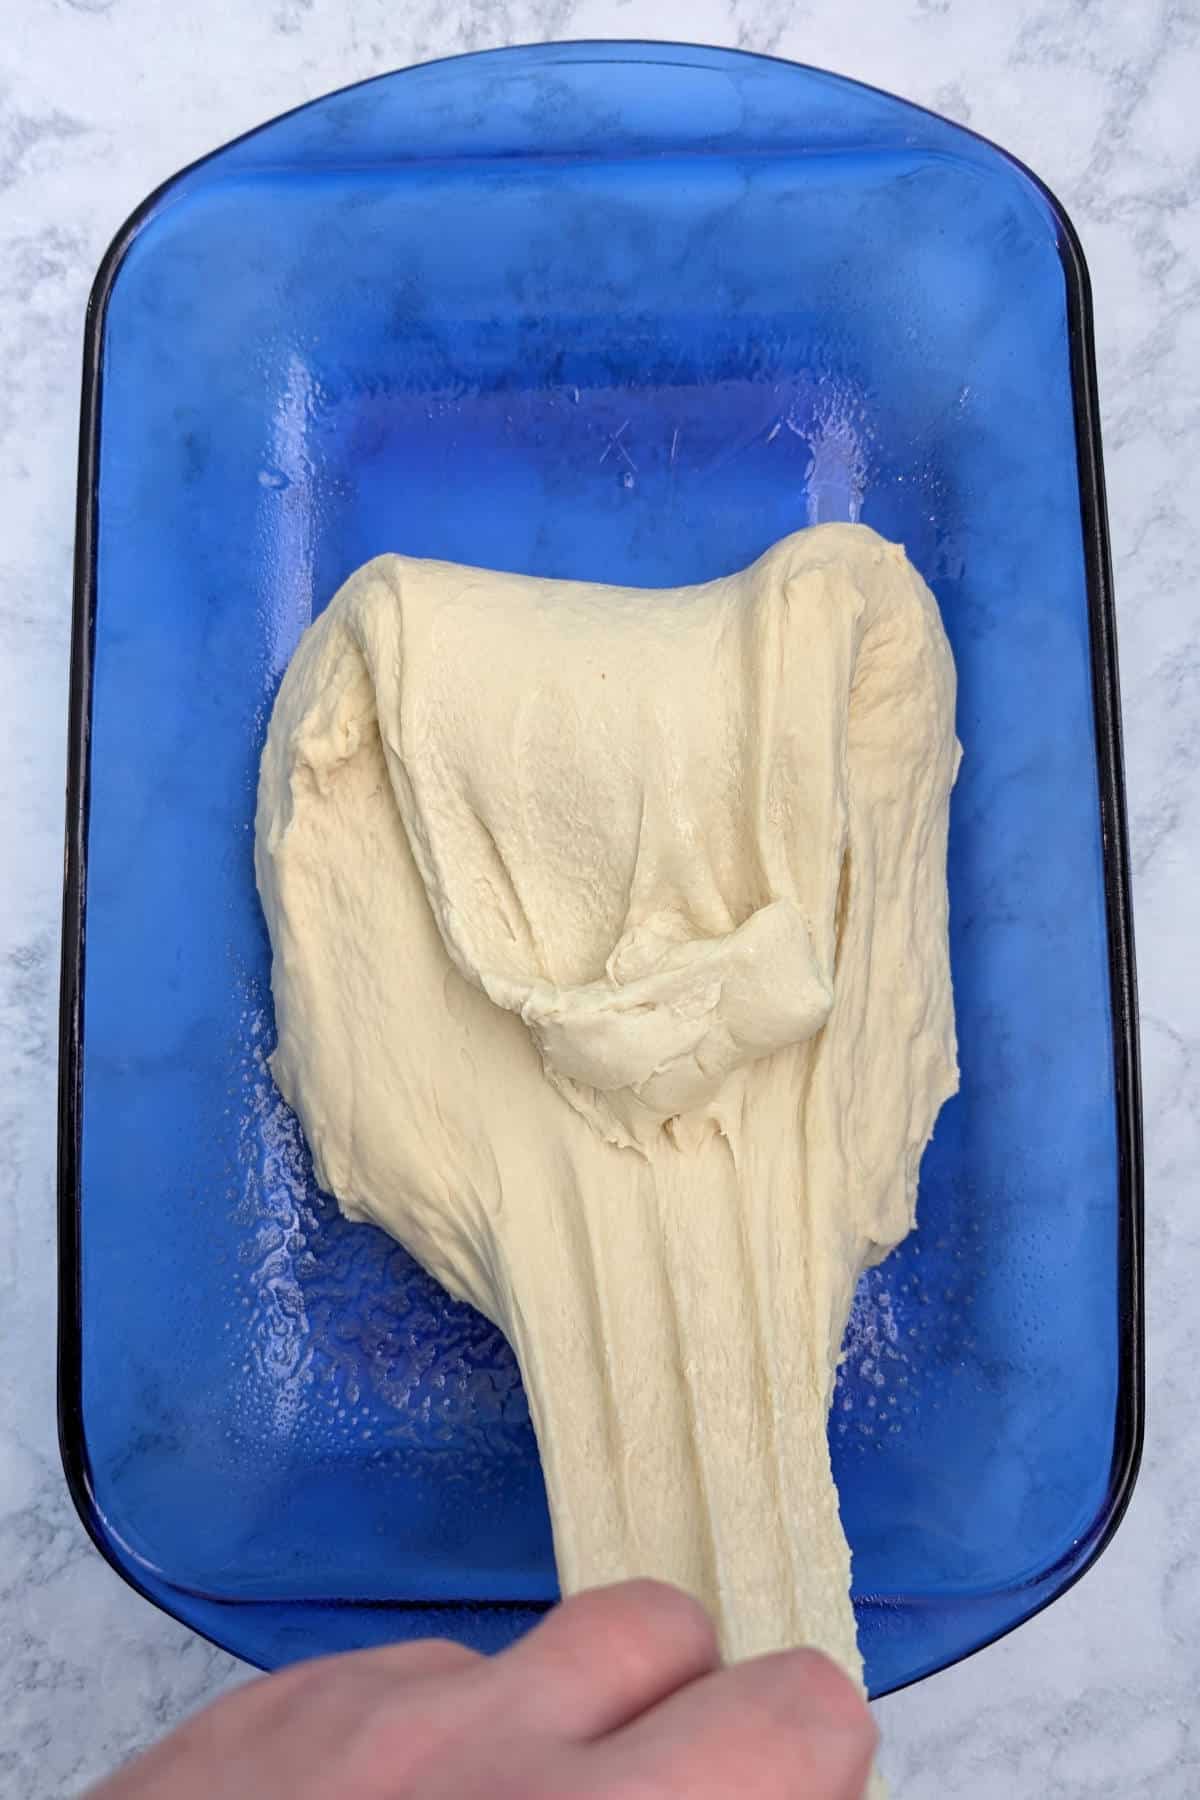
- Scrape the dough into an oiled, large flat container. Use wet or oiled hands to pull the dough from the ends until it's twice its length...

- ...then fold the dough over itself, like you're folding a letter. Cover the dough with plastic wrap, and let rest.
Since the dough is so slack, this folding process helps knead the dough to strengthen the gluten.
You're going to let the dough rest for 30 minutes, then you'll repeat the stretching. Then you'll let it rest another 30 minutes, and stretch the dough a third time.

After you've stretched the dough a third time, let it rest and ferment for 60 minutes. It'll grow but likely won't double in size.
While your dough takes a little break, it's time to make herb oil! Just combine olive oil and your herbs, and heat gently on low. After the pot feels warm, turn it off and let it cool until it's time to shape the bread.

(Reinhart says to heat the oil to around 100F, so it shouldn't scorch you if you forget to make your oil until it's time to pan the focaccia.)
Line a large, 17-inch sheet pan with 1 inch sides with parchment. Coat it with olive oil. The oil is also for flavoring the bread, not just for greasing, so don't skip it or skimp on it.

- Turn the dough out into your prepared sheet pan.

- Pour half of the herb oil over the dough. It may be helpful to make a well or trench in the center beforehand, so the oil doesn't drain off.

- Use your fingertips to coat the entire surface of the bread dough with herb oil and dimple it in...

- ...until the dough almost reaches the edges of the pan.
Next, cover the pan loosely with plastic wrap. Place in the refrigerator overnight.
Day 2
Remove the pan from the refrigerator 3 hours before you plan to bake the bread.

- Pour the remaining herb oil over the dough you just removed from the refrigerator...

- ...and use your fingers to spread it all over the surface and to dimple it in again.
Cover the dough again with plastic wrap, and let the dough rest at room temperature for 3 hours.
When it's time to bake, preheat your oven to 500F. If your oven doesn't go that high, it's ok; 475-480F will be okay too.

- After the dough has rested for 3 hours, it will have grown to about 1 inch tall, as tall as the pan.

- Reduce the oven temperature when you put the bread in the oven. Bake for 10 minutes, then rotate the pan and bake for 10 more, until the bread is a light golden brown.
Transfer the bread to a cooling rack. I usually keep the parchment on the bottom when I do. Let cool for 20 minutes before cutting.

Equipment
The most important tool you can have when making bread is a digital kitchen scale (affiliate link). The weight of a cup of flour can vary when you scoop it (as I tend to), so weighing it will give you the most consistent results.
A digital scale is accurate, and you can zero out the weight (tare) when you add additional ingredients. Also, less scooping means fewer dirty dishes!
I rely heavily on my KitchenAid stand mixer (affiliate link) when I make this bread. I've had it for 15 years. It's expensive, but worth the investment.
A stand mixer makes breadmaking much easier. If you don't have a stand mixer, however, you can easily make this bread. Focaccia dough is soft, and easy to knead.
This bread bakes in a 17-inch half sheet pan (affiliate link). I have these exact ones from Nordicware, and they're still going strong. I've seen them at stores like TJ Maxx as well.
I prefer baking sheets that are NOT non-stick. The most important thing for this recipe, however, is that the baking sheet has a 1-inch rim to contain the bread dough.
If you don't already own one, you should get a serrated bread knife (affiliate link). It really does work better at cutting bread than non-serrated knives.
Storage
Focaccia is best on the day that it's baked.
I store leftovers in an airtight container for up to 3 days. It's a moist bread, so I would not recommend keeping it longer than that, especially in humid weather.

Top Tip
The most important thing is to be sure that your dough is sticky and slack enough. If the dough doesn't have enough water, you won't get a nice, open texture.
FAQ
This focaccia recipe depends on gluten development for its structure. A gluten-free flour blend would not provide the same structure. If you have to eat gluten-free, I recommend finding an alternative recipe specifically designed to avoid wheat flour.
All flour (that has had the bran and germ removed) whitens as it ages. Some millers bleach flour, using chemicals, to hasten this process. If you compare bleached and unbleached flour side by side, you'll noticed that although both are white, bleached flour is very white. Kind of like how you find multiple kinds of white paint at the home improvement store.
Bleaching flour changes its chemical structure, pH, and performance. It also gives the baked goods an off-taste or aftertaste to some people who are sensitive to it. All of the bleaching chemicals are approved for the US food supply. King Arthur Baking has a more in-depth description of bleached/unbleached flour.
Overall, I figure that I'd rather have fewer additives in my food.
Unbleached flour is not necessarily more expensive. Some store brands carry bleached and unbleached flour on their shelves, for the same price.
Related
Make even more bread, using some of my favorite recipes!

Interested in other recipes? I save and share recipes I like or want to try on my Pinterest page - follow me there! You can also check out my Facebook page for more recipes and helpful tips. I'm also happy to try to help troubleshoot my recipes there.
Have you tried this recipe? Or have a question about it? Rate it or leave a comment below! (PS: rating my recipes helps other people find them, too!)
📖 Recipe

Peter Reinhart's Focaccia
Ingredients
Bread dough
- 5 cups bread flour (22.5 ounces/635 grams)
- 2 teaspoon table salt
- 2 teaspoon yeast (active or instant)
- 6 tablespoons olive oil (84 grams)
- 2 cups water (454 grams/16 ounces)
Homemade Herb Oil
- ½ cup olive oil (112 grams)
- 4 teaspoons dried herbs (I use oregano and thyme) (see notes for using fresh herbs)
- 1 teaspoon table salt
- 1 teaspoon garlic powder (or 1-2 cloves minced garlic)
- ¼ teaspoon black pepper
Assembly
- ¼ cup olive oil (56 grams)
- ½ cup herb oil (see instructions above)
Instructions
Day 1/Bread Dough
- Combine flour, salt, yeast, 6 tablespoons olive oil, and water in the bowl of a stand mixer. Use the dough hook on low to create a wet, sticky ball.
- Turn the speed up to medium and knead for another 5-7 minutes to create a smooth, sticky dough. A sticky dough will leave dough on your finger when you touch it. The dough should clear the sides of the bowl, but will stick to the bottom. Add more flour if it doesn't clear the sides; add more water if it doesn't stick to the bottom.
- Oil a large, 10-cup container or pan, and scrape the dough into it. Let the dough rest for 5 minutes.
- Wet or oil your hands, and stretch the dough on both ends until it is twice the length. Fold each end over on the center, as if you're folding a letter. Spray with oil, cover with plastic wrap.
- Let the dough rest for 30 minutes, then stretch and fold a second time.
- Cover the dough and let the dough rest for another 30 minutes, then stretch and fold a third time.
- After the third stretch/fold, cover the dough again, and let it rise for 60 minutes. The dough will grow but may not double in size.
Herb Oil
- While the dough rests after the third stretch, make the herb oil.
- Combine the ingredients for the herb oil in a small saucepan. Heat it gently, just until it's warm. Do not bring it to a boil. You should be able to touch the oil comfortably.
- Remove the oil from the heat and let cool until you pan and shape the bread.
Panning/Shaping
- Line a 17x12x1 inch sheet pan with parchment paper, using a whole sheet. (Don't combine pieces, which will allow oil to leak away from the bread.)
- Coat the parchment with ¼ cup olive oil, then transfer the dough onto the parchment paper. Keep the dough rectangular if you can.
- Top the dough with half of the herb oil. (It may help to make a trench so all of it doesn't slide off.) Use your fingers to dimple the dough and spread it to mostly fill the pan. The dimples/divots will allow oil to pool and make the bread extra delicious.
- If your dough is too springy to shape, you can let it rest for 15 minutes. Try to keep the dough the same thickness throughout the pan. It's ok if it doesn't fill the pan entirely yet, but do coat the entire surface of the dough with oil.
- Cover the pan loosely with plastic wrap and refrigerate the dough overnight.
Day 2/Baking
- Remove the pan from the fridge 3 hours before you plan to bake it.
- Top the dough with the remaining herb oil and dimple it in. Coat the entire surface again. You will likely be able to fill the entire pan with the dough at this point.
- Cover the pan loosely with plastic wrap again. Let it rest at room temperature for 3 hours. The dough will double in size and be about 1 inch tall.
- When it's time to bake, preheat your oven to 500F. 475F will be ok if your oven doesn't go that high.
- Once the oven's preheated, remove the plastic wrap. Place the bread in the oven, and lower the temperature to 450F.
- Bake the bread for 10 minutes, then rotate the pan and bake for another 5-10 minutes, until the bread is a light golden brown.
- Remove the pan from the oven, and transfer the focaccia to a cooling rack. (I usually keep the parchment on the bottom.)
- Cool focaccia at least 20 minutes before cutting and serving. Use a serrated bread knife (affiliate link) for the neatest cuts.
- Focaccia is best on the day it is made, but leftovers can be stored in a sealed container for up to 3 days.
Notes
Nutrition
[Originally published in August 2014. Completely rewritten, with new photos and updated recipe, in February 2025.]


Leona Konkel says
It's my recipe, so clearly I love it. I've made it 2 times this time around, exactly as written. I hope you love it as much as my family and I do. If you have questions about it, feel free to ask!