
Every time I make homemade bread, I ask myself, "Why don't I make bread all the time?"
Jump to:
The main reason is that I shouldn't eat bread all the time. But I bemoan that every time I make this French Bread. It's just so incredibly easy.
It's easier than the other French Bread recipe (also by Peter Reinhart) that I've made, and easier than the Italian Bread as well. As easy as the Pain a l’Ancienne too (although that was likewise pretty simple).
Ever since I cracked open Peter Reinhart's Artisan Breads Every Day (affiliate link) a few years ago, I've only made this French Bread. It's what I've made for Christmas when I've visited my parents over the last few years.
My favorite thing about this bread is just how little effort it takes to make it. I still love cooking and making elaborate things. But like all moms (or people, period) out there, I just don't have time.
I love this recipe. You just mix together dough and refrigerate it. Shape it as soon as you take it out of the fridge the next day. It rises for a few hours, then you bake it.
I weigh my flour to make sure I use the right amount. That's probably the most important thing for bread success. But I don't weigh my flour when I travel, and the bread turns out great.
There's no trick to making the dough. Very little kneading - just a few minutes. No seeing if you've developed your gluten properly. No waiting for the dough to rise since you stick it in the fridge overnight. It does take a little getting used to shaping loaves of bread dough. Honestly, though, even if you don't do a perfect job of shaping, the loaves still bake well and taste delicious. I've had some misshapen loaves of bread in my day (see most of my previous bread recipes above), but they are still wonderful to eat.
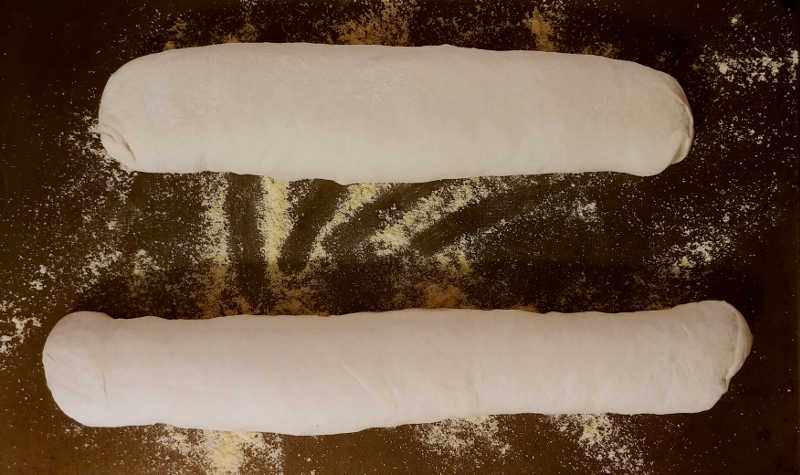
When you shape a loaf of free-standing bread like this, you're folding it up like a letter. Pat the dough into a rectangle, fold up the bottom into the center, and squish in the seam. Fold down the top to the center, and squish in that seam. Then fold the new top all the way to the bottom, and pinch/squish the dough together. Roll the loaf a little to stretch it out and make the surface a little tighter; getting surface tension is the whole point. Then place the loaf, seam side down, on a baking sheet.
[envira-gallery id="35205"]
The first time I made French Bread for this blog - a whole 8 years ago - I wrote, "I wish I could have bread like that every day, but aside from bakers, who has 10 hours to devote to breadmaking a day?" I still maintain that. With this recipe, that 10 hours is overnight. You only spend 10-15 minutes making the dough on the first day, and 40 minutes (admittedly, with a 2 hour break in there) shaping and baking it on the second day. It's a perfect easy weekend project.
I hate to say that I'll probably never make Peter Reinhart's original French Bread again, but it's true. If you're a fan of that one, give this recipe a try instead and see how much easier it is.
And if you're not sure that bread-making is for you but you'd like to give it a try anyway, this is definitely the recipe for you. It's worlds better than what you can buy.
What would I eat with this? Anything. But my favorites would be Beef with Capers and Garlic, Chickpeas with Spinach, and Slow Cooker Bean and Bacon Soup.
📖 Recipe
Easy French Bread
Ingredients
- 24 ounces unbleached bread flour (about 5 ⅓ cups)
- .5 ounces salt (2 teaspoons)
- .25 ounces instant or active dry yeast (2 ¼ teaspoons)
- 16 ounces water (2 cups)
Instructions
Day 1
- Combine flour, salt, yeast, and water in a mixing bowl or stand mixer. If using a mixer, mix on low speed for 1 minute, until the dough comes together. If mixing by hand, mix with a spoon for about 1 minute. Ingredients should form a shaggy ball of dough, but you may need to use your hands to knead it together for a few seconds before a ball forms. Let rest for 5 minutes.
- Switch to the dough hook on your stand mixer (if you haven't started with it; I usually do), and mix for 2 minutes on medium-low speed; or knead by hand for about 2 minutes. The dough should be smooth and tacky but not sticky. (Think, like a post-it note that clings to you but doesn't leave much if any residue.) Add flour or water as needed.
- Regardless of if you're using the stand mixer or using your hands, knead by hand for 1 more minute, then place in an oiled bowl at least twice as big as your dough. If dough is too wet/sticky, don't add more flour; instead, stretch out the dough and fold it on itself, from each side of the dough. Wait 10 minutes, and if the dough still seems too wet, repeat. You can repeat this process two more times if necessary.
- Cover bowl with plastic wrap, then refrigerate overnight or up to 4 days. You can also divide your dough before you refrigerate it. Dough will double in volume overnight.
Day 2
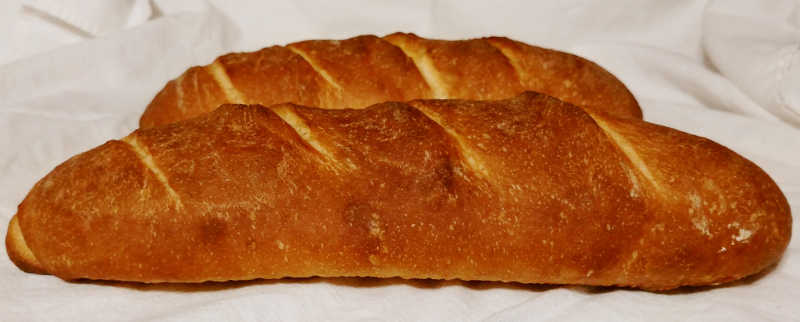
- Remove dough from the refrigerator 2 hours before you plan to bake it. Gently turn it out onto a floured surface, but do not deflate it. Divide it into 2 pieces for large loaves (the size I made above), or 4 if you want smaller baguettes.
- To form loaves, gently pat the dough into a thick rectangle. Fold the bottom half of the rectangle to the center, and press the seam into the dough. Fold the top half of the dough to the center and seal the seam. Roll the new top half of the dough over that seam, to create a new seam at the bottom of the loaf. Pinch that seam together into the dough to make the surface of the loaf tight. Rock the loaf back and forth to make the loaf however long you'd like it (but usually no longer than 12 inches). Place dough seam-side down on a cornmeal-dusted piece of parchment on a baking sheet.
- Spray the loaves with cooking spray and cover with plastic wrap. Let proof at room temperature for about 90 minutes, until they have increased to 1 ½ times their original size.
- About 30 minutes before baking, preheat your oven to 500F. (Mine starts to smoke at that temperature if the oven's a little dirty, so I usually do 475F instead.) Place a sturdy metal (not non-stick) pan on the bottom rack to preheat as well.
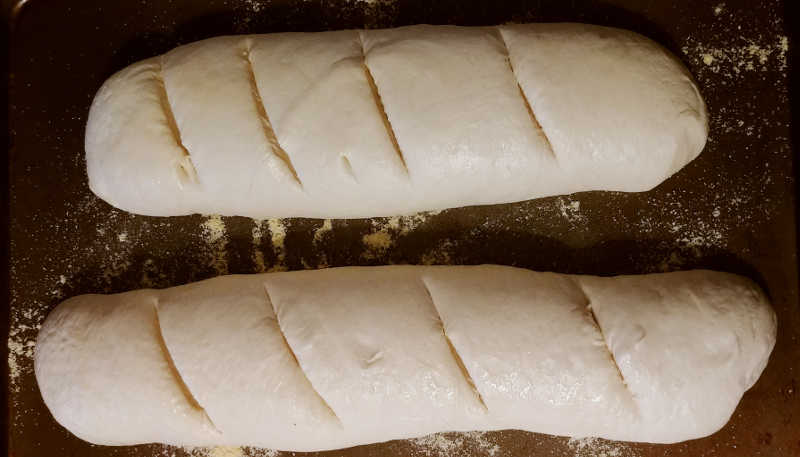
- Remove the plastic wrap from the dough. Use a serrated knife to cut (or saw, if necessary) slashes into the dough. (I've been using my bread knife, and cutting pretty deep.) Place the loaves in the oven on the middle/upper rack. Pour 1 cup of hot water into the preheated pan on bottom, being careful not to spill any onto your oven window. (This will create steam, which will help your loaves spring and rise beautifully.)
- Reduce heat to 450F and bake for 12 minutes. Rotate the pan, and bake for another 15-25 minutes, until the crust is a dark golden brown and the loaves sound hollow when tapped. (If you want to take their temperature, it will be about 200F.)
- Cool bread on a wire rack for at least 45 minutes before slicing.


Leave a Reply