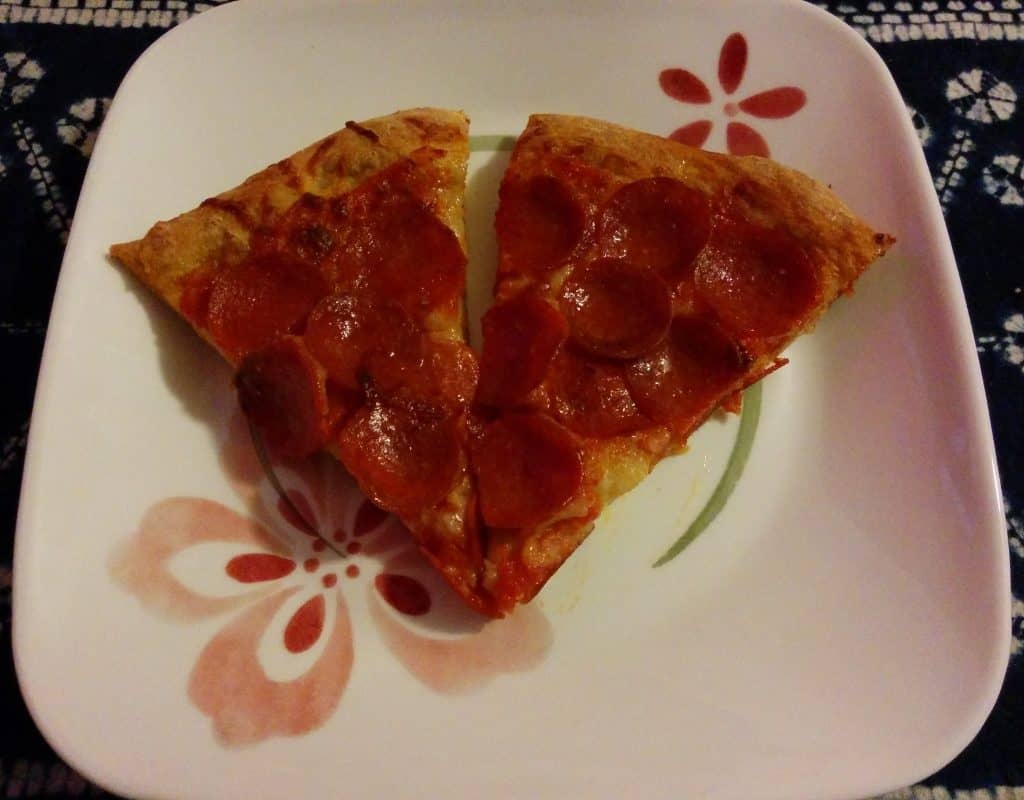
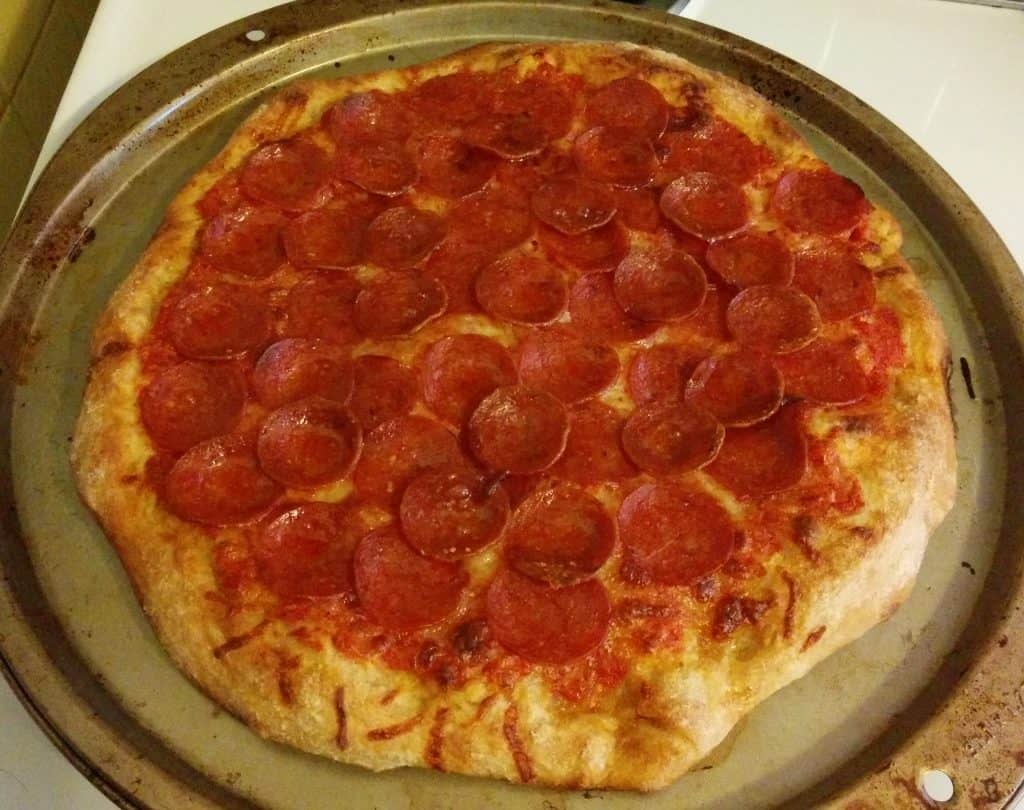
In the winter, we have pizza once a week, usually on Friday night or over the weekend. I make homemade pizza, because it's actually easy to make from scratch when you use a No-Knead Pizza Dough!

"Pizza takes yeast, and that means kneading dough, and having it rise!" you might think. And while that's sometimes true, this is a no-knead pizza dough. Just mix together the dough, walk away, and don't bother it until it's time to make dinner!
New Jersey, where I live, is a land of good pizza, but I still like to make it homemade because it's so much cheaper. With this dough, making pizza takes no more time than making a normal dinner. I can keep the ingredients for both dough and toppings on hand in my pantry and refrigerator.
I originally made this as Bread Week 27 of my year of bread in 2014. It also happens to be the only pizza dough recipe that I make on a regular basis. It's just that easy and dependable.
[This post contains affiliate links. I may make a commission for purchases made through links on this post. As an Amazon Associate, I earn from qualifying purchases.]
Ingredients
Pizza dough, like most bread, only takes a few simple ingredients.
- Flour
- Salt
- Yeast
- Water
This recipe takes all-purpose flour. You can use bread flour if you'd prefer; it may make for a chewier crust. I usually use a mix of all-purpose flour and whole-wheat flour.
I always use unbleached flour in my baking. It performs a little better, and it'll taste a little better in this recipe. If you have a choice and not much of a cost difference, it's worth trying unbleached flour. You can read a little more about unbleached flour in the FAQ.
I use table salt because it's what I have, and it always has a uniform texture.
I use active dry yeast in my baking. If you have instant yeast instead, I think it will work fine; your dough may rise more quickly.
Water activates the gluten in the flour. Flour can dry out in the winter, so you may need to add a little extra water if some of your flour isn't wet. The dough will be easier to roll that way, and the pizza will be better.
Instructions
I've adapted my pizza dough from Smitten Kitchen's lazy pizza dough recipe, who adapted it from Jim Lahey.
There's two parts to making pizza dough - mixing it, and baking it!
About 6 hours (or 3 hours, or 12 hours; see recipe card for details) before you want to bake pizza, gather your ingredients.
Mix the flour, salt, yeast, and water until there's no dry flour remaining. You want the dough to be a little wet-looking. Cover and set aside, preferably in a warmish place. Take a break and go on with your day!
Come back at the end of the rising time and take a peek! It will have grown; it may or may not have doubled in size.
Preheat your oven to at least 475 or 480F. You can go up to 500F if you want, but some ovens don't tolerate the higher temperatures well.
You can pat the dough out into the pan, or roll it. Patting it gives you a thicker crust. I prefer to roll it because I prefer a thinner crust, and rolling the dough makes the crust a more uniform thickness.
- Turn the dough out onto a well floured surface. Roll the dough in the flour so that it doesn't stick to the surface or to the rolling pin.
- Roll the dough until it's a little larger, than the size of your pizza pan, and roughly circular.
- Drape the pizza dough over the rolling pin, then slide the pan underneath it. Unfurl the dough into the pizza pan.
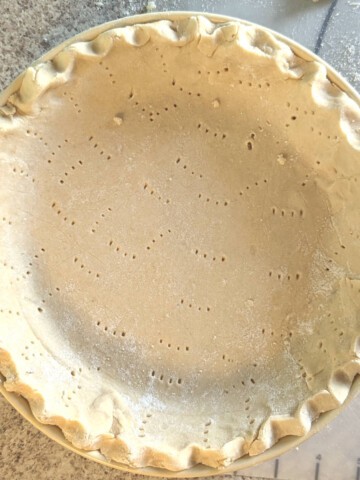
- Tuck (but don't stretch) the crust into the corners of the pan. This helps it shrink back less as the pizza prebakes. However, you don't want a big edge or handle, which can become too crisp.
- Bake your crust in the preheated oven for 5 minutes. It'll puff up a little, but won't brown. Gently deflate any bubbles.
Next, add toppings. The most important thing is to not add too much sauce to the pizza, as that can make your crust soggy, especially if your oven can't go as high as I've recommended.
Top the pizza with 1) sauce, 2) cheese, and 3) pepperoni or other toppings. Put the pizza back in the oven. Bake for another 12 minutes, until the cheese in the middle is bubbly and 4) it looks done.
Wait 5 minutes before you cut it. The pizza toppings will slide off without this rest. Even with the rest, the pizza will still be hot enough to burn your mouth if you're not careful.
Equipment
The beauty of this recipe is that it doesn't take any special equipment. That said, some things will make it easier.
I always use a digital kitchen scale (affiliate link) to weigh my flour, because it's the most accurate way to measure. If you don't have a scale, I've included volume measurements in cups; be sure to pay attention to if your dough needs more water.
I use a 12-inch pizza pan. I have never tried this pizza with a crisper pan (the kind with holes in the bottom). You can also bake the pizza in a 9x13-inch pan (affiliate link). If you're going to cut your pizza in the pan, do NOT use a nonstick pan.
I prefer to roll out my dough for even thickness. Any rolling pin should work fine. If you don't have a rolling pin, you can pat the dough directly into shape in the pan.
Storage
This makes one 12-inch pizza. When split between two or three people, we never have leftovers. If you do, store them covered in the refrigerator, since pizza is topped with cheese.
To feed one person, I recommend making a half batch of dough.
If you want to make the full batch of dough for a single person, I recommend splitting the dough in half and baking two smaller pizzas. Bake the first pizza on the first day, and cover and refrigerate the remaining dough. Bake the second pizza a few days later. Check for doneness a few minutes early when baking smaller pizzas, but baking time will be very similar to the full recipe.
Top Tip
Don't overload the crust with sauce! I love pizza sauce, and prebaking your pizza before adding toppings helps keep it from getting soggy. However, excessive sauce will keep your pizza from baking properly.
FAQ
Even though you don't knead the dough, this pizza dough still depends on gluten development for its structure. If you eat gluten-free, I recommend finding a different recipe that specifically avoids wheat flour.
I almost always use a mix of all-purpose and whole wheat flour to make pizza. I use about 120 grams of all-purpose flour, and 67 grams of whole wheat, for a 2:1 ratio. It will make your dough a bit shaggier, and you may need to add more water.
If you add more whole wheat flour than the above ratio, it may affect how the dough rises and the crust may be a bit more dense.
You can use bread flour, but you don't have to for this recipe! Bread flour has more protein and generates more gluten than all-purpose flour, so pizza made with bread flour may be a bit chewier. I prefer to save bread flour for when the bread is the star (like in focaccia), and use all-purpose flour for pizza where I'm savoring toppings.
Generally, I think unbleached flour performs a little better and tastes a little better.
All flour (that has had the bran and germ removed) whitens as it ages. Some millers bleach flour, using chemicals, to hasten this process. If you compare bleached and unbleached flour side by side, you'll notice that although both are white, bleached flour is very white. Kind of like how you find multiple kinds of white paint at the home improvement store.
Bleaching flour changes its chemical structure, pH, and performance. It also gives the baked goods an off-taste or aftertaste to some people who are sensitive to it. All of the bleaching chemicals are approved for the US food supply. King Arthur Baking has a more in-depth description of bleached/unbleached flour.
Overall, I figure that I'd rather have fewer additives in my food.
Unbleached flour is not necessarily more expensive. Some store brands carry bleached and unbleached flour on their shelves, for the same price.
Related
Make even more bread, using some of my favorite recipes!
Interested in other recipes? I save and share recipes I like or want to try on my Pinterest page - follow me there! You can also check out my Facebook page for more recipes and helpful tips. I'm also happy to try to help troubleshoot my recipes there.
Have you tried this recipe? Or have a question about it? Rate it or leave a comment below! (PS: rating my recipes helps other people find them, too!)
📖 Recipe
Easy No-Knead Pizza Dough
Equipment
- 12-inch pizza pan
Ingredients
No-Knead Pizza Dough
- 187 grams all-purpose flour (about 1 ½ cups; see notes for whole wheat flour)
- ¼ teaspoon active dry yeast (for a 6-hour rise; see notes for quantities for other rising times)
- ⅜ teaspoon table salt
- 141 milliliters water (5 ounces; ½ cup + 2 tablespoons)
Pizza Toppings
- ½ cup pizza sauce (5 ounces) (a heaping ½ cup)
- 2 cups mozzarella cheese (8 ounces; shredded)
- 3 ounces pepperoni (or other toppings as desired)
Instructions
No-Knead Pizza Dough
- Mix together the flour, yeast, salt, and water until a rough ball forms. Add a tiny bit of extra water if the flour doesn't all mix in.
- Cover bowl with plastic wrap and let the dough rise on the counter for 5-6 hours, until dough has about doubled in size.
Shape and Pre-Bake
- Preheat oven to 500F. (475F is okay if your oven has issues.)
- Turn dough out onto a well-floured surface. Roll the ball of dough loosely in flour, then roll out until it's about the size of your pizza pan.
- Grease your pizza pan if food tends to stick to it; this is more common on roughened up pizza pans. Use the rolling pin to transfer the dough to the pan. Tuck, but don't stretch, the dough into the corners.
- Bake in the preheated oven for 5 minutes. The crust may shrink a bit; this is ok. Use a fork to gently deflate any bubbles.
Top the Pizza
- Top the pizza with the sauce, cheese, and pepperoni or other toppings.
- Bake the pizza for around 12 minutes, until the cheese is molten in the center.
- Cool 5 minutes before cutting and serving.
Notes
In the past
Originally posted July 2014. Completely rewritten and overhauled, with new instructions and photos, in March 2025.
Leona Konkel says
I hope this recipe finds its way into your dinner rotation, just like it has mine!