
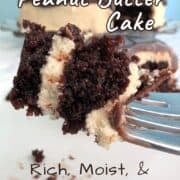
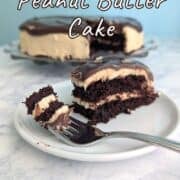
Peanut butter is not usually my first, second, or even third choice for a dessert, but let me tell you, that changes when dessert is this Chocolate Peanut Butter Cake. It's moist, rich, and decadent, and I almost don't want to share it with anyone.

I first made this cake for Alex's birthday back in 2013, and it's been unforgettable ever since. The chocolate cake is soft and moist, while cream cheese in the peanut butter frosting cuts through some of that richness. And it's topped with a peanut butter fudge ganache.
This cake really reminds me of the chocolate peanut butter cupcakes that you find at Trader Joe's, which are one of the rare baked goods I buy at a grocery store. This cake is better, though, because I can make it at home whenever I want!
Although I cut the recipe in half in 2020, this is still a very rich cake. Even so, it's 12 pieces of decadent cake that you won't regret eating or sharing.
Jump to:
Ingredients
There's 3 parts to this cake, so let's break it down.
Cake

All-purpose flour is the go-to, but I expect that a gluten-free flour blend with xanthan gum would work in this. Definitely line the pans with parchment paper if you make the swap, though; even with wheat flour, this is a tender cake.
As always, use unsweetened cocoa powder. Brand doesn't matter.
Baking soda adds lift, reacting to the acidity in the cocoa powder and the vinegar. If you don't have white vinegar, I think bottled lemon juice would also work.
Vegetable oil keeps this cake incredibly soft, even straight from the refrigerator. Melted butter would likely work, but would make the cake stiffer.
Yogurt adds moisture and a little flavor. I've used both whole milk yogurt and low fat yogurt. The recipe originally called for sour cream, but I don't keep that in my house.
An egg helps bind the batter together. The cake would be too crumbly without it. Given that it is such a tender cake, though, using a flax egg should work. If you're interested, try using 1 tablespoon ground flaxmeal plus 2 ½ tablespoons water, like Minimalist Baker does.
Peanut Butter Cream Cheese Frosting
The frosting takes fewer ingredients, but you will need to bring them to room temperature first.

I used whole fat cream cheese. Cut it into small pieces to help it soften more quickly. Lower fat, Neufchatel cheese may work if you're used to it. Whipped cream cheese will not work, as it already has air beaten into it.
You could substitute salted instead of unsalted butter, but your frosting may end up too salty.
Use a standard, creamy peanut butter that already has sugar and oil added to it. Jif, Skippy, and store brands are all okay. Don't use a "natural" peanut butter that has to be refrigerated. You can try a crunchy peanut butter, but you may have to beat the frosting for longer to get it mixed together.
Powdered sugar adds the rest of the sweetness and bulk.
Chocolate Peanut Butter Ganache
This ganache is slightly different from others that I've made, taking:

Use semisweet chocolate chips or chopped chocolate. Nothing too dark, as it may thicken excessively. Try something below 50% chocolate. If it doesn't tell you how much chocolate is in it, it's perfect.
Use smooth peanut butter; you don't want chunky ganache.
Corn syrup helps keep the ganache shiny and smooth. I haven't used corn syrup in other ganache recipes I've made, but I'm afraid to try it without for this. You can try honey instead.
This ganache takes dairy half-and-half instead of cream, which is in most ganache. The chocolate-peanut butter mixture is thicker than regular melted chocolate, so the water content in the half-and-half keeps the ganache thinner, and more pourable, than a ganache made with cream.
Cake Instructions
When I made this cake in 2013, I made a large, 3-layer cake, exactly as Smitten Kitchen had adapted it from Sky High: Irresistable Triple-Layer Cakes. In 2020, I converted the cake to a 2-layer cake, and have made further tweaks to it.
Since this is an oil-based cake, you can start baking as soon as you think of it! Start by preparing your round cake pans.
The cake layers are incredibly soft and turning them out of the cake pans later is tricky, so I recommend you use parchment paper rounds on the bottom, unlike what I have done here. For the sides, you can also use strips of parchment paper, or just grease and dust the sides of the pans as I show below.

- Although I highly recommend using parchment paper on bottom (see explanation above), you can grease and flour/cocoa your pans. Spray the surface with cooking spray or cover with shortening. Add a mixture of flour and cocoa powder, and tap the pan to spread it around the surface. Tap the powder into the other pan to continue.
Be sure that all the surfaces look dry with powder, and not sticky. Then tap out the excess.

- In a large mixing bowl, whisk together the flour, sugar, cocoa powder, baking soda, and salt.

- Add the vegetable oil, yogurt, and egg. Use the wire whisk (affiliate link) to mix until combined. It's thick and will resemble brownie batter at this point. You mix this before adding the rest of the liquid, so that the egg gets thoroughly combined and you don't get streaks of egg in your cake.

- Pour in the water, vinegar, and vanilla extract. Carefully whisk it in until the batter is liquidy and uniform. (It will splash if you mix too quickly to start!)

- Divide the batter evenly between the two prepared baking pans.

- Bake until the cakes have domed slightly, and a toothpick inserted into the center comes out clean.
Baking the rounds can take somewhere between 18-25 minutes, depending on how heavy your cup of flour is, how hot your oven runs, if you use 8-inch or 9-inch pans, and if your pans are dark metal. My cake always domes slightly when it's about done. If you press the cake slightly with a finger, the cake should spring back a little.
Cool the cakes completely in the pan. Meanwhile, pull out the cream cheese and butter to soften for when you make the frosting in about an hour.
Frosting and assembly
If your cream cheese is not thoroughly softened, you will have lumps in the frosting. So don't rush to make the frosting.
About 30 minutes before you make the frosting, place the cake pans in the freezer. The cake is so soft that chilling it will really help keep it from tearing when you assemble the layers.

- Beat together the softened butter and cream cheese until smooth, then beat in the peanut butter.

- Add the powdered sugar 1 cup at a time. Once it's all mixed in, beat another 3-4 minutes until fluffy.
While you can use the frosting as soon as you've mixed in the powdered sugar, it spreads much more nicely after you've beaten it longer.

- Take a frozen cake layer, and run a thin cake spatula or rubber spatula around the edge to loosen it from the pan.

- Invert the pan onto a wire rack.
If you used parchment paper on the bottom, it will come out easily. If you haven't, you'll likely need to use the spatula to pry the cake away from the edges more. I usually bang on the bottom of the pan to get it to release.

- Flip the cake onto your cake stand so that the top of the cake is face up. (The top surface is sturdier, less prone to tearing and breaking, and will be easier to frost.) Coat the top with a layer of around ⅔ cup frosting.

- Remove the other cake layer from the pan, and place on the frosted layer top-side up. Coat the top and sides with a thin layer of frosting to form a crumb coat. This will help seal the crumbs and make your final coat of icing prettier.
Place the cake in the refrigerator or freezer for 15 minutes, to let the frosting set up.

- After the crumb coat has set, spread the rest of the frosting along the top and up the sides. I usually still have a few crumbs peek through, and I'm okay with that.
Hint: It's easier to keep your cake plate clean of frosting if you line it with strips of waxed or parchment paper, as seen above. Let the frosting set completely before removing them. If the frosting tears away a little, press chocolate chips or sprinkles into the bottom edge as a border.
Ganache
Refrigerate (or freeze) your cake for another 30 minutes before topping with the ganache.

- Put about 1 inch of water in a small saucepan. Put chocolate, peanut butter, and corn syrup in a bowl that fits over it. Heat over low heat, stirring constantly, until the mixture is smooth. Be very careful, because the chocolate can scorch quickly. You'll also notice this mixture is thicker than melted chocolate usually is.

- Add the half-and-half to the melted chocolate mixture. Carefully stir it in, until smooth. Don't let the ganache cool; use it immediately.

- Immediately pour the ganache over the chilled cake.

- Spread the ganache to the sides of the cake, but don't pour it down. I found that ganache along the sides was harder to cut through prettily.
I recommend letting the ganache set for at least an hour before cutting into the cake.
Variations and substitutions
I think this cake could be successfully made with a cup-for-cup, gluten-free flour blend with xanthan gum. Be extra cautious when removing the cake from the pan.
Since the cake only takes 1 egg and is already very tender, I think it would be possible to substitute a flax egg. I suggest trying the flax egg recipe from Minimalist Baker, if you don't already have your own.
Given the large quantity of dairy in the frosting and ganache, I would recommend finding a dedicated dairy-free recipe for those components, instead of trying substitutions.
Equipment
You'll need 8-inch or 9-inch round cake pans to make this recipe. Mine are shiny aluminum, and must be greased or parchment-lined. Even if you use nonstick pans, you should grease and flour them or line them with parchment. Darker pans will bake the cake more quickly; check for doneness early. Since you place the pans in and out of the freezer, I cannot recommend using glass. I've never had success with silicone bakeware.
The cake batter itself is a one bowl recipe, and is easily made with a wire whisk (affiliate link).
To thoroughly cream together butter and cream cheese and beat the frosting, however, you should use an electric hand mixer (affiliate link) or stand mixer.
Although you can melt chocolate in the microwave, I find I have more control doing it on the stove for this amount. If you don't have a double boiler - I don't! - you can hack it with a heat-safe bowl over a small saucepan. The bowl should not touch the water; rather, you're using the steam from the water to gently melt the chocolate. Be sure that the bowl completely covers the top of the pan so steam doesn't escape (and burn you).
Once you've gotten used to using a double boiler, it'll be easy to try my Chocolate Truffle Cake or Chocolate Espresso Tiramisu!
Storage and Serving
Since the cake has a cream cheese frosting, it should be stored in the refrigerator.
Remove it from the fridge 15-30 minutes before serving to make the ganache easier to cut. If you still have trouble cutting it, use a sawing motion on the ganache, rather than squishing the knife through.
I get 12 slices from this layer cake, but they are rich and sometimes I've had trouble finishing one! I recommend slicing only what you will eat at a given time. Place a layer of plastic wrap against the cut side of the cake to keep it from drying out. That said, store slices in a sealed container if you're concerned the cake will pick up odors from your fridge.

The cake stays soft and delicious for at least 4 days after baking, and we've definitely enjoyed it for longer.
Top Tip
Be patient with yourself when you assemble a layer cake, especially this one. The cake layers are prone to crumbling, and you will have lots of crumbs in your crumb coat. Remember that as long as your cake, frosting, and ganache taste good, your cake will be great!
Chocolate Peanut Butter Cake FAQs
I think this cake is a great candidate for using gluten-free flour. Swap in a cup-for-cup, gluten-free flour blend with xanthan gum in place of the wheat flour. Be sure that you haven't cross-contaminated any of your other ingredients with flour. Since gluten-free flour usually makes a cake more delicate and this was already a tender cake, I highly recommend lining the pans with parchment paper instead of dusting them with cocoa powder. And as always, don't use a cooking spray with flour to coat your pans for a gluten-free cake!
Since this cake only takes one egg and uses that egg primarily for binding (and not for leavening), I think it's a great candidate to try a flax egg or some other type of egg substitute. Try 1 tablespoon of ground flaxmeal with 2 ½ tablespoons water; stir it and let it rest for 5 minutes to begin to gel. This substitution may make the cake more tender, so I highly recommend using parchment paper to line the bottom of the pans.
While you may be able to substitute something else for the yogurt in the chocolate cake layers, cream cheese and half-and-half are important ingredients in the rest of the cake. I would recommend finding a dedicated dairy-free recipe instead.
If you don't want to use parchment paper to line the bottoms of the round cake pans, grease the bottoms and sides of the pan with shortening or spray them with cooking oil. For a chocolate cake, immediately put a spoon of flour and a spoon of cocoa into a pan. (You'd use just flour for a not-chocolate cake.) Swirl the pan a bit to mix the flour and cocoa together, and then tap the side of the pan with your hand to shake the flour mixture all over the bottom. Then, turn the pan on its side to tap the flour along the edges. Holding the pan over the other pan will help reduce mess.
Tap until all the surfaces are coated with dry powder. Then, tap the excess into your mixing bowl, a compost pile, or the trash.
Technically yes, you can melt the chocolate with the cream (or half-and-half, as for this chocolate peanut butter ganache), all at the same time. That said, I found that my chocolate didn't fully incorporate into the half-and-half when I tried it this way; I ended up with chocolate lumps. I find that melting the chocolate with the peanut butter and corn syrup is a safer way to make this ganache. I hypothesize that it's the higher water content of the half-and-half that keeps the chocolate from melting smoothly.
While I like natural peanut butter on toast, I stick with regular peanut butter for baking because it's more consistent. "Natural" peanut butter usually has a single ingredient - peanuts. The oil separates because there are no additives. There's a couple of reasons not to use it in baking:
💧Oil separation makes it harder to mix into the frosting or ganache; it might also separate out later.
🧁No added sugar means that your frosting (or other baked goods) won't be as sweet. While this may be okay sometimes, it's a problem when you use a large amount of peanut butter.
While you can substitute single-ingredient peanut butter for regular peanut butter, you'll have to make some adjustments to the fat and sugar as you go.
🍫🥜More chocolate and peanut butter
Looking for other recipes like this? Try these:


I hope this becomes a recipe you'll return to. If you try it, a star rating below helps others find it - and I'd love to hear how yours turns out in the comments! 💕 Questions or trouble? Drop a note, and I'll do my best to help.
📖 Recipe

Chocolate Peanut Butter Cake
Equipment
- wire whisk (affiliate link)
- 2 8-inch or 9-inch round cake pans
- parchment paper (for lining pans; optional)
- electric mixer
Ingredients
Chocolate Cake
- 1 cup flour (125 grams)
- 1 ¼ cups sugar (250 grams)
- 6 tablespoons cocoa powder (30 grams)
- 1 teaspoon baking soda
- ½ teaspoon table salt
- ½ cup vegetable oil (112 grams)
- ½ cup yogurt (112 grams)
- 1 egg
- ¾ cups water (170 grams)
- 1 tablespoon white vinegar (15 grams)
- ½ teaspoon vanilla extract (3 grams)
Cream Cheese Peanut Butter Frosting
- 6 ounces cream cheese (¾ cup/170 grams, at room temperature)
- 5 tablespoons butter (70 grams, at room temperature)
- 3 cups powdered sugar (360 grams)
- 6 ½ tablespoons peanut butter (104 grams)
Chocolate Peanut Butter Ganache
- ⅔ cup semisweet chocolate (113 grams/4 ounces, in pieces)
- 1 ½ tablespoons peanut butter (25 grams)
- 1 tablespoon corn syrup (20 grams)
- ¼ cup half and half (57 grams)
Instructions
Chocolate Cake
- Line the bottoms and sides of two 8-inch or 9-inch round (metal) cake pans with parchment paper, for easiest release.Or, grease the pans, or spray them with cooking spray. Sprinkle a little flour and cocoa powder in each pan, and tap the pan until all surfaces are coated with dry powder. Tap out any excess.
- In a large bowl, mix together flour, sugar, cocoa powder, baking soda, and salt.
- Add vegetable oil, yogurt, and egg, and use a whisk to combine. The batter will be thick at this stage.
- Whisk in water, vinegar, and vanilla. This will thin it out considerably.
- Divide batter evenly between the two pans. Bake on the same rack in the middle of your oven, for about 18-25 minutes at 350F.
- Check for doneness a few minutes early. The cakes will dome up slightly by the time they are done, and if you press on them with a finger, the cake will mostly spring back. Stick a toothpick into the center of a layer; it should come out clean, or with only a crumb.
- Cool cake layers completely, in the pan, before making the frosting.
Cream Cheese Peanut Butter Frosting
- Freeze the cake layers, in their pans, for 30 minutes before assembling the cake. This helps keep the very tender cake together better as you frost it.
- Using an electric hand mixer (affiliate link), beat cream cheese and butter until creamy. Add the peanut butter, and mix until well combined.
- Add powdered sugar 1 cup at a time, scraping the bottom occasionally. Then, beat until fluffy, about 3-4 minutes. Thorough beating will make the cake easier to frost.
Cake Assembly
- Take a cake layer from the freezer. If you greased and floured the cake pan instead of using parchment paper, run a thin cake spatula or rubber spatula around the edges to loosen it up. Place a wire rack on top of the pan, and flip the cake out onto it. If you didn't use parchment, you may need to go back to loosen up the cake a little more underneath the edges.
- Transfer the cake layer to your cake plate, top side up. (The top side is less prone to breakage.) Place strips of waxed paper underneath the edges of the cake to cover the cake plate and keep it cleaner while you frost.
- Place about ⅔ cup of frosting on the layer and spread to almost, but not quite, the edge.
- Turn out the second cake layer as you did the first cake layer. Place it on the frosted layer, top side up again.
- Frost the top and sides of the cake with a thin layer of frosting. It will get crumbs in it, but that's okay, because this is the crumb coat. Refrigerate the cake for 15 minutes to set the frosting and (mostly) seal the crumbs in.
- Spread the remaining frosting on the top of the cake, and then the sides. I tend to add frosting at the bottom of the sides, and swipe toward the top. You may still get a crumb or two in the cake, but it's much better looking than the crumb coat.
- Chill the cake for another 30 minutes while you make the ganache.
Chocolate Peanut Butter Ganache
- Combine the chocolate chips, peanut butter, and corn syrup in a heat-safe bowl placed over a saucepan filled with ~1 inch of water.
- Heat over low heat, stirring constantly, until the chocolate is melted and everything is smooth. My experience has been that this melted chocolate is very thick. Be sure not to overheat, or the chocolate will clump up.
- Stir in the half-and-half, and mix until everything is combined and smooth.
- Immediately pour the ganache on the chilled cake, spreading it out to the edges, but not over the sides. I recommend letting the ganache set for a while before serving.
- Store the cake in the refrigerator. Pull it out 15 minutes to let the ganache soften before cutting. If you have trouble cutting the ganache, try sawing through it rather than pressing down and squishing the cake.
- I tend to cut slices as we want them. Press a layer of plastic wrap against the cut sides of the cake to keep it moist in the refrigerator. If you're concerned about it picking up off flavors, store in a sealed container.
- Cake is still delicious 4-7 days after it's made.
Notes
Nutrition
[Originally posted June 24, 2013 and updated August 2020. Completely redone, including tweaks to the recipe card, in May 2025.]


Leona Konkel says
This is by far my favorite chocolate peanut butter recipe ever. It's a soft, squishy cake, everything I could want in a cake like this. I hope you love it too! And let me know if you have questions - I love to troubleshoot!