
Freeform Honey Walnut Pie is an idea that's been living in my head for years, decades even, and I'm thrilled to finally share it with you. This egg-free pie is nutty like pecan pie but not as sweet or gooey. Honey and cinnamon bring baklava vibes, but without all the syrup so it's much easier and neater to eat.

I first tried a similar recipe after college when we made Honey Nut Wedges at a gathering at my friend Kate's. I loved it, tucked it away in a notebook, and skipped over it for 20 years. 🤦♀️ I finally revisited it since I often thought about it when making other pies. I increased the nuts and coated the top crust with a honey glaze to really bring home the flavor. I still love it after testing batch after batch of it - and I think you will too.
Jump to:
Why You'll Love This Recipe
Freeform Honey Walnut Pie is perhaps my favorite nut pie ever, and I think you'll love it too. Here's why:
- The honeyed, walnut-rich flavors of baklava, but less mess!
- Freeform style: no pie pan needed, just shape and bake.
- Balanced sweetness: less sugary than pecan pie, with a nut-forward filling.
- Naturally egg-free: perfect for those with allergies.
- Flexible portions: make a whole pie for a crowd, or a half pie for a cozy night in!
Ingredients
My Freeform Honey Walnut Pie has similarities to my Classic Pecan Pie, but has more crust, less sugar, and no eggs. All the honey reminds me of baklava, so I include a few flavors that pecan pie doesn't have. You'll need:

- 2 unbaked pie crusts
- Walnuts
- Honey
- Sugar
- Cinnamon
- Lemon juice
I use a double batch of my Homemade Pie Crust dough, but you can use refrigerated store-bought pie crusts for convenience. Choose a package with two rolled-up pie crusts, rather than ones that come in a tin.
Use chopped walnuts if you can, to save yourself a little work. I like walnuts paired with honey because they remind me of baklava, but pecans have a similar texture. My favorite baklava I've ever eaten had pistachios; they'd be a great addition to this! If you'd rather use hard nuts like almonds, be sure they're very finely chopped. If you have walnuts leftover, they're a great addition to my Classic Banana Bread with Oats.
Honey provides sweetness and flavor. Don't skip this. You can substitute a little agave nectar (slightly different flavor), light corn syrup (no flavor), sorghum (molasses flavor), or sugar or brown sugar if you run short. Maple syrup may work but may leak more easily since it's runnier than honey. I wanted more filling but not a stronger honey flavor, so I added a little sugar to bulk it up.
A small amount of ground cinnamon provides warmth; fresh lemon juice provides sharpness. Fresh orange juice would be an okay substitute for lemon juice if necessary.
Tools You'll Need
You'll want a rolling pin to roll out homemade pie crusts. Some prepackaged crusts are a little smaller than I prefer, and so I roll them out a little too; I feel like it makes them bake a little better.
I bake this pie on parchment paper on a pizza pan. Choose a pizza pan or baking sheet that has a rim, in case the pie leaks a little bit. Don't skip the parchment, which protects the pan from messes and makes it very easy to remove the pie to a cutting board.
A pizza cutter works incredibly well to cut this pie.
How to Make Freeform Honey Walnut Pie - Step-by-Step
Go ahead and make the pie crust dough (a double batch of my Homemade Pie Crust recipe), if you're going fully homemade. Otherwise, be sure your pie crusts are thawed and in the refrigerator, and follow the instructions on the package for preparing them.
Even though they're already chopped, I usually give the walnuts another rough chop because I prefer the fine texture, just like in Earthquake Cake from Scratch.

- Mix together the honey, sugar, lemon juice, and cinnamon in a mixing bowl, then stir in the chopped walnuts. Yours will look a little more gooey than this.

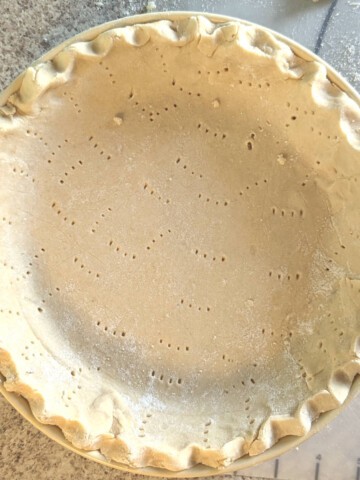
- Roll out one of the pie crusts into a 9-10 inch circle and place it on parchment on a pizza pan. (Parchment helps reduce mess if the pie leaks; yours should cover the entire pan and be larger than what I've shown.) Spread the walnut filling over the crust, leaving a 1-inch gap along the edges.

- Roll out the other pie crust to the same size and lay it over the filling. Line up the edges and seal the pie crust. [See the section below for step-by-step instructions.]
Mix together the 2 tablespoons honey and water in the mixing bowl for the filling. Brush half of this glaze over the top, including the edge crust.
Next, chill the pie for 15 minutes.

- Bake for 20-25 minutes, until the crust has browned. Check at 20 minutes and remove the pie if it's leaking, to prevent the filling from scorching.
Immediately brush with the remaining honey glaze after removing the pie from the oven.
I usually slide the parchment from the baking sheet to a cutting board. Cool at least 15 minutes before cutting.
Hint: Pie crusts aren't sweet on their own, so brushing the top crust with a honey syrup is necessary. Don't skip it!
How to Seal Pie Crusts - Step-by-Step
Since you're making a pie without a pan to hold it into shape, it's important to properly seal the edges so that filling doesn't leak out.
I made a half of this pie, using sorghum instead of the honey, to show demonstrate how to seal the pie (and also highlight a potential issue).

- Wet the entire edge of both pie crusts with a little water, to help them stick together.
- Line up the pie crust edges, and press to seal.
- Fold up the bottom edge of the pie crust, so it's now on top.
- Press the seams of the crust into the dough's top crust, to seal.

- I like to use my fingertips to flute the dough, to make it pretty. However you shape it, keep the dough's seams on the inside.
- Don't create thin spots on the top crust like I did. Glaze also pooled here.
- The fluted edge lost definition since I forgot to chill this pie. Still, the crust remained sealed.
- Glaze softened this already-thin spot, and filling bubbled through.
The pie used sorghum instead of honey, so the filling is already dark; it's not burnt yet. I pulled it at 20 minutes instead of 25 to prevent it from scorching.
Why Freeform Pies Leak (and How to Prevent It)
Freeform pies sometimes leak if the crust isn't sealed properly or there's too much filling. Both issues can cause filling to bubble out and make a mess.
The whole pie made with less honey and sugar (seen in my step-by-step instructions) didn't leak. I left plenty of border around the edges and folded the bottom pie crust over the top pie crust to seal it. I scored it, but not enough to affect the pie either way.
I had leakage when I increased the filling and didn't seal the test pie well. I attribute leakage mainly to poor sealing for this example. You can see it below.

- Top, before and after: I created a thin spot in the dough, which didn't leak because I had the seams tucked into the dough on the inside. It would likely leak with further baking.
- Bottom, before and after: I didn't have the seams tucked into the dough on the inside. Instead, seams faced the side where they could open as they baked. This allowed filling to leak.
Tips to Prevent Leakage
Here's my best tips on how to prevent leakage when making a freeform pie or turnover:
- Leave enough of a border along the edge.
- Properly seal the pie crust, as shown in the How To Seal Pie Crust section.
- Don't create thin spots or holes on the crust as you seal it. Filling will leak out of weak spots.
- Refrigerate the pie briefly before baking, to firm up the dough to maintain crust definition.
Is Leakage Always a Problem?
I prefer the filling with more honey, so I take the chance of leakage. I wish it hadn't leaked; where it did, however, the crust caramelized a little and was extra delicious.
Minimizing Cleanup
If you're new to making pie, I recommend minimizing cleanup by:
- Choosing a baking sheet with a rim to contain any leakage.
- Lining the full baking sheet with parchment to prevent leaked syrup from settling on the baking sheet where it becomes a mess.
- Checking the pie at 20 minutes so you can remove it if it's started to leak, since you don't want that syrup to scorch. Edge crust with scorched syrup does not taste good.
If the filling does leak onto the baking sheet, it's just honey and sugar. It cleans up easily if soaked in water, as long as you don't let the filling scorch and bake on.
And remember that your pie will be delicious, leaks or not.
Serving and Storage
A pizza cutter works incredibly well to cut the pie. I usually cut it into 10-12 slices, although sometimes the crust begins to separate with 12.
Freeform pie slices are generally very flat and rustic. While this doesn't make them photogenic, it makes them easy to eat! I sometimes eat slices with a fork, and other times with my hands.
Store at room temperature, and eat within the first day or two. After that, the crust begins to soften, although leftovers will still taste good.
Freeform Honey Walnut Pie FAQs
A freeform pie is a pie that's baked without a pie dish, like a galette. The dough is folded up along the edges to contain the filling. Some of these are open, single-crust pies; others, like my Freeform Honey Nut Pie recipe, use a double crust.
I have not made this Freeform Honey Walnut Pie recipe vegan, but I think it would work! Choose vegan pie crusts. Honey is not vegan, so substitute a mixture of half agave syrup and half brown sugar. Taste the nut mixture before you bake, and consider adding lemon or orange zest to it if it needs more flavor.
Pecans are the best substitute for walnuts, since they have a similar texture. You can substitute in pistachios for a portion of the walnuts, for a very delicious twist. Harder nuts like almonds should be very finely chopped.
For an entirely nut-free version, try shelled, unsalted pepitas.
Pie crusts can be made in advance; see my Homemade Pie Crust recipe for details. The pie itself can be made one day in advance, although the pastry may not be as crisp as it was when freshly baked. Fortunately, the prep and bake time on this pie isn't nearly so long as for pecan pie, and cooling time is negligible, so it's an easy pie to make on the same day you need it.
Yes! The beauty of a freeform pie is that you can make a half-batch easily; I made half-batch test pies. Just use one pie crust and halve the ingredients. Place the filling on one half of the rolled out crust, and fold the dough over. It'll look like a giant turnover! Bake for the full baking time.
While the filling itself is gluten-free, I don't know enough about gluten-free pie crusts to know how they would behave for a freeform pie. If you have a gluten-free pie crust recipe or brand you trust, I think it would be worth trying.
I recommend making a half-batch to test a gluten-free crust. Roll out a single crust, layer a half batch of filling on one half of the crust, fold it over like a turnover, and seal. Be sure to line the baking sheet fully with parchment in case the crust leaks, and bake as usual.
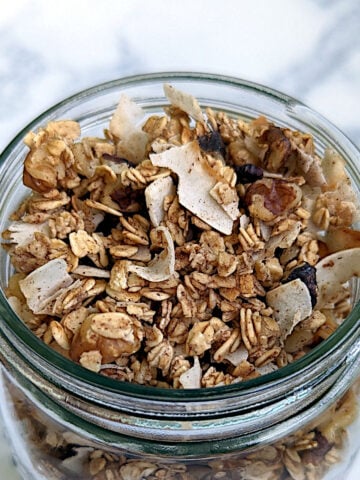
More Nutty Treats
Here's some of my other favorite nutty recipes.


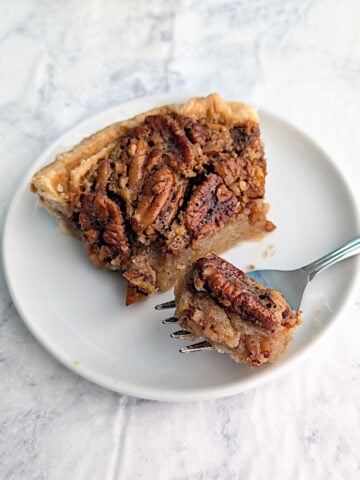
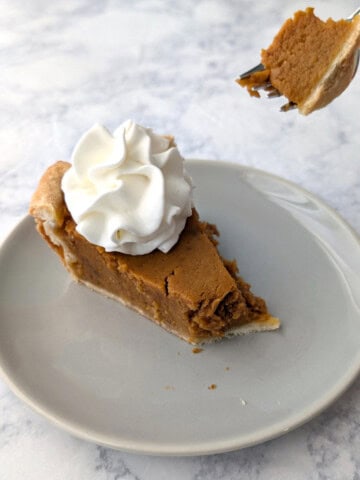
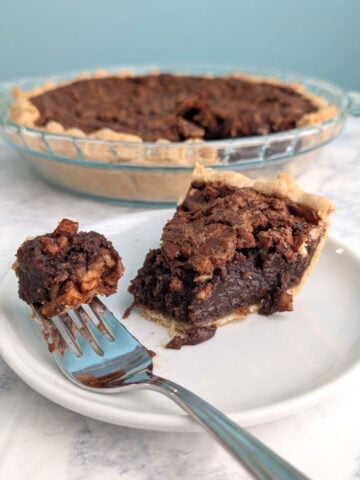
Other Holiday Pies
Here's some other favorite pies that I pull out for Thanksgiving, Christmas, and any time in autumn.

Have you tried this recipe? Or have a question about it? Rate it or leave a comment below! (PS: rating my recipes helps other people find them, too!)
📖 Recipe

Freeform Honey Walnut Pie
Equipment
- Baking sheet or pizza pan
- Pastry brush
- parchment paper
Ingredients
- 2 pie crusts (a double batch of my Homemade Pie Crust recipe)
- ¾ cup honey (252 grams)
- ¼ cup granulated sugar (50 grams)
- 1 teaspoon cinnamon
- 1 teaspoon lemon juice (5 grams)
- 2 cups walnuts (240 grams; finely chopped)
Glaze
- 2 tablespoons honey (42 grams)
- 4 teaspoons water (20 grams)
Instructions
- Use a baking sheet or pizza pan with a rim, and line the entire surface with parchment paper to protect the surface from leakage.
- In a mixing bowl, combine the honey, sugar, cinnamon, and lemon juice. Stir in the walnuts.
- Roll out one pie crust into a 9- or 10-inch circle. Transfer it to the parchment-lined baking sheet. Spread the filling on the pie crust, leaving a 1-inch border clear along the edges.
Seal the Pie
- Roll out your second pie crust into a circle to fit the bottom crust.
- Wet the edges of both pie crusts with water, then line up the wet edges of the top and bottom crusts. Press firmly to seal.
- Fold the bottom edge up so it's on top, and press the seams of the crust into the top crust, to seal.
- Use your fingertips to make a decorative pattern to the edge crust, if desired. Do not make the dough too thin, however, or the pie may leak.
Glaze and Bake
- Combine 2 tablespoons honey and 2 teaspoons in the same mixing bowl you used for filling, mixing until combined.
- Brush half of the glaze over the pie, including the edge crust. Try not to let it pool in the thinner crimped parts of the dough, though.
- Refrigerate the pie for 15 minutes.
- Bake at 375F for 20-25 minutes. Check the pie at 20 minutes, and remove if it's started to leak so the syrup doesn't scorch. Otherwise, bake until golden brown.
- Remove from oven, and immediately brush with the remaining honey glaze. Cool before cutting.
- Store at room temperature. The pie is best eaten within 1-2 days after baking. The crust will soften after that, although leftovers will still be delicious.


Leona Konkel says
I adore this pie. It's better than pecan pie because it's nuttier and less gooey. Friends raved about the first version of this I made, and now it's even better. I hope you love it as much as we all do. I'd love to hear how it turns out when you make it!